주요 콘텐츠로 건너뛰기

Ryobi RS290G Brush Assembly Replacement

필요한 것

  1. Ryobi RS290G Brush Assembly Replacement, Top Cap: 1 단계, 이미지 1/1
    • Remove two 20mm and one 16mm Phillips #2 screws from the housing assembly and exhaust port.

  2. Ryobi RS290G Brush Assembly Replacement: 2 단계, 이미지 1/1
    • Remove the three 16mm Phillips #2 screws from the top cap/upper grip.

  3. Ryobi RS290G Brush Assembly Replacement: 3 단계, 이미지 1/1
    • Remove the top cap.

  4. Ryobi RS290G Brush Assembly Replacement, Switch Trigger: 4 단계, 이미지 1/1
    • Remove the switch trigger.

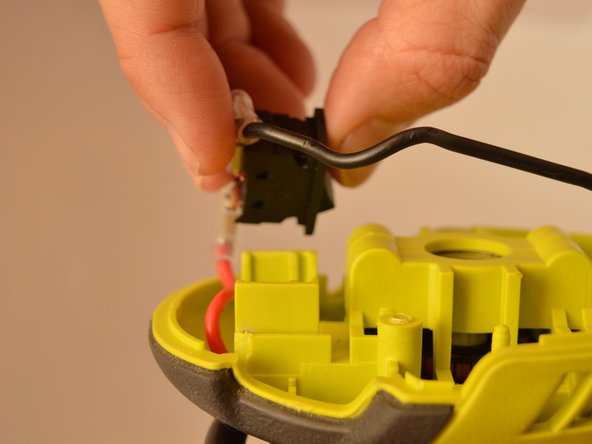
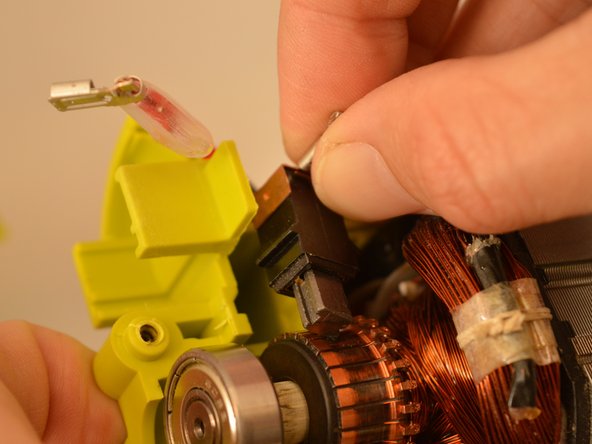
  5. Ryobi RS290G Brush Assembly Replacement, Brush Assembly: 5 단계, 이미지 1/2 Ryobi RS290G Brush Assembly Replacement, Brush Assembly: 5 단계, 이미지 2/2
    • Slide the power switch out of the housing assembly by carefully gripping the power switch and slide upward from the base.

  6. Ryobi RS290G Brush Assembly Replacement: 6 단계, 이미지 1/1
    • Remove the two 16mm Phillips #2 screws from the inner housing assembly.

  7. Ryobi RS290G Brush Assembly Replacement: 7 단계, 이미지 1/1
    • Remove the two 14mm Phillips #2 screws from the cord clamp.

  8. Ryobi RS290G Brush Assembly Replacement: 8 단계, 이미지 1/1
    • Carefully slide the housing assembly apart, avoiding damage or pulling on wires.

  9. Ryobi RS290G Brush Assembly Replacement: 9 단계, 이미지 1/2 Ryobi RS290G Brush Assembly Replacement: 9 단계, 이미지 2/2
    • Slide out both brush assemblies from the inner housing assembly.

  10. Ryobi RS290G Brush Assembly Replacement: 10 단계, 이미지 1/1
    • Slide off the disconnect terminal for the brush assembly (white lead).

  11. Ryobi RS290G Brush Assembly Replacement: 11 단계, 이미지 1/1
    • Slide off the disconnect terminal for the brush assembly (black lead).

결론

To reassemble your device, follow these instructions in reverse order.

Daniel

회원 가입일: 09/17/19

639 평판

안내서 4개 작성하였습니다

댓글 0개

댓글 쓰기

조회 통계:

24 시간 전: 2

7일 전: 4

30일 전: 7

전체 시간: 728