주요 콘텐츠로 건너뛰기

Ryobi String Trimmer RY253SS Fuel Lines and Filter Replacement

필요한 것

  1. Ryobi String Trimmer RY253SS Fuel Lines and Filter Replacement, Fuel Lines and Filter: 1 단계, 이미지 1/3 Ryobi String Trimmer RY253SS Fuel Lines and Filter Replacement, Fuel Lines and Filter: 1 단계, 이미지 2/3 Ryobi String Trimmer RY253SS Fuel Lines and Filter Replacement, Fuel Lines and Filter: 1 단계, 이미지 3/3
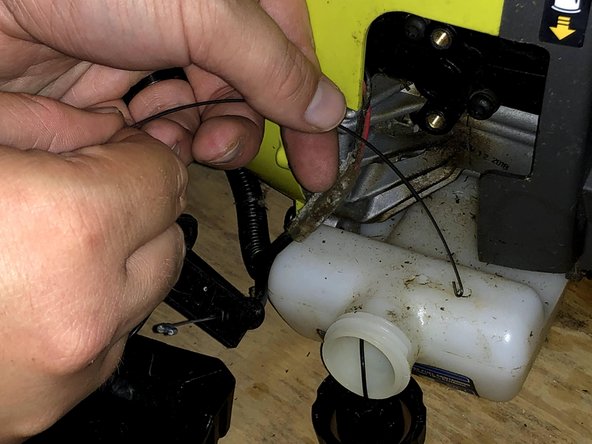
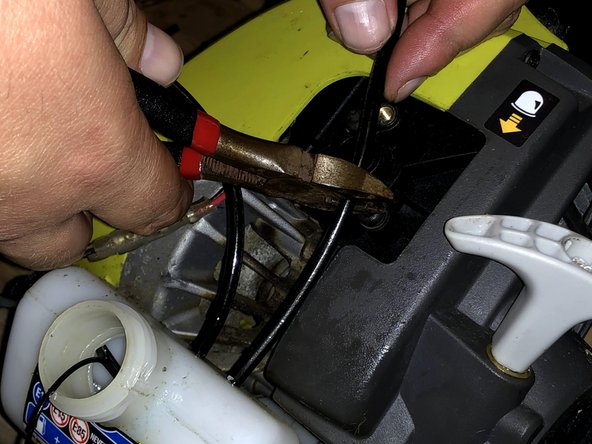
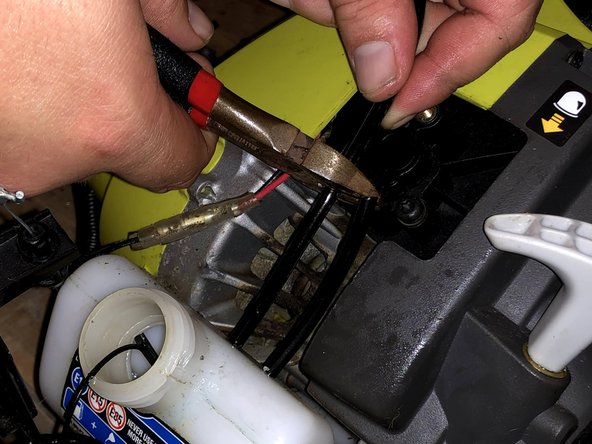
    • With your hands, remove the air filter cover from your edge trimmer.

    • This will expose the air filter and the screws that attach the housing to the frame.

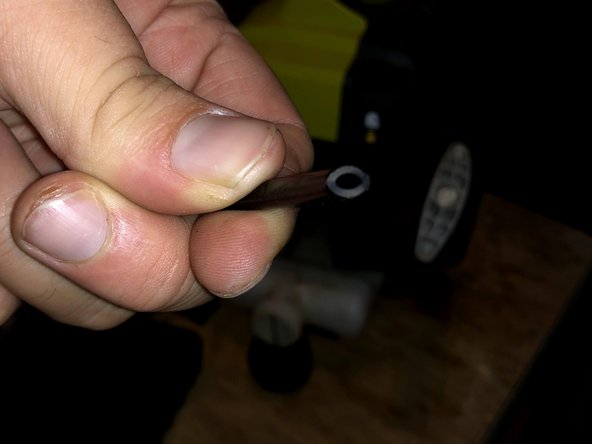
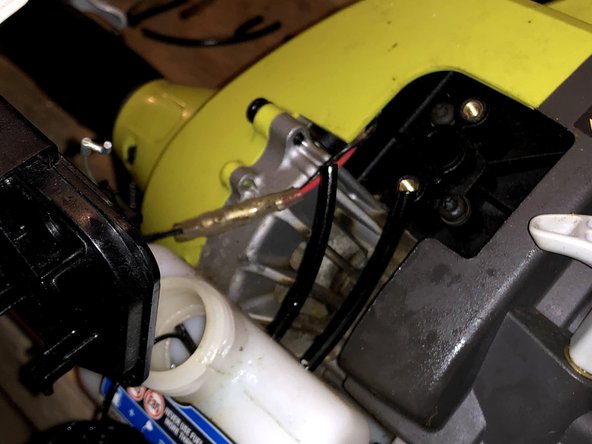
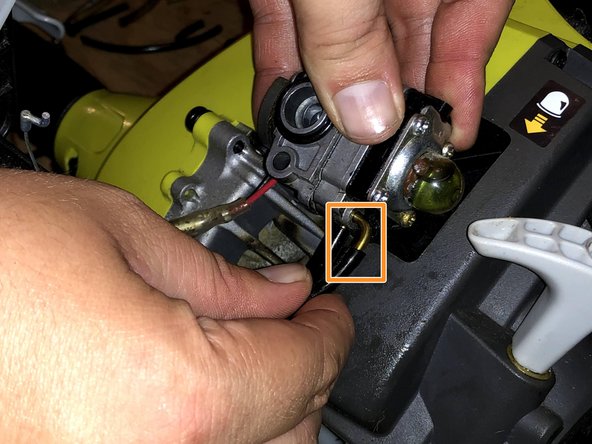
    • Remove the air filter before moving to the next step.

  2. Ryobi String Trimmer RY253SS Fuel Lines and Filter Replacement: 2 단계, 이미지 1/3 Ryobi String Trimmer RY253SS Fuel Lines and Filter Replacement: 2 단계, 이미지 2/3 Ryobi String Trimmer RY253SS Fuel Lines and Filter Replacement: 2 단계, 이미지 3/3
    • Remove the two M5 x 45 mm shoulder screws attaching the air filter housing to the engine frame using a flathead screwdriver.

    • Pull the housing away from the engine block.

    • The screws also attach the carburetor to the frame.

  3. Ryobi String Trimmer RY253SS Fuel Lines and Filter Replacement: 3 단계, 이미지 1/2 Ryobi String Trimmer RY253SS Fuel Lines and Filter Replacement: 3 단계, 이미지 2/2
    • Pull the carburetor away from the engine block.

    • Gently remove the input fuel line from the carburetor.

    • Gently remove the output fuel line from the carburetor.

  4. Ryobi String Trimmer RY253SS Fuel Lines and Filter Replacement: 4 단계, 이미지 1/3 Ryobi String Trimmer RY253SS Fuel Lines and Filter Replacement: 4 단계, 이미지 2/3 Ryobi String Trimmer RY253SS Fuel Lines and Filter Replacement: 4 단계, 이미지 3/3
    • Use the cutting pliers to cut the excess line flush to the tank.

    • Use a screwdriver to push the remaining line into the tank.

  5. Ryobi String Trimmer RY253SS Fuel Lines and Filter Replacement: 5 단계, 이미지 1/3 Ryobi String Trimmer RY253SS Fuel Lines and Filter Replacement: 5 단계, 이미지 2/3 Ryobi String Trimmer RY253SS Fuel Lines and Filter Replacement: 5 단계, 이미지 3/3
    • The lines should now be in the tank.

    • Lift and shake the edge trimmer until both lines fall out of the tank.

  6. Ryobi String Trimmer RY253SS Fuel Lines and Filter Replacement: 6 단계, 이미지 1/2 Ryobi String Trimmer RY253SS Fuel Lines and Filter Replacement: 6 단계, 이미지 2/2
    • Thread the gripping tool through the input line on the tank.

    • Thread the tool through the gas cap opening.

  7. Ryobi String Trimmer RY253SS Fuel Lines and Filter Replacement: 7 단계, 이미지 1/2 Ryobi String Trimmer RY253SS Fuel Lines and Filter Replacement: 7 단계, 이미지 2/2
    • Use the cutting pliers to taper the end of the fuel line.

    • A larger taper will make it easier to thread the fuel line through the hole in the tank.

  8. Ryobi String Trimmer RY253SS Fuel Lines and Filter Replacement: 8 단계, 이미지 1/2 Ryobi String Trimmer RY253SS Fuel Lines and Filter Replacement: 8 단계, 이미지 2/2
    • Insert the hooked end of the gripping tool into the fuel line.

    • Clamp the hook to avoid puncturing the tube or the gas tank when pulling it through.

  9. Ryobi String Trimmer RY253SS Fuel Lines and Filter Replacement: 9 단계, 이미지 1/3 Ryobi String Trimmer RY253SS Fuel Lines and Filter Replacement: 9 단계, 이미지 2/3 Ryobi String Trimmer RY253SS Fuel Lines and Filter Replacement: 9 단계, 이미지 3/3
    • Lubricate the fuel line with the 2-Cycle oil.

    • The 2-Cycle Oil will more easily allow the fuel line to move through the hole in the gas tank.

    • Only use proper 2-Cycle oil to avoid contamination of the fuel tank.

  10. Ryobi String Trimmer RY253SS Fuel Lines and Filter Replacement: 10 단계, 이미지 1/3 Ryobi String Trimmer RY253SS Fuel Lines and Filter Replacement: 10 단계, 이미지 2/3 Ryobi String Trimmer RY253SS Fuel Lines and Filter Replacement: 10 단계, 이미지 3/3
    • Place your finger through the key ring end of the gripping tool.

    • Pull the tool until the line begins to make its way through the hole.

    • Grab the fuel line directly with your hand to continue pulling it completely through.

    • Make sure to use the fuel line connected to the fuel filter for the input line.

    • Use caution when pulling on the gripping tool, if you use too much force you can not only puncture the fuel line, but you can also puncture the tank.

  11. Ryobi String Trimmer RY253SS Fuel Lines and Filter Replacement: 11 단계, 이미지 1/3 Ryobi String Trimmer RY253SS Fuel Lines and Filter Replacement: 11 단계, 이미지 2/3 Ryobi String Trimmer RY253SS Fuel Lines and Filter Replacement: 11 단계, 이미지 3/3
    • Using the same methods as the previous steps, thread the output fuel line through the tank.

  12. Ryobi String Trimmer RY253SS Fuel Lines and Filter Replacement: 12 단계, 이미지 1/3 Ryobi String Trimmer RY253SS Fuel Lines and Filter Replacement: 12 단계, 이미지 2/3 Ryobi String Trimmer RY253SS Fuel Lines and Filter Replacement: 12 단계, 이미지 3/3
    • Push the remaining fuel line into the gas tank.

  13. Ryobi String Trimmer RY253SS Fuel Lines and Filter Replacement: 13 단계, 이미지 1/3 Ryobi String Trimmer RY253SS Fuel Lines and Filter Replacement: 13 단계, 이미지 2/3 Ryobi String Trimmer RY253SS Fuel Lines and Filter Replacement: 13 단계, 이미지 3/3
    • Use your cutting pliers to cut the excess fuel line to an appropriate length.

    • Cut the line to an appropriate length as shown in Picture 3.

  14. Ryobi String Trimmer RY253SS Fuel Lines and Filter Replacement: 14 단계, 이미지 1/3 Ryobi String Trimmer RY253SS Fuel Lines and Filter Replacement: 14 단계, 이미지 2/3 Ryobi String Trimmer RY253SS Fuel Lines and Filter Replacement: 14 단계, 이미지 3/3
    • Attach the output fuel line back to the carburetor.

    • Attach the input fuel line back to the carburetor.

    • Push the fuel lines up as far as you can to the carburetor block.

결론

To reassemble your device, follow steps 1 and 2 in reverse order.

다른 3명이 해당 안내서를 완성하였습니다.

Nathan McKinney

회원 가입일: 10/08/20

330 평판

안내서 1개 작성함

Carson-Newman University, Team S1-G1, Sobiech Fall 2020 Carson-Newman University, Team S1-G1, Sobiech Fall 2020 회원

CNU-SOBIECH-F20S1G1

3 회원들

안내서 1개 작성하였습니다

댓글 0개

댓글 쓰기

조회 통계:

24 시간 전: 8

7일 전: 54

30일 전: 217

전체 시간: 5,718