주요 콘텐츠로 건너뛰기

SHARP EL-W53XG WriteView Battery Replacement

필요한 것

  1. SHARP EL-W53XG WriteView  Battery Replacement, Battery: 1 단계, 이미지 1/2 SHARP EL-W53XG WriteView  Battery Replacement, Battery: 1 단계, 이미지 2/2
    • Turn off the calculator by pressing both the [2NDF ] and [ON] buttons at the same time.

  2. SHARP EL-W53XG WriteView  Battery Replacement: 2 단계, 이미지 1/1
    • Flip the calculator so that the battery cover is facing you, and it will be easy to remove.

  3. SHARP EL-W53XG WriteView  Battery Replacement: 3 단계, 이미지 1/2 SHARP EL-W53XG WriteView  Battery Replacement: 3 단계, 이미지 2/2
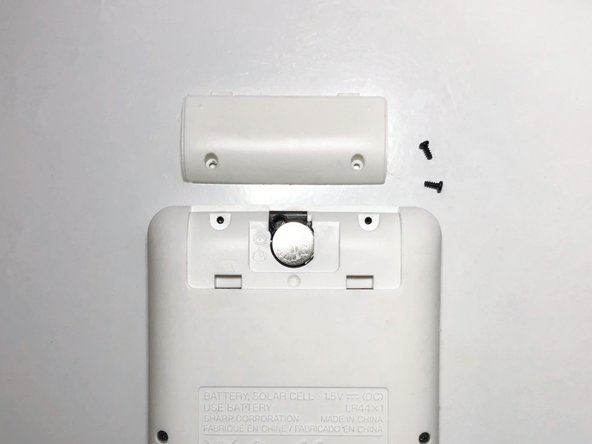
    • Remove the two screws securing the battery cover with the Tri-point #000 screwdriver.

    • Remove the battery cover.

    • Make sure not to remove the other screws on the calculator, just the two screws on the battery cover.

  4. SHARP EL-W53XG WriteView  Battery Replacement: 4 단계, 이미지 1/2 SHARP EL-W53XG WriteView  Battery Replacement: 4 단계, 이미지 2/2
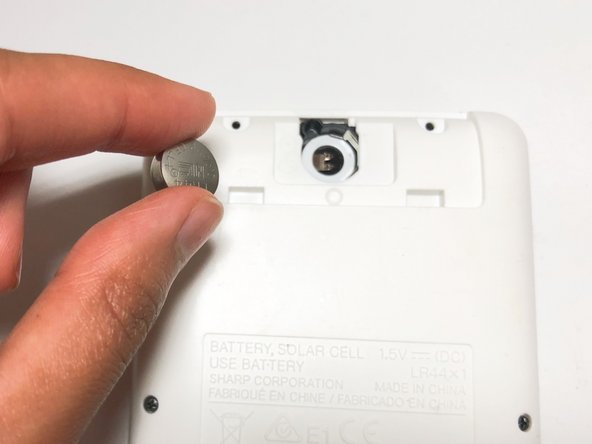
    • Remove the worn-out LR44 battery inside using a spudger.

  5. SHARP EL-W53XG WriteView  Battery Replacement: 5 단계, 이미지 1/1
    • Gently insert the new LR44 battery in the empty battery slot.

  6. SHARP EL-W53XG WriteView  Battery Replacement: 6 단계, 이미지 1/1
    • Place and screw the battery cover on using the Tri-point #000 screwdriver.

    • Tightly screw the battery cover to prevent losing screws.

결론

To reassemble your device, follow these instructions in reverse order.

Faduma Hagi

회원 가입일: 09/14/21

133 평판

안내서 1개 작성함

York University, Team 1-7, O'Regan Fall 2021 York University, Team 1-7, O'Regan Fall 2021 회원

YORK-O'REGAN-F21S1G7

1 회원

안내서 1개 작성하였습니다

댓글 0개

댓글 쓰기

조회 통계:

24 시간 전: 0

7일 전: 11

30일 전: 47

전체 시간: 1,429