소개
You need to disconnect or replace the SSD from your Dell XPS 13 9380, this guide is for you!
필요한 것
-
-
Use a Torx T5 driver to unscrew the eight screws securing the back panel.
-
Use a spudger to pry up and loosen the back panel.
-
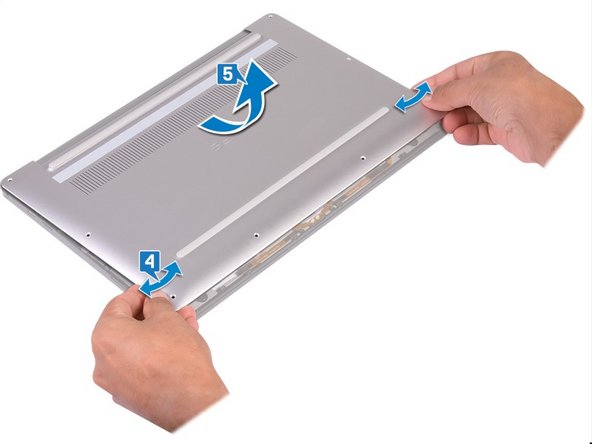
Lift the back panel up slightly from the non-hinged edge.
-
Pull the back panel away from the hinged edge, wiggling it back and forth to loosen the clips.
-
When the back panel clips are free, remove the back panel.
-
-
-
-
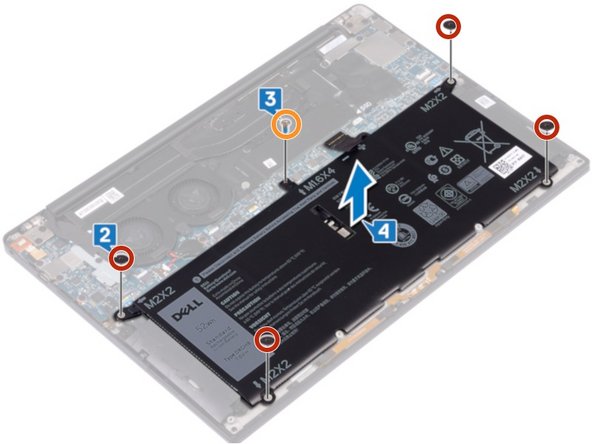
Disconnect the cable from the battery by pulling the connector towards the battery.
-
Remove the four screws (M2 x 2) securing the battery.
-
Remove the screw (M1.6 x 4) securing the battery.
-
Remove the battery from its recess.
-
-
-
1- Remove the screw (M2x3) that attaches the SSD and its protective frame to the motherboard.
-
2- Slide the protective frame of the SSD disk slot protection frame and remove it from the SSD disk.
-
3- Lift the SSD at an angle, then slide it and remove it from its housing.
-


To reassemble your device, follow the instructions in reverse order.
To reassemble your device, follow the instructions in reverse order.
다른 5명이 해당 안내서를 완성하였습니다.


팀

댓글 5개
Thanks for the write up. There's only have one little problem. The M2x3 screw that holds the SSD in place is just too tightly fastened for me to remove. I'm concerned if I press too hard on the motherboard that I'll break it. Any suggestions for non-destructive ways to remove it?
Thanks,
Mike
Mike Avery - 답글
Beware: Dell's documentation says the 128GB drive heatsink (aka protective frame?) is not compatible with higher capacity SSD's.