-
-
The coffeebean supply is fixed with two screws. Unscrew them and lift it off.
-
There is a black rubber lid under the bean hopper that you can easily lift off, leaving a large opening.
-
The adjuster of the grinder has to be solved. Mark the position or just take a picture. This type is fixed with a screw, others are only sticked together.
-
-
-
-
The screws are situated on the underneath of the cover. This type is held by four screws.
-
-
-
Now the cover can be raised: first grip on left and right rear side and lift about 10 cm (4 in). Sometimes the cover jams a little bit.
-
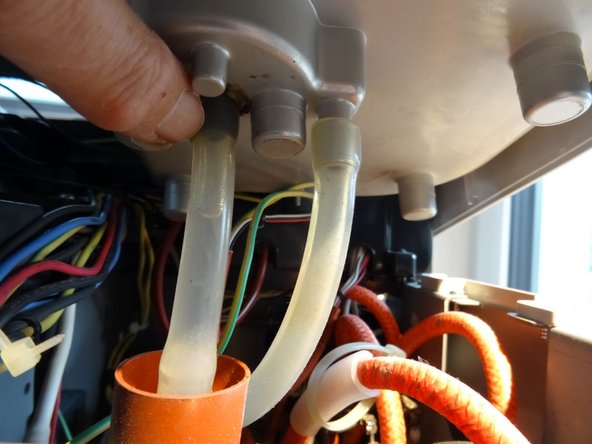
Solve the hoses which lead to the water tank. Perhaps you have to pull out some contacts, (e.g. the yellow-green protection lead), don´t forget to put them on again later.
-
The cover can be drawn aslant towards the front, sliding it over the hot water pipe.
-
Most repairs can be done with the cover being laid up partially , it must not be completely removed.
-


To assemble the Saeco follow the steps in reverse order.
To assemble the Saeco follow the steps in reverse order.
다른 4명이 해당 안내서를 완성하였습니다.
다음 번역가들에게 특별히 감사 드립니다:
100%


이 번역자 분들은 저희가 세상을 수리하는데 동참해 주시는 분입니다! 기여하시겠습니까?
번역 시작하기 ›
팀

댓글 한 개
I had a flow error, i thought was bad pump, which turned out to be a blown diode on the power board. I replaced with a larger diode (3 amp rectifying diode from Frys NTE5809), don’t un-solder the old diode, just solder the new one to the old after cleaning the bits from the leads. The 3 amp diode leads are larger diameter then the stock 1 amp diode and will not fit in the holes in the board.
There are two boards in this espresso maker, one is the power board, the other with the CPU board (it has the front panel buttons). I suggest you do not remove the CPU board, as it is easy to tear the ribbon cable to the display.
The cables to the boards can’t be mixed up when reconnecting as Saeco used different connectors for all the connection points.
Parts can be sourced here: https://philips.encompass.com/model/SAEH...