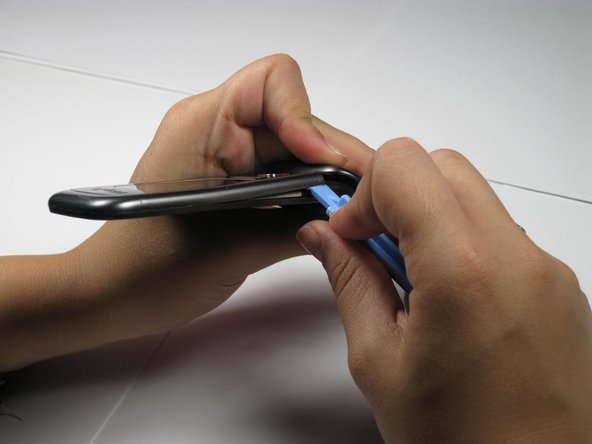
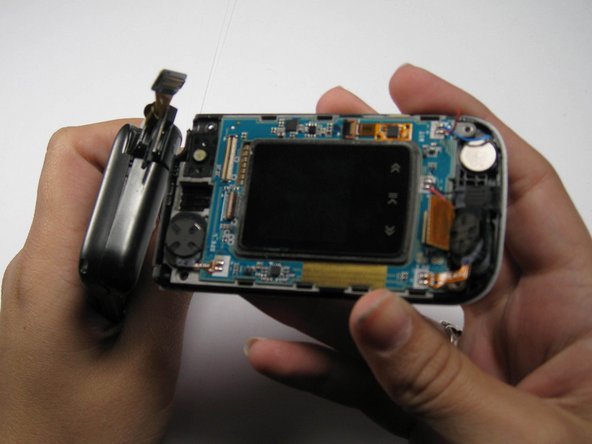
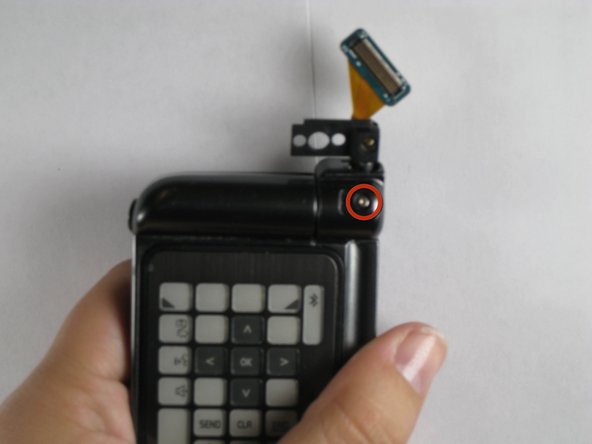
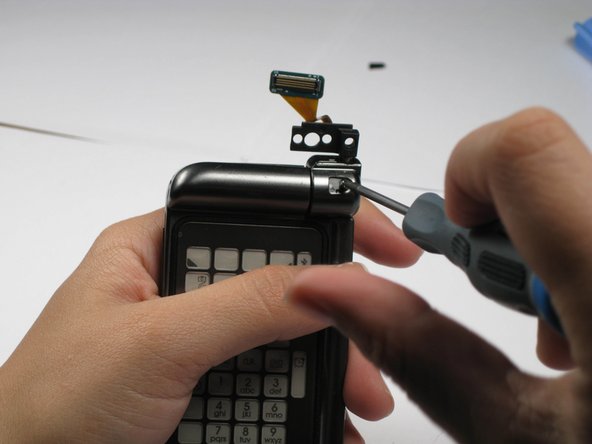
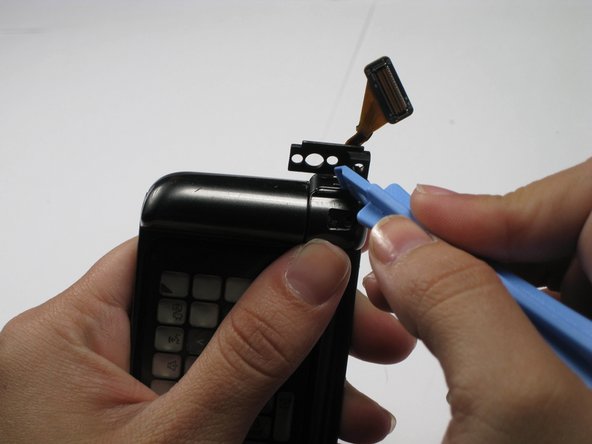
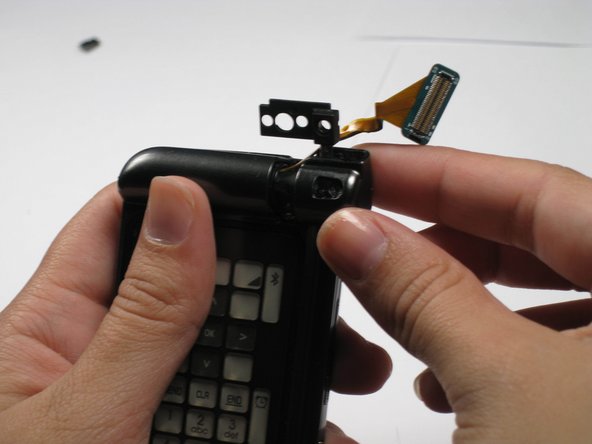
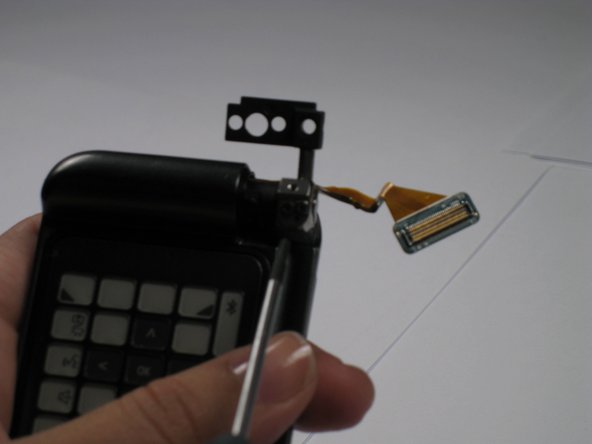
주요 콘텐츠로 건너뛰기

Samsung Alias 2 Hinge Replacement

필요한 것

  1. Samsung Alias 2 Hinge Replacement, Battery: 1 단계, 이미지 1/1
    • Push down on the back cover of the phone, then remove the back cover.

  2. Samsung Alias 2 Hinge Replacement: 2 단계, 이미지 1/1
    • Remove the battery.

  3. Samsung Alias 2 Hinge Replacement, Hinge: 3 단계, 이미지 1/1
    • Use a Phillips #00 screwdriver to remove the two 4 mm screws on screen.

  4. Samsung Alias 2 Hinge Replacement: 4 단계, 이미지 1/2 Samsung Alias 2 Hinge Replacement: 4 단계, 이미지 2/2
    • Use the opening tool to remove the front outside casing.

  5. Samsung Alias 2 Hinge Replacement: 5 단계, 이미지 1/1
    • Remove ribbon connector next to camera using tweezers.

  6. Samsung Alias 2 Hinge Replacement: 6 단계, 이미지 1/1
    • Unscrew and remove the two 3.95 mm screws underneath that ribbon connector.

    • Be careful not to lose their accompanying plastic washers.

  7. Samsung Alias 2 Hinge Replacement: 7 단계, 이미지 1/2 Samsung Alias 2 Hinge Replacement: 7 단계, 이미지 2/2
    • Pull the two halves of the phone apart.

    • The phone will not slide straight apart. You have to angle the back half up a little.

    • Do not force it. Jiggle it a little if it doesn't come apart.

  8. Samsung Alias 2 Hinge Replacement: 8 단계, 이미지 1/1
    • Remove the plastic panel cover from the hinge.

  9. Samsung Alias 2 Hinge Replacement: 9 단계, 이미지 1/2 Samsung Alias 2 Hinge Replacement: 9 단계, 이미지 2/2
    • Remove the 3.41 mm screw out from underneath plastic cover.

  10. Samsung Alias 2 Hinge Replacement: 10 단계, 이미지 1/2 Samsung Alias 2 Hinge Replacement: 10 단계, 이미지 2/2
    • Pop out the top half of the hinge with the plastic opening tool. This will release the hinge cover for removal.

  11. Samsung Alias 2 Hinge Replacement: 11 단계, 이미지 1/2 Samsung Alias 2 Hinge Replacement: 11 단계, 이미지 2/2
    • Pull off the hinge cover.

  12. Samsung Alias 2 Hinge Replacement: 12 단계, 이미지 1/2 Samsung Alias 2 Hinge Replacement: 12 단계, 이미지 2/2
    • Remove the two 2.71 mm screws on the hinge using screwdriver.

    • Under these screws will be a washer, spring, and small metal disc. Make sure you don't lose these.

  13. Samsung Alias 2 Hinge Replacement: 13 단계, 이미지 1/1
    • Remove the Verizon logo from the back of phone using the plastic opening tool.

    • The logo is attached with glue. It will be sticky, but it just pulls off.

  14. Samsung Alias 2 Hinge Replacement: 14 단계, 이미지 1/1
    • Remove the four 4.44 mm screws from the back.

    • Remove the three 4.35mm screws from under the Verizon logo.

    • Make sure you don't mix the screws together.

  15. Samsung Alias 2 Hinge Replacement: 15 단계, 이미지 1/1
    • Pull the back off by using the plastic opening tool.

    • Do not lose the buttons on the side of the phone, as they will come off of the phone when you remove the back outside casing.

  16. Samsung Alias 2 Hinge Replacement: 16 단계, 이미지 1/1
    • Pull up on the yellow tab.

  17. Samsung Alias 2 Hinge Replacement: 17 단계, 이미지 1/1
    • Disconnect the connecting cord using tweezers.

  18. Samsung Alias 2 Hinge Replacement: 18 단계, 이미지 1/1
    • Disconnect the rectangular ribbon.

  19. Samsung Alias 2 Hinge Replacement: 19 단계, 이미지 1/1
    • Remove the logic board.

  20. Samsung Alias 2 Hinge Replacement: 20 단계, 이미지 1/1
    • Remove the three 3.95 mm screws.

    • The two rightmost screws must be pulled out with tweezers after unscrewed.

  21. Samsung Alias 2 Hinge Replacement: 21 단계, 이미지 1/1
    • Pull the hinge out.

결론

To reassemble your device, follow these instructions in reverse order.

다른 한 분이 해당 안내서를 완성하였습니다.

Chris

회원 가입일: 04/16/11

133 평판

안내서 5개 작성하였습니다

Cal Poly, Team 12-35, Maness Spring 2011 Cal Poly, Team 12-35, Maness Spring 2011 회원

CPSU-MANESS-S11S12G35

4 회원들

안내서 10개 작성하였습니다

댓글 0개

댓글 쓰기

조회 통계:

24 시간 전: 0

7일 전: 6

30일 전: 12

전체 시간: 4,298