주요 콘텐츠로 건너뛰기

Samsung Captivate Earpiece Replacement

필요한 것

  1. Samsung Captivate Earpiece Replacement, Battery: 1 단계, 이미지 1/1
    • Remove the back cover by pressing on the bottom section of the phone and sliding the bottom piece downward.

    • Lift up the back cover.

  2. Samsung Captivate Earpiece Replacement: 2 단계, 이미지 1/1
    • Place your finger on the bottom of the battery and lift to remove.

  3. Samsung Captivate Earpiece Replacement: 3 단계, 이미지 1/1
    • Replace the old battery with the new one.

  4. Samsung Captivate Earpiece Replacement, Rear Case: 4 단계, 이미지 1/1
    • Insert the spudger underneath the bottom section of the phone.

    • Gently lift and push the spudger to slide the bottom section down to reveal two hidden screws.

  5. Samsung Captivate Earpiece Replacement: 5 단계, 이미지 1/1
    • Remove the six 4.5mm #000 Phillips screws.

  6. Samsung Captivate Earpiece Replacement: 6 단계, 이미지 1/3 Samsung Captivate Earpiece Replacement: 6 단계, 이미지 2/3 Samsung Captivate Earpiece Replacement: 6 단계, 이미지 3/3
    • Starting at a bottom corner, use the spudger to separate the rear case from the front display.

    • Move the spudger towards the top on both sides. The plastic opening tool is easier to use for this step.

    • Be careful when detaching the top. Free each side, stopping short of the center of the cover. Apply backward pressure on both corners with a finger applying pressure on the center, and slide the whole back cover toward the bottom of the device. Note: forcing the cover can result in cracked plastic.

  7. Samsung Captivate Earpiece Replacement: 7 단계, 이미지 1/1
    • Separate the rear case from the phone.

  8. Samsung Captivate Earpiece Replacement, Antenna Cable: 8 단계, 이미지 1/2 Samsung Captivate Earpiece Replacement, Antenna Cable: 8 단계, 이미지 2/2
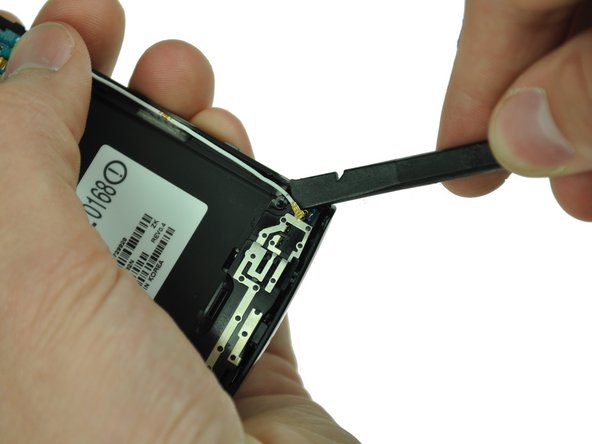
    • Use a spudger tool to pry up the antenna cable from the connector on the motherboard.

    • Pry up the other end of the cable from the connector on the antenna array.

  9. Samsung Captivate Earpiece Replacement, Camera Assembly: 9 단계, 이미지 1/1
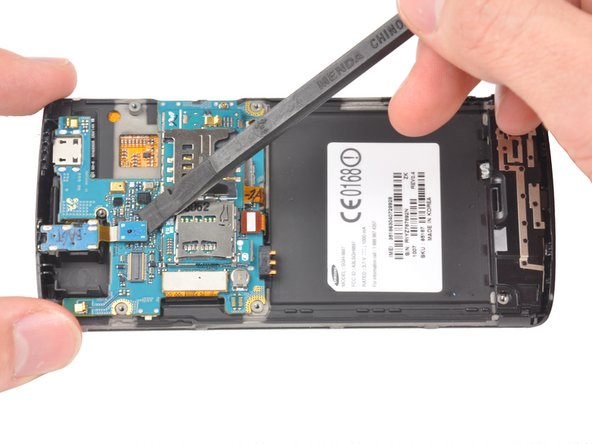
    • Use the spudger tool to pry up the chip labeled "NEC." This releases the chip.

  10. Samsung Captivate Earpiece Replacement: 10 단계, 이미지 1/1
    • Gently lift the camera assembly out of the plastic housing.

  11. Samsung Captivate Earpiece Replacement, Motherboard: 11 단계, 이미지 1/3 Samsung Captivate Earpiece Replacement, Motherboard: 11 단계, 이미지 2/3 Samsung Captivate Earpiece Replacement, Motherboard: 11 단계, 이미지 3/3
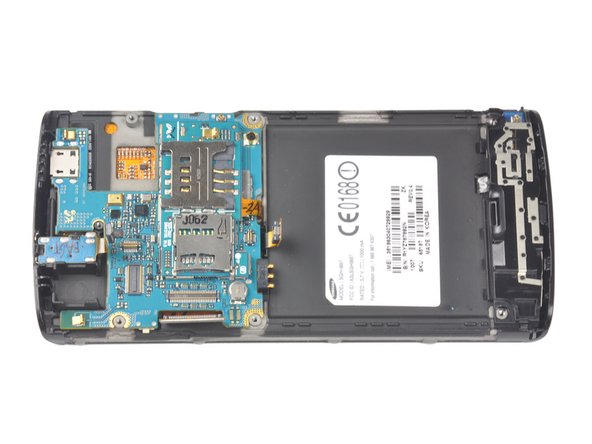
    • Using the spudger slide the tool under the three highlighted connectors to begin disconnection

    • Excluding the motherboard socket, pry straight from up under the connectors, Therefore ending disconnection.

    • Be careful to not pry against the connector. Prying against could further damage to the device.

  12. Samsung Captivate Earpiece Replacement: 12 단계, 이미지 1/1
    • Use your fingers to carefully lift up the Samsung Capivate's Motherboard from the assembly.

  13. Samsung Captivate Earpiece Replacement, 3.5mm Headphone Jack: 13 단계, 이미지 1/2 Samsung Captivate Earpiece Replacement, 3.5mm Headphone Jack: 13 단계, 이미지 2/2
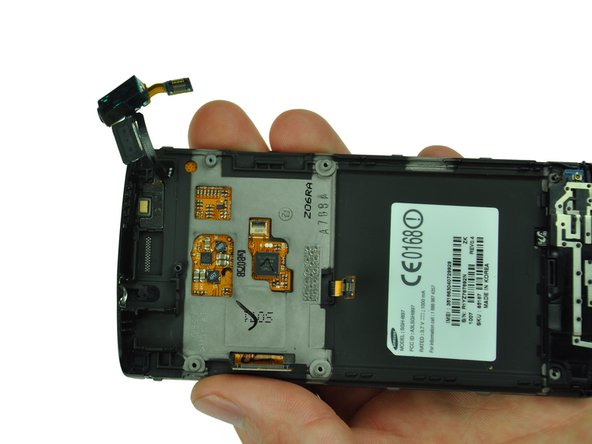
    • Gently pull up on the audio jack, taking the attached ribbon cable with it.

    • There is a small amount of glue holding the ribbon cable that attaches the audio jack to the earpiece.

  14. Samsung Captivate Earpiece Replacement, Earpiece: 14 단계, 이미지 1/1
    • The earpiece is attached to the 3.5mm audio jack. You will need to replace the entire assembly.

결론

To reassemble your device, follow these instructions in reverse order.

다른 2명이 해당 안내서를 완성하였습니다.

Drew Bentz

회원 가입일: 09/22/11

565 평판

안내서 5개 작성하였습니다

Cal Poly, Team 20-25, Maness Fall 2011 Cal Poly, Team 20-25, Maness Fall 2011 회원

CPSU-MANESS-F11S20G25

3 회원들

안내서 9개 작성하였습니다

댓글 0개

댓글 쓰기

조회 통계:

24 시간 전: 0

7일 전: 0

30일 전: 4

전체 시간: 2,369