이 버전에는 잘못된 편집 사항이 있을 수 있습니다. 최신 확인된 스냅샷으로 전환하십시오.
필요한 것
-
이 단계는 번역되지 않았습니다. 번역을 도와주십시오
-
Make sure your Chromebook is turned off before you begin.
-
Set the labtop face down on a flat surface.
-
-
이 단계는 번역되지 않았습니다. 번역을 도와주십시오
-
Remove the nine 5 mm screws on the bottom cover using a Phillips #0 screwdriver.
-
-
이 단계는 번역되지 않았습니다. 번역을 도와주십시오
-
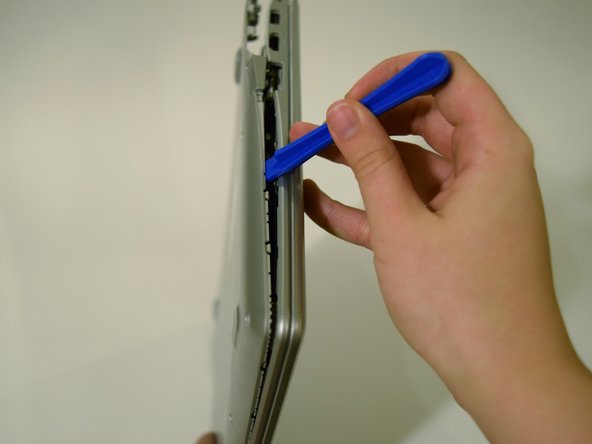
Loosen the back cover panel with a plastic opening tool, and work it all the way around the computer.
-
-
이 단계는 번역되지 않았습니다. 번역을 도와주십시오
-
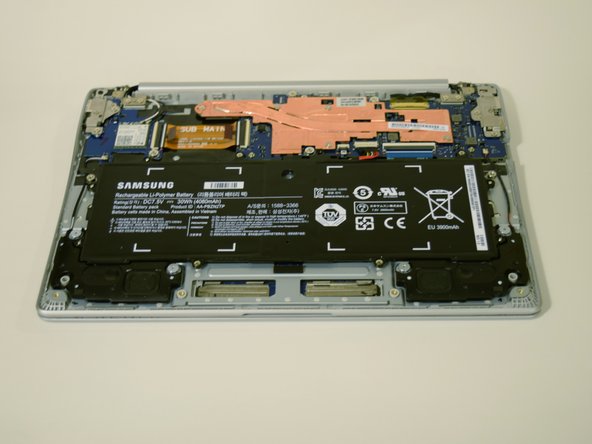
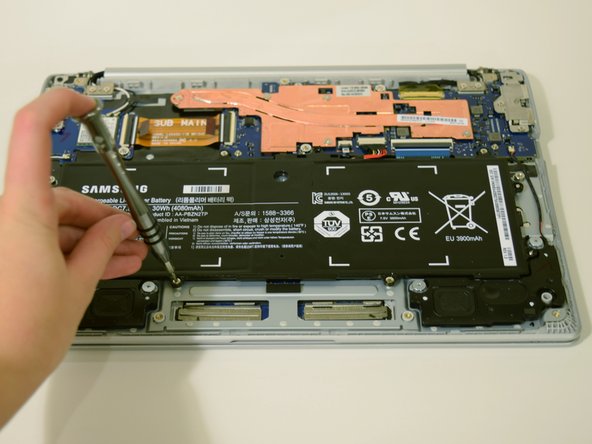
Unscrew the four 4 mm screws holding the battery in place with a Phillips #0 screwdriver.
-
-
-
이 단계는 번역되지 않았습니다. 번역을 도와주십시오
-
Disconnect the wire that connects the battery to the motherboard by pulling upward.
-
-
이 단계는 번역되지 않았습니다. 번역을 도와주십시오
-
Open the laptop and place it so that the back of the screen is laying on a flat surface.
-
Insert a plastic opening tool between the front cover and plastic screen trim.
-
Work the plastic opening tool all around the trim.
-
-
이 단계는 번역되지 않았습니다. 번역을 도와주십시오
-
Flip the computer over so that the keys and screen are facing down.
-
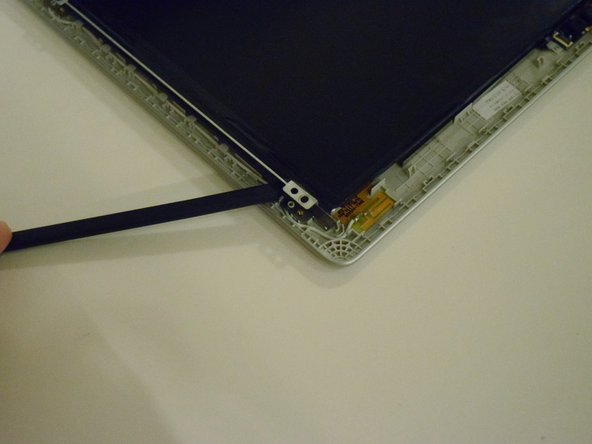
Insert the spudger between the back and front panel, at the hinge, and push the trim out.
-
-
이 단계는 번역되지 않았습니다. 번역을 도와주십시오
-
Place the laptop in a position where it is resting on the back of the screen.
-
Remove the trim from the front panel by pulling up with your hands.
-
-
이 단계는 번역되지 않았습니다. 번역을 도와주십시오
-
Using a Phillips #0 screwdriver to unscrew the four 3 mm screws keeping the screen in place.
-
-
이 단계는 번역되지 않았습니다. 번역을 도와주십시오
-
Place the laptop in an upright position.
-
Pull back the screen to locate the LCD cable, and disconnect it by pulling the black tape that surrounds it towards you.
-
-
이 단계는 번역되지 않았습니다. 번역을 도와주십시오
-
Pull the screen from the front panel using your hands to fully remove it.
-


다른 10명이 해당 안내서를 완성하였습니다.
팀

UW Tacoma, Team 1-3, Rose Winter 2016 UW Tacoma, Team 1-3, Rose Winter 2016 회원
UWT-ROSE-W16S1G3
4 회원들
안내서 4개 작성하였습니다