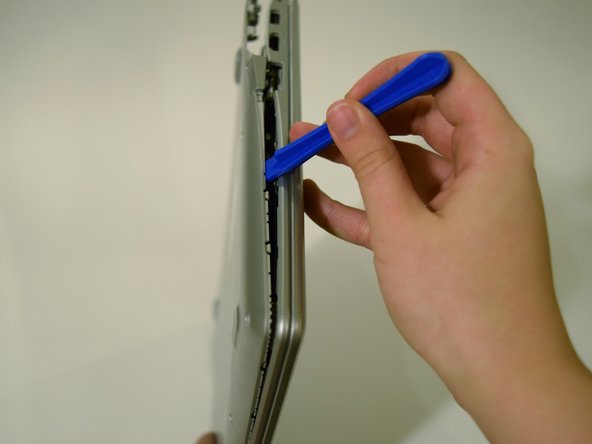
주요 콘텐츠로 건너뛰기

Samsung Chromebook 2 Trackpad Replacement

필요한 것

  1. Samsung Chromebook 2 Trackpad Replacement, Battery: 1 단계, 이미지 1/1
    • Make sure your Chromebook is turned off before you begin.

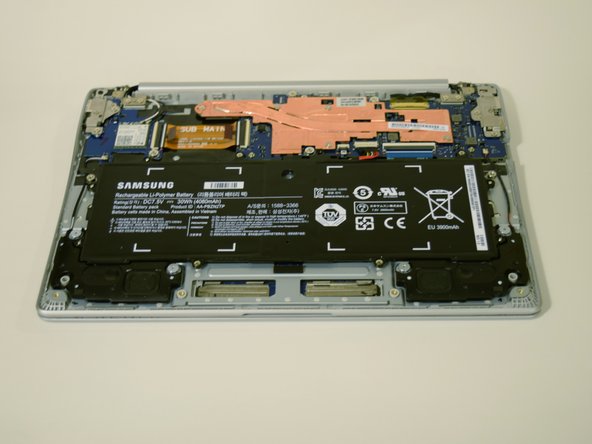
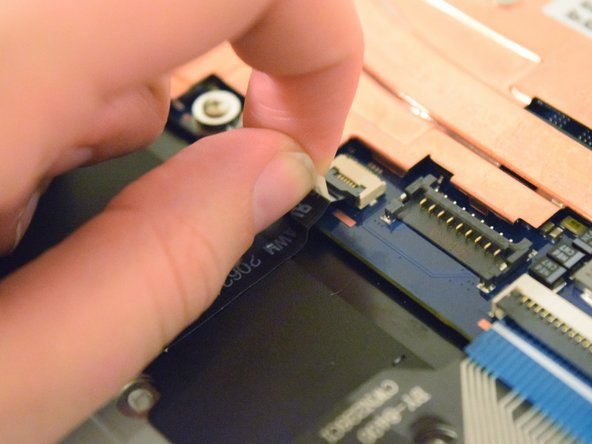
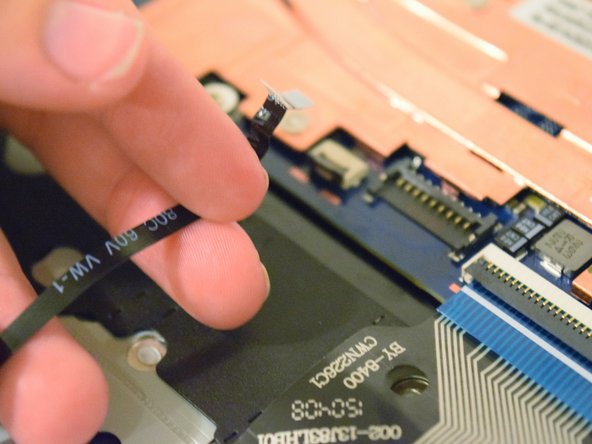
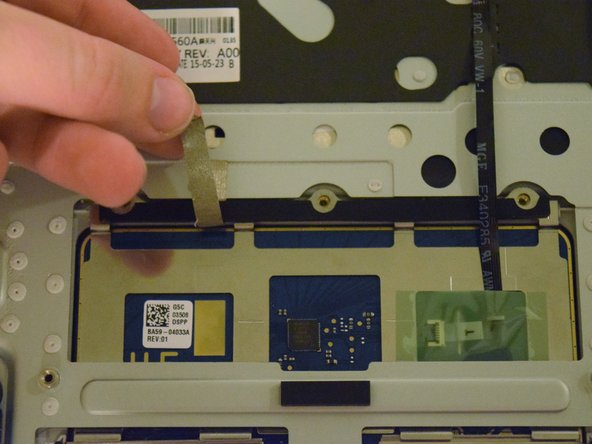
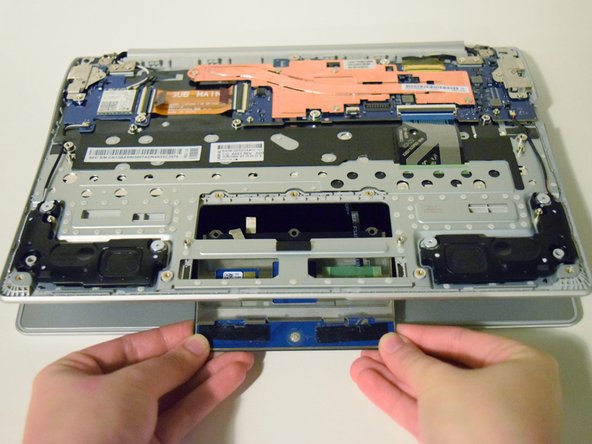
    • Set the labtop face down on a flat surface.

  2. Samsung Chromebook 2 Trackpad Replacement: 2 단계, 이미지 1/3 Samsung Chromebook 2 Trackpad Replacement: 2 단계, 이미지 2/3 Samsung Chromebook 2 Trackpad Replacement: 2 단계, 이미지 3/3
    • Remove the nine 5 mm screws on the bottom cover using a Phillips #0 screwdriver.

  3. Samsung Chromebook 2 Trackpad Replacement: 3 단계, 이미지 1/2 Samsung Chromebook 2 Trackpad Replacement: 3 단계, 이미지 2/2
    • Loosen the back cover panel with a plastic opening tool, and work it all the way around the computer.

  4. Samsung Chromebook 2 Trackpad Replacement: 4 단계, 이미지 1/2 Samsung Chromebook 2 Trackpad Replacement: 4 단계, 이미지 2/2
    • Once the cover is loose, remove the back cover panel using your hands.

  5. Samsung Chromebook 2 Trackpad Replacement: 5 단계, 이미지 1/2 Samsung Chromebook 2 Trackpad Replacement: 5 단계, 이미지 2/2
    • Unscrew the four 4 mm screws holding the battery in place with a Phillips #0 screwdriver.

  6. Samsung Chromebook 2 Trackpad Replacement: 6 단계, 이미지 1/3 Samsung Chromebook 2 Trackpad Replacement: 6 단계, 이미지 2/3 Samsung Chromebook 2 Trackpad Replacement: 6 단계, 이미지 3/3
    • Disconnect the wire that connects the battery to the motherboard by pulling upward.

  7. Samsung Chromebook 2 Trackpad Replacement, Trackpad: 7 단계, 이미지 1/3 Samsung Chromebook 2 Trackpad Replacement, Trackpad: 7 단계, 이미지 2/3 Samsung Chromebook 2 Trackpad Replacement, Trackpad: 7 단계, 이미지 3/3
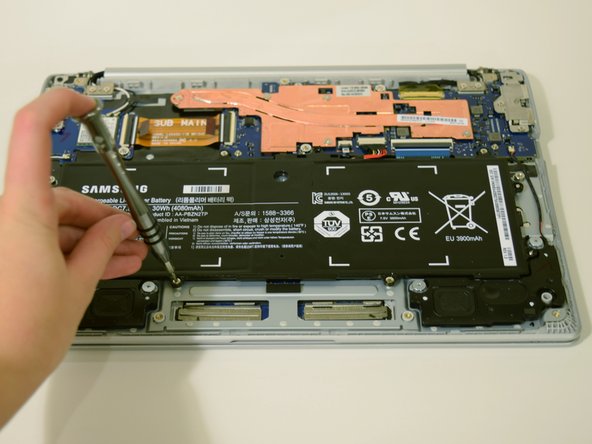
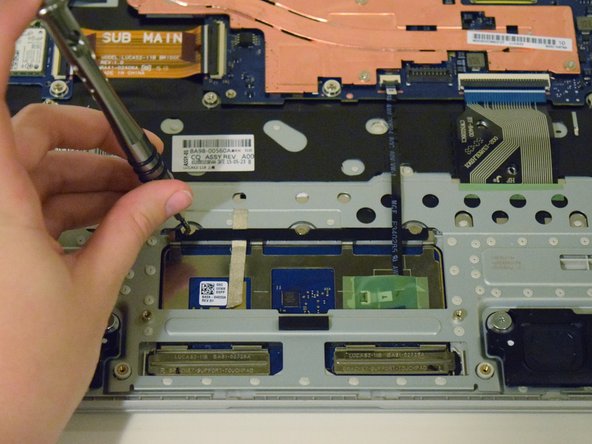
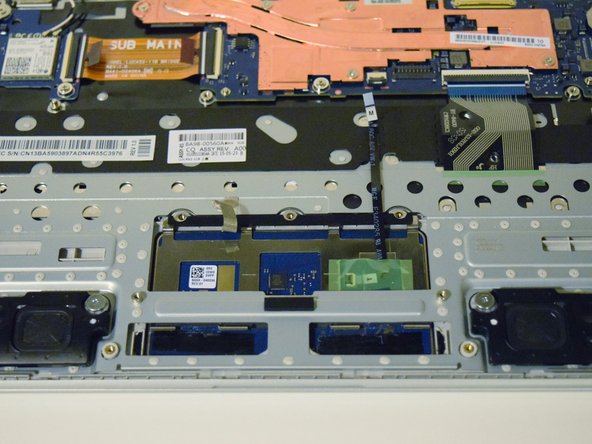
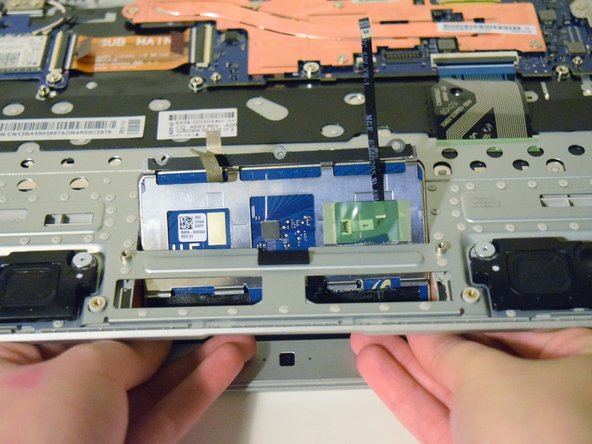
    • Using the Phillips #00 screwdriver, remove the three 2 mm screws keeping the trackpad in place.

  8. Samsung Chromebook 2 Trackpad Replacement: 8 단계, 이미지 1/3 Samsung Chromebook 2 Trackpad Replacement: 8 단계, 이미지 2/3 Samsung Chromebook 2 Trackpad Replacement: 8 단계, 이미지 3/3
    • Remove the connector between the trackpad and the motherboard by pulling upwards on it at the port.

  9. Samsung Chromebook 2 Trackpad Replacement: 9 단계, 이미지 1/2 Samsung Chromebook 2 Trackpad Replacement: 9 단계, 이미지 2/2
    • Peel back the adhesive strip holding the trackpad in place with the heavy-duty spudger.

  10. Samsung Chromebook 2 Trackpad Replacement: 10 단계, 이미지 1/2 Samsung Chromebook 2 Trackpad Replacement: 10 단계, 이미지 2/2
    • Use a plastic opening tool to disconnect the metal trackpad support brackets.

    • Don't be afraid to use a moderate amount of force when prying the support brackets loose.

  11. Samsung Chromebook 2 Trackpad Replacement: 11 단계, 이미지 1/3 Samsung Chromebook 2 Trackpad Replacement: 11 단계, 이미지 2/3 Samsung Chromebook 2 Trackpad Replacement: 11 단계, 이미지 3/3
    • With the laptop slightly open, push the trackpad upwards at the rear, and pull it out from the bottom.

결론

To reassemble your device, follow these instructions in reverse order.

다른 7명이 해당 안내서를 완성하였습니다.

Sebastian Baba

회원 가입일: 01/27/16

417 평판

안내서 1개 작성함

UW Tacoma, Team 1-3, Rose Winter 2016 UW Tacoma, Team 1-3, Rose Winter 2016 회원

UWT-ROSE-W16S1G3

4 회원들

안내서 4개 작성하였습니다

댓글 2개

Olá, gostei do site , pois apresenta um conteúdo bem rico em conhecimento gostaria de uma assistência sempre uso os métodos de reparo do site sempre da certo , porém não visualizei os manuais de reparo toubleshoting , ficaria muito agradecido caso vocês envie esses arquivos pra mim aprofundar meus conhecimentos da área de eletrônica .

atenciosamente.

jordson Martins Dantas - 답글

Reassembly Note: It should be noted that the trackpad will not "click" if the 2mm screws in STEP 7 are tight. Screw down until just snug then back off slightly. The bracket will then function correctly to return the trackpad to the up position after each click depress.

Nathan B. - 답글

댓글 쓰기

조회 통계:

24 시간 전: 0

7일 전: 0

30일 전: 4

전체 시간: 3,509