주요 콘텐츠로 건너뛰기

Samsung Chromebook 2 XE503c12 Speakers Replacement

필요한 것

  1. Samsung Chromebook 2 XE503c12 Speakers Replacement, Battery: 1 단계, 이미지 1/2 Samsung Chromebook 2 XE503c12 Speakers Replacement, Battery: 1 단계, 이미지 2/2
    • Flip device over so that the underside is facing up.

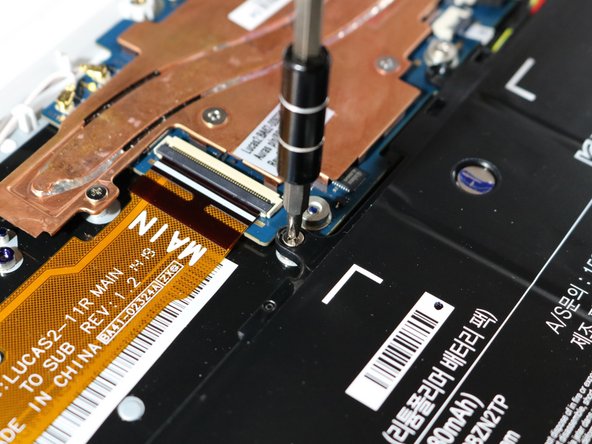
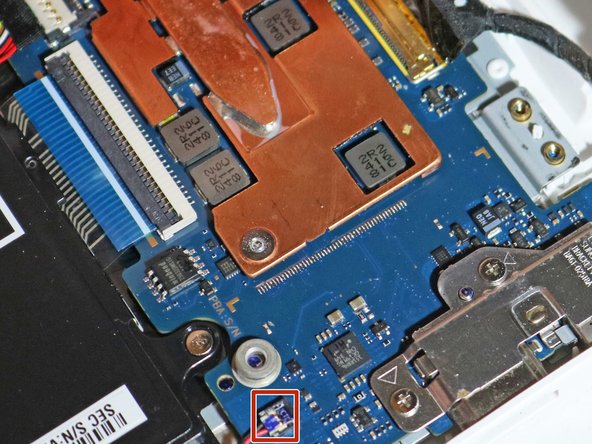
    • Remove nine, 7mm PH#0 screws from the bottom.

  2. Samsung Chromebook 2 XE503c12 Speakers Replacement: 2 단계, 이미지 1/2 Samsung Chromebook 2 XE503c12 Speakers Replacement: 2 단계, 이미지 2/2
    • Using the plastic opening tool, pry open the bottom of the Chromebook case, working all around the computer.

    • Lift the panel out of the way to reveal the battery.

  3. Samsung Chromebook 2 XE503c12 Speakers Replacement: 3 단계, 이미지 1/2 Samsung Chromebook 2 XE503c12 Speakers Replacement: 3 단계, 이미지 2/2
    • Remove four, 5mm Phillips #0 screws connecting the battery to the laptop

  4. Samsung Chromebook 2 XE503c12 Speakers Replacement: 4 단계, 이미지 1/1
    • Lift the battery, and pull it up and towards you, away from the connector.

    • Be sure to lift gently to avoid damage to connector

  5. Samsung Chromebook 2 XE503c12 Speakers Replacement: 5 단계, 이미지 1/1
    • Using a plastic opening tool, pry the connector up from the contact.

    • Remove the battery from the device.

  6. Samsung Chromebook 2 XE503c12 Speakers Replacement, Speakers: 6 단계, 이미지 1/2 Samsung Chromebook 2 XE503c12 Speakers Replacement, Speakers: 6 단계, 이미지 2/2
    • Remove the connectors for each speaker.

  7. Samsung Chromebook 2 XE503c12 Speakers Replacement: 7 단계, 이미지 1/1
    • Remove two 7mm Phillips #0 screws from each speaker.

    • Pull speakers out of laptop.

결론

To reassemble your device, follow these instructions in reverse order.

Britney Betterman

회원 가입일: 09/26/18

253 평판

안내서 2개 작성하였습니다

댓글 0개

댓글 쓰기

조회 통계:

24 시간 전: 0

7일 전: 1

30일 전: 3

전체 시간: 115