주요 콘텐츠로 건너뛰기

Samsung Chromebook 3 XE500C13-K02US Display Screen Replacement

필요한 것

  1. Samsung Chromebook 3 XE500C13-K02US Display Screen Replacement, Bottom Case: 1 단계, 이미지 1/2 Samsung Chromebook 3 XE500C13-K02US Display Screen Replacement, Bottom Case: 1 단계, 이미지 2/2
    • Place the laptop back cover facing up to expose the screws.

    • Using a Phillips #00 screwdriver, remove nine 4.6mm screws from the back casing.

  2. Samsung Chromebook 3 XE500C13-K02US Display Screen Replacement: 2 단계, 이미지 1/2 Samsung Chromebook 3 XE500C13-K02US Display Screen Replacement: 2 단계, 이미지 2/2
    • Use an iFixit opening tool to wedge in between the case and body of the laptop.

    • Once the tool is wedged in between the case and laptop, slide it around the entire laptop's edge to disengage the retaining clips.

    • You should hear a popping sound as you slide the iFixit opening tool around the laptop.

  3. Samsung Chromebook 3 XE500C13-K02US Display Screen Replacement: 3 단계, 이미지 1/2 Samsung Chromebook 3 XE500C13-K02US Display Screen Replacement: 3 단계, 이미지 2/2
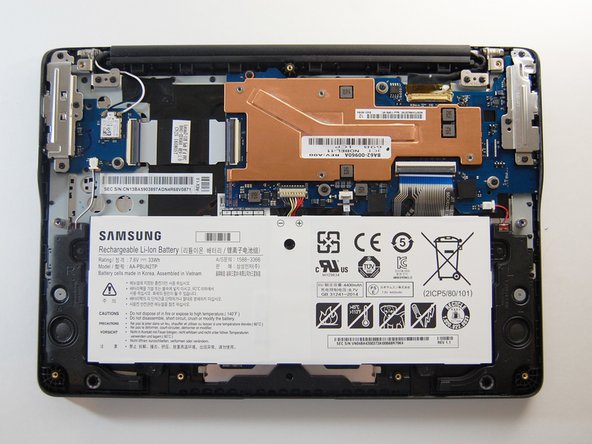
    • Remove the cover exposing the inside of the laptop.

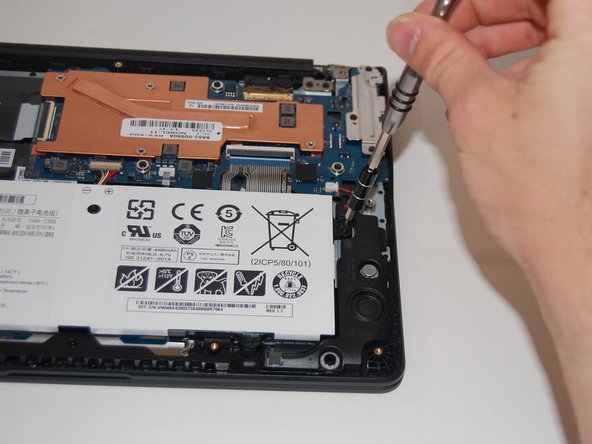
  4. Samsung Chromebook 3 XE500C13-K02US Display Screen Replacement, Battery: 4 단계, 이미지 1/2 Samsung Chromebook 3 XE500C13-K02US Display Screen Replacement, Battery: 4 단계, 이미지 2/2
    • Remove the four 4.6mm screws with the Phillips #00 screwdriver.

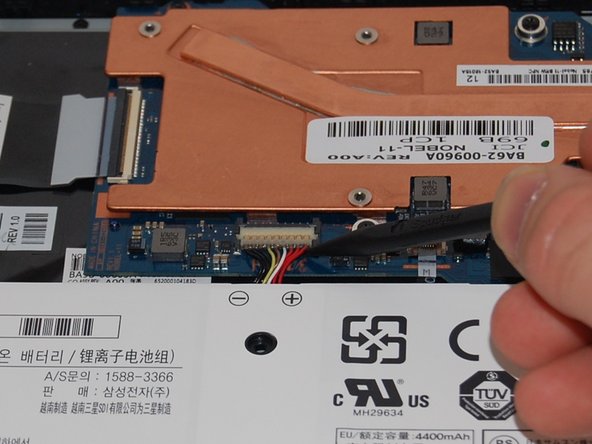
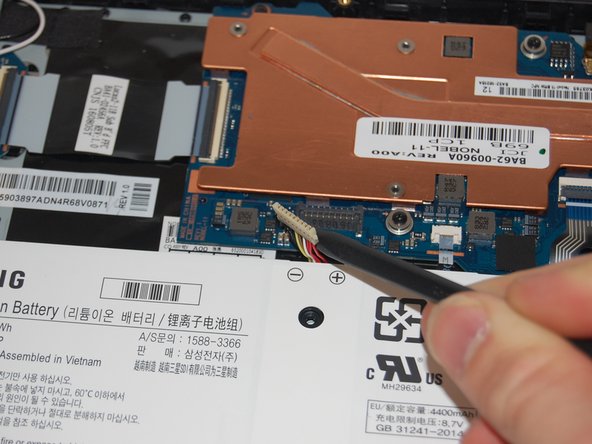
  5. Samsung Chromebook 3 XE500C13-K02US Display Screen Replacement: 5 단계, 이미지 1/3 Samsung Chromebook 3 XE500C13-K02US Display Screen Replacement: 5 단계, 이미지 2/3 Samsung Chromebook 3 XE500C13-K02US Display Screen Replacement: 5 단계, 이미지 3/3
    • Use the spudger to pry underneath the cable and gently lift the connector up.

  6. Samsung Chromebook 3 XE500C13-K02US Display Screen Replacement: 6 단계, 이미지 1/1
    • Lift the battery up and out of the case.

  7. Samsung Chromebook 3 XE500C13-K02US Display Screen Replacement, Display Screen: 7 단계, 이미지 1/3 Samsung Chromebook 3 XE500C13-K02US Display Screen Replacement, Display Screen: 7 단계, 이미지 2/3 Samsung Chromebook 3 XE500C13-K02US Display Screen Replacement, Display Screen: 7 단계, 이미지 3/3
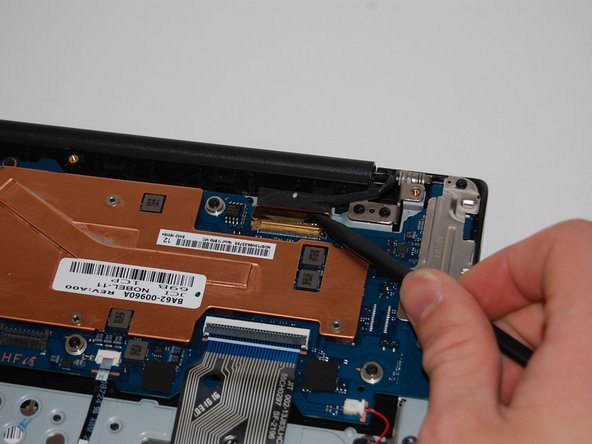
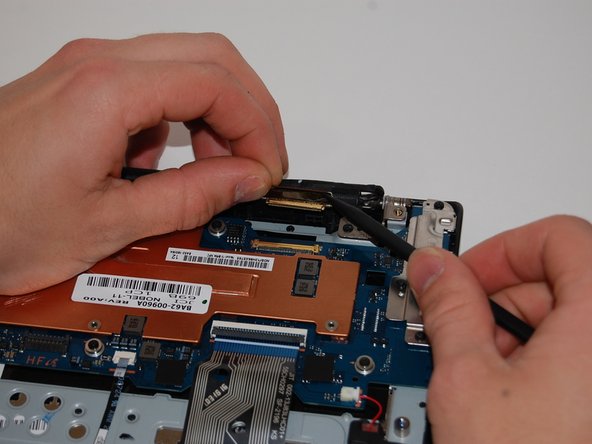
    • Use the spudger to lift the hinge locking the gold colored display cable in place.

    • Slide the cable out to remove it from the motherboard.

  8. Samsung Chromebook 3 XE500C13-K02US Display Screen Replacement: 8 단계, 이미지 1/3 Samsung Chromebook 3 XE500C13-K02US Display Screen Replacement: 8 단계, 이미지 2/3 Samsung Chromebook 3 XE500C13-K02US Display Screen Replacement: 8 단계, 이미지 3/3
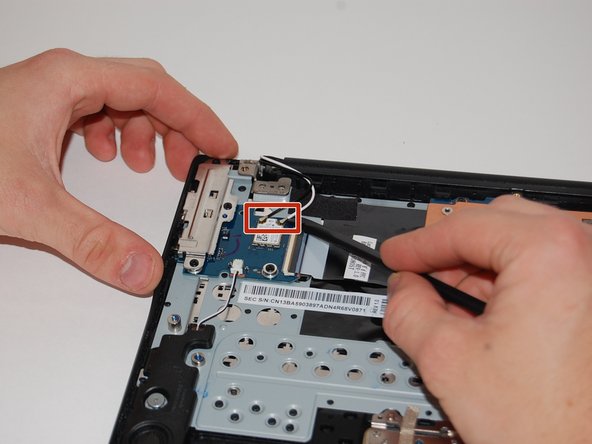
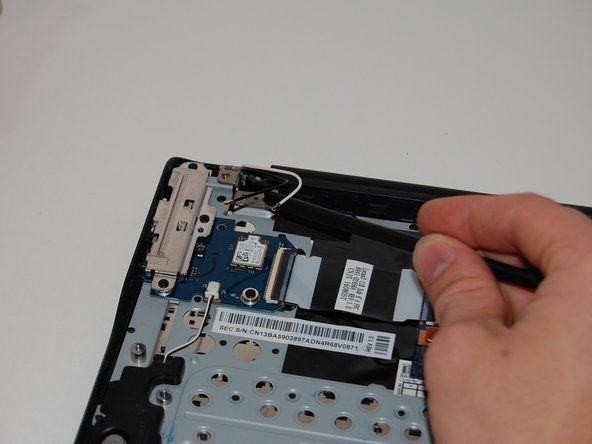
    • Using the spudger, lift the adhesive securing the wireless card antenna wires.

    • Lift the white and black antenna wires with the spudger.

  9. Samsung Chromebook 3 XE500C13-K02US Display Screen Replacement: 9 단계, 이미지 1/3 Samsung Chromebook 3 XE500C13-K02US Display Screen Replacement: 9 단계, 이미지 2/3 Samsung Chromebook 3 XE500C13-K02US Display Screen Replacement: 9 단계, 이미지 3/3
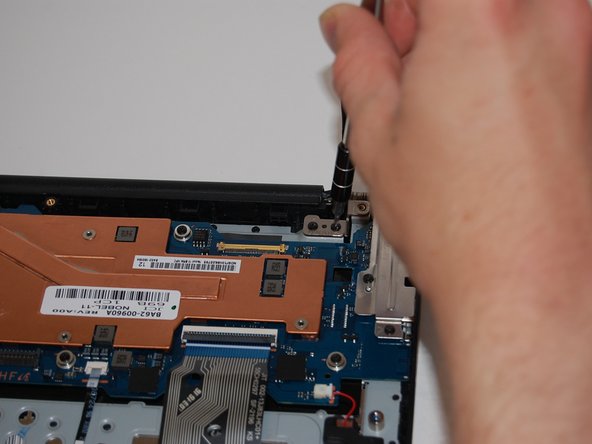
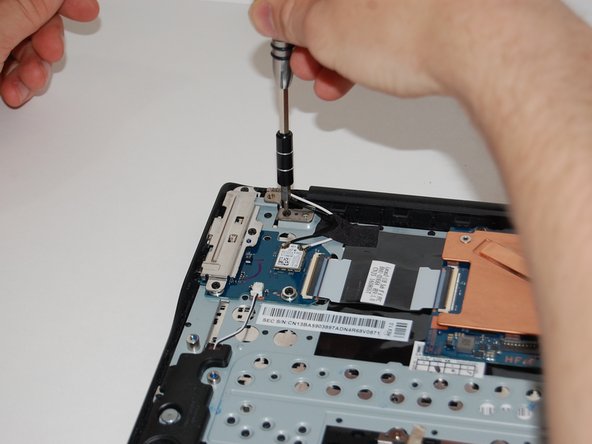
    • Remove the four 4.6mm screws from the display mounts using a Phillips #00 screwdriver.

  10. Samsung Chromebook 3 XE500C13-K02US Display Screen Replacement: 10 단계, 이미지 1/3 Samsung Chromebook 3 XE500C13-K02US Display Screen Replacement: 10 단계, 이미지 2/3 Samsung Chromebook 3 XE500C13-K02US Display Screen Replacement: 10 단계, 이미지 3/3
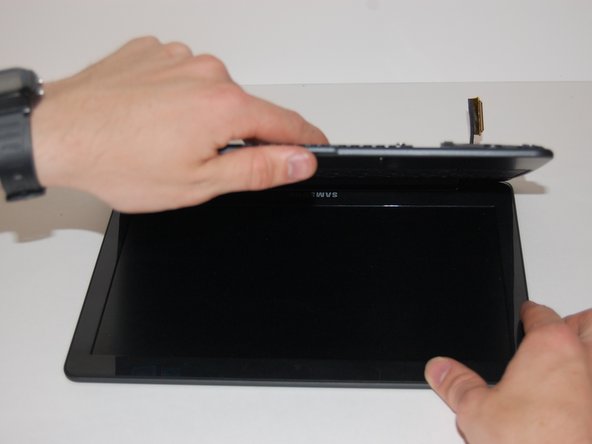
    • Once the hinge screws have been removed, open the laptop.

    • The laptop bottom will separate from the screen once you open it a certain amount.

  11. Samsung Chromebook 3 XE500C13-K02US Display Screen Replacement: 11 단계, 이미지 1/3 Samsung Chromebook 3 XE500C13-K02US Display Screen Replacement: 11 단계, 이미지 2/3 Samsung Chromebook 3 XE500C13-K02US Display Screen Replacement: 11 단계, 이미지 3/3
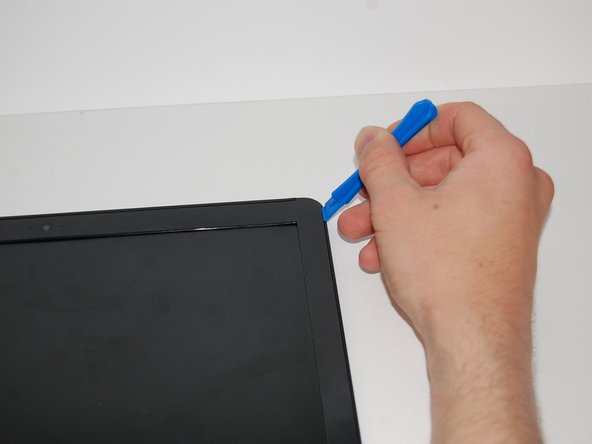
    • Use the iFixit opening tool to pry in between the bezel and screen.

    • You will hear a snapping sound as you work your way around the bezel with the iFixit opening tool.

  12. Samsung Chromebook 3 XE500C13-K02US Display Screen Replacement: 12 단계, 이미지 1/2 Samsung Chromebook 3 XE500C13-K02US Display Screen Replacement: 12 단계, 이미지 2/2
    • Remove the four 4.6mm screws from the display mounts using a Phillips #00 screwdriver.

  13. Samsung Chromebook 3 XE500C13-K02US Display Screen Replacement: 13 단계, 이미지 1/2 Samsung Chromebook 3 XE500C13-K02US Display Screen Replacement: 13 단계, 이미지 2/2
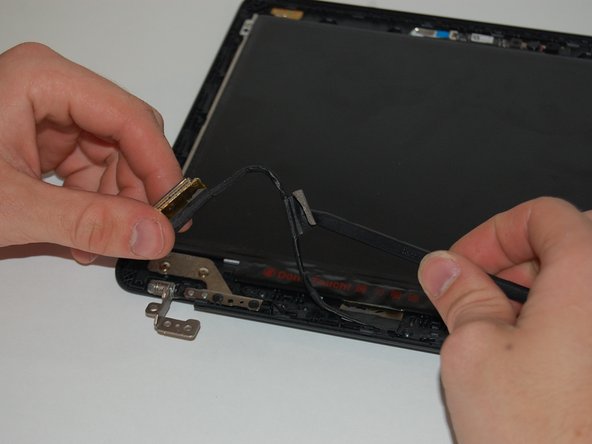
    • Using the spudger, lift the adhesive tape holding the display cable.

  14. Samsung Chromebook 3 XE500C13-K02US Display Screen Replacement: 14 단계, 이미지 1/3 Samsung Chromebook 3 XE500C13-K02US Display Screen Replacement: 14 단계, 이미지 2/3 Samsung Chromebook 3 XE500C13-K02US Display Screen Replacement: 14 단계, 이미지 3/3
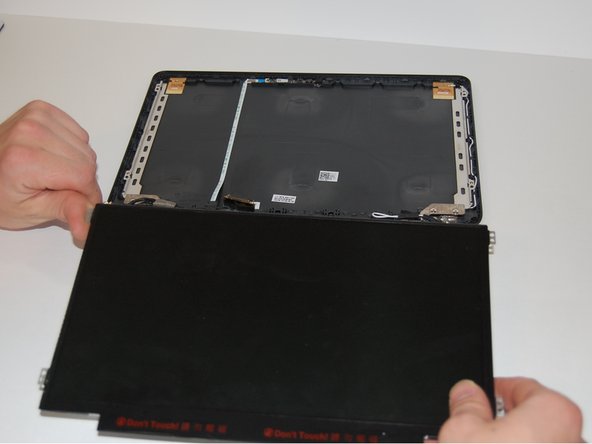
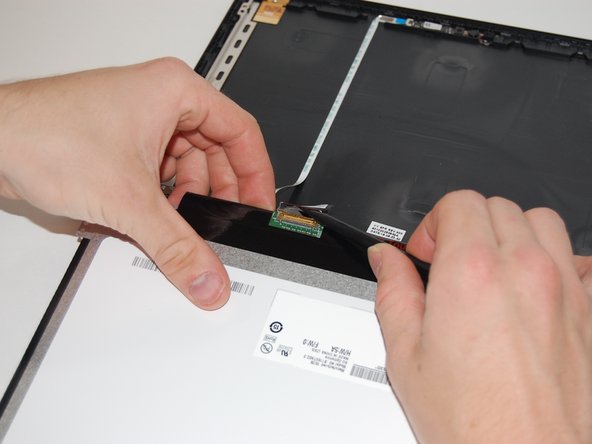
    • Gently lift the panel up and fold it over to expose the display cable on the backside of the display.

  15. Samsung Chromebook 3 XE500C13-K02US Display Screen Replacement: 15 단계, 이미지 1/3 Samsung Chromebook 3 XE500C13-K02US Display Screen Replacement: 15 단계, 이미지 2/3 Samsung Chromebook 3 XE500C13-K02US Display Screen Replacement: 15 단계, 이미지 3/3
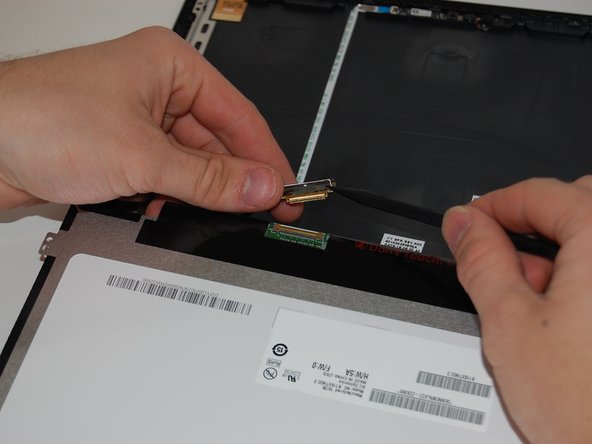
    • Use the spudger, lift the hinge locking the gold colored display cable in place.

    • Pull the cable away from you to slide it out of the monitor.

    • Be gentle around the display circuit board. It is labeled "Do not touch."

  16. Samsung Chromebook 3 XE500C13-K02US Display Screen Replacement: 16 단계, 이미지 1/1
    • Once the display cable has been removed, lift the screen up and out of the case.

결론

To reassemble your device, follow these instructions in reverse order.

다른 8명이 해당 안내서를 완성하였습니다.

Mick McCarty

회원 가입일: 03/18/19

980 평판

안내서 6개 작성하였습니다

University of Memphis, Team S1-G24, Kim Spring 2019 University of Memphis, Team S1-G24, Kim Spring 2019 회원

UM-KIM-S19S1G24

3 회원들

안내서 6개 작성하였습니다

댓글 4개

This also works for the XE500C13-K04US

Jonathan - 답글

It was more challenging than I thought. Reconnecting the antenna wires wasn’t easy. I needed better vision and dexterity to find it easier. Don’t forget to reuse the adhesive tape or you may be disappointed.

Bill Watson - 답글

Great guide!

Very accurate!

Joshua McVey - 답글

Just to confirm. You have to tear apart the bottom just to replace the led screen? Can't just remove the bezel?

Xe501c13-k02us

Trisha Kurtz - 답글

댓글 쓰기

조회 통계:

24 시간 전: 3

7일 전: 4

30일 전: 5

전체 시간: 1,956