주요 콘텐츠로 건너뛰기

Samsung Chromebook 3 XE500C13-K02US Motherboard Replacement

필요한 것

  1. Samsung Chromebook 3 XE500C13-K02US Motherboard Replacement, Bottom Case: 1 단계, 이미지 1/2 Samsung Chromebook 3 XE500C13-K02US Motherboard Replacement, Bottom Case: 1 단계, 이미지 2/2
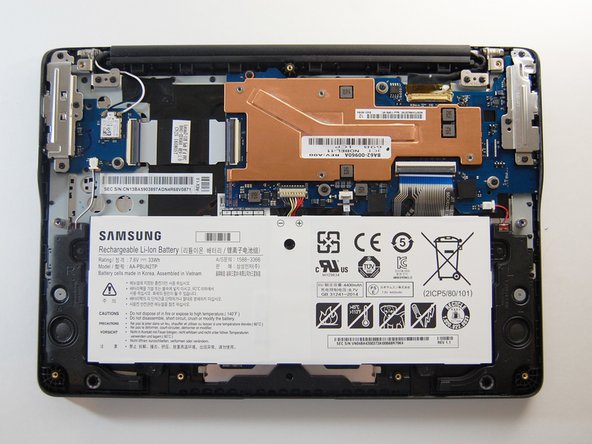
    • Place the laptop back cover facing up to expose the screws.

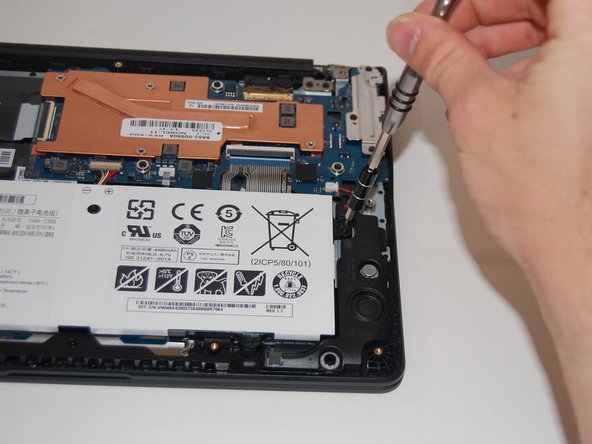
    • Using a Phillips #00 screwdriver, remove nine 4.6mm screws from the back casing.

  2. Samsung Chromebook 3 XE500C13-K02US Motherboard Replacement: 2 단계, 이미지 1/2 Samsung Chromebook 3 XE500C13-K02US Motherboard Replacement: 2 단계, 이미지 2/2
    • Use an iFixit opening tool to wedge in between the case and body of the laptop.

    • Once the tool is wedged in between the case and laptop, slide it around the entire laptop's edge to disengage the retaining clips.

    • You should hear a popping sound as you slide the iFixit opening tool around the laptop.

  3. Samsung Chromebook 3 XE500C13-K02US Motherboard Replacement: 3 단계, 이미지 1/2 Samsung Chromebook 3 XE500C13-K02US Motherboard Replacement: 3 단계, 이미지 2/2
    • Remove the cover exposing the inside of the laptop.

  4. Samsung Chromebook 3 XE500C13-K02US Motherboard Replacement, Battery: 4 단계, 이미지 1/2 Samsung Chromebook 3 XE500C13-K02US Motherboard Replacement, Battery: 4 단계, 이미지 2/2
    • Remove the four 4.6mm screws with the Phillips #00 screwdriver.

  5. Samsung Chromebook 3 XE500C13-K02US Motherboard Replacement: 5 단계, 이미지 1/3 Samsung Chromebook 3 XE500C13-K02US Motherboard Replacement: 5 단계, 이미지 2/3 Samsung Chromebook 3 XE500C13-K02US Motherboard Replacement: 5 단계, 이미지 3/3
    • Use the spudger to pry underneath the cable and gently lift the connector up.

  6. Samsung Chromebook 3 XE500C13-K02US Motherboard Replacement: 6 단계, 이미지 1/1
    • Lift the battery up and out of the case.

  7. Samsung Chromebook 3 XE500C13-K02US Motherboard Replacement, Motherboard: 7 단계, 이미지 1/3 Samsung Chromebook 3 XE500C13-K02US Motherboard Replacement, Motherboard: 7 단계, 이미지 2/3 Samsung Chromebook 3 XE500C13-K02US Motherboard Replacement, Motherboard: 7 단계, 이미지 3/3
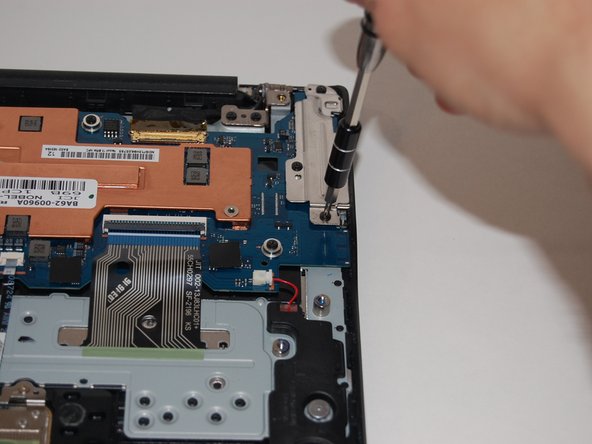
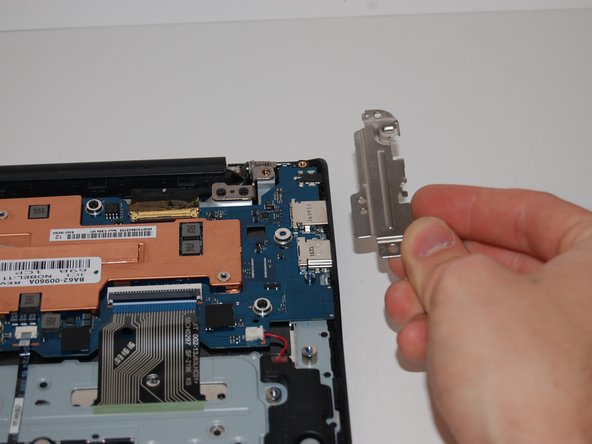
    • Remove the three 4.6mm screws from the silver port cover using a Phillips #00 screwdriver.

    • The port cover will take a little wiggling to lift up and out of the laptop.

  8. Samsung Chromebook 3 XE500C13-K02US Motherboard Replacement: 8 단계, 이미지 1/2 Samsung Chromebook 3 XE500C13-K02US Motherboard Replacement: 8 단계, 이미지 2/2
    • Remove the right speaker connector using a spudger.

  9. Samsung Chromebook 3 XE500C13-K02US Motherboard Replacement: 9 단계, 이미지 1/3 Samsung Chromebook 3 XE500C13-K02US Motherboard Replacement: 9 단계, 이미지 2/3 Samsung Chromebook 3 XE500C13-K02US Motherboard Replacement: 9 단계, 이미지 3/3
    • Use a spudger to lift the hinge locking the gold colored display cable in place.

    • Slide the hinge out to remove it from the motherboard.

  10. Samsung Chromebook 3 XE500C13-K02US Motherboard Replacement: 10 단계, 이미지 1/2 Samsung Chromebook 3 XE500C13-K02US Motherboard Replacement: 10 단계, 이미지 2/2
    • Use a spudger to flip up the ZIF connector holding in the ribbon cable.

    • Once the ZIF connector has been lifted, slide the ribbon cable out of the motherboard.

  11. Samsung Chromebook 3 XE500C13-K02US Motherboard Replacement: 11 단계, 이미지 1/2 Samsung Chromebook 3 XE500C13-K02US Motherboard Replacement: 11 단계, 이미지 2/2
    • Slide the track pad ribbon cable out from the motherboard using a spudger.

  12. Samsung Chromebook 3 XE500C13-K02US Motherboard Replacement: 12 단계, 이미지 1/2 Samsung Chromebook 3 XE500C13-K02US Motherboard Replacement: 12 단계, 이미지 2/2
    • Lift the ZIF connector on the keyboard ribbon cable with a spudger.

    • Once the ZIF connector has been flipped, slide the ribbon cable out from the motherboard.

  13. Samsung Chromebook 3 XE500C13-K02US Motherboard Replacement: 13 단계, 이미지 1/3 Samsung Chromebook 3 XE500C13-K02US Motherboard Replacement: 13 단계, 이미지 2/3 Samsung Chromebook 3 XE500C13-K02US Motherboard Replacement: 13 단계, 이미지 3/3
    • Use your Phillips #00 screwdriver to remove four 4.6mm screws from the motherboard.

    • Ensure there are no cables in the way and lift the motherboard up and out of the laptop.

결론

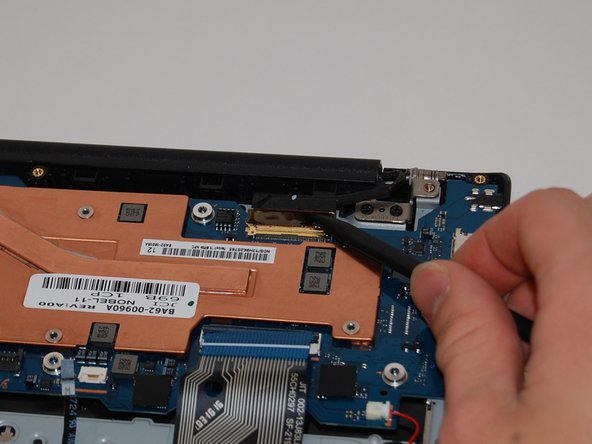
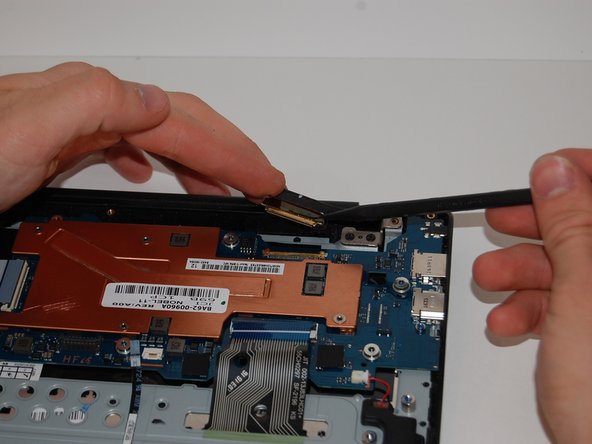
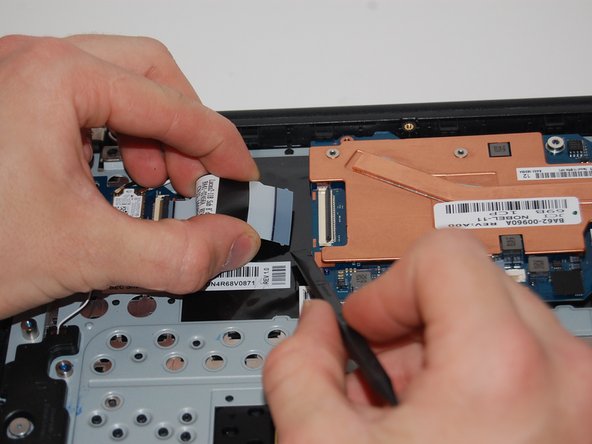
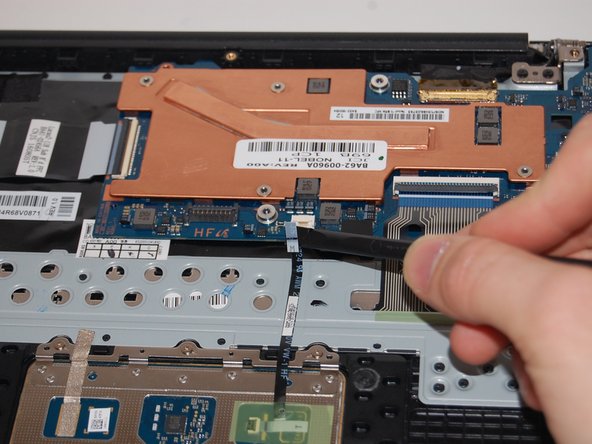
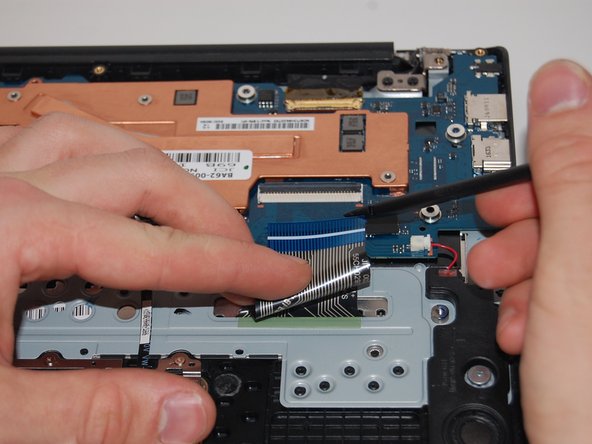
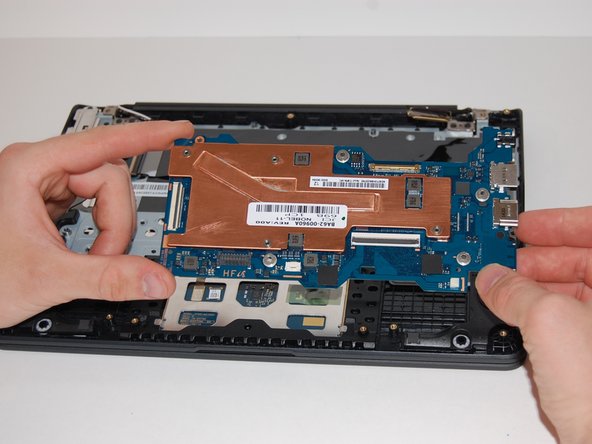
To reassemble your device, follow these instructions in reverse order.

Mick McCarty

회원 가입일: 03/18/19

980 평판

안내서 6개 작성하였습니다

University of Memphis, Team S1-G24, Kim Spring 2019 University of Memphis, Team S1-G24, Kim Spring 2019 회원

UM-KIM-S19S1G24

3 회원들

안내서 6개 작성하였습니다

댓글 한 개

Thanks for this. I was able to follow the steps and start up the Chromebook successfully. However, now my keyboard and mouse pad aren't working. I tried going back and reinserting the ribbon connectors a couple of times without success. If I plug in a separate mouse and keyboard, they both work. Anything else I should try?

Melissa Skilliter - 답글

댓글 쓰기

조회 통계:

24 시간 전: 0

7일 전: 2

30일 전: 18

전체 시간: 1,116