주요 콘텐츠로 건너뛰기

Samsung Chromebook Series 3 Speaker Replacement

필요한 것

  1. Samsung Chromebook Series 3 Speaker Replacement, Bottom Cover: 1 단계, 이미지 1/3 Samsung Chromebook Series 3 Speaker Replacement, Bottom Cover: 1 단계, 이미지 2/3 Samsung Chromebook Series 3 Speaker Replacement, Bottom Cover: 1 단계, 이미지 3/3
    • Lay the Chromebook down so that the bottom cover is facing up.

    • Remove the rubber feet on the four corners of the Chromebook in order to get to the screws underneath. They are stuck on with an adhesive.

  2. Samsung Chromebook Series 3 Speaker Replacement: 2 단계, 이미지 1/3 Samsung Chromebook Series 3 Speaker Replacement: 2 단계, 이미지 2/3 Samsung Chromebook Series 3 Speaker Replacement: 2 단계, 이미지 3/3
    • Remove the nine 4.7 mm screws on the bottom cover using a Phillips #00 screwdriver.

  3. Samsung Chromebook Series 3 Speaker Replacement: 3 단계, 이미지 1/3 Samsung Chromebook Series 3 Speaker Replacement: 3 단계, 이미지 2/3 Samsung Chromebook Series 3 Speaker Replacement: 3 단계, 이미지 3/3
    • Pry up the plastic strip on the back of the Chromebook using a plastic opening tool.

    • It is not necessary to remove it completely. It just needs to be separated from the bottom cover.

  4. Samsung Chromebook Series 3 Speaker Replacement: 4 단계, 이미지 1/3 Samsung Chromebook Series 3 Speaker Replacement: 4 단계, 이미지 2/3 Samsung Chromebook Series 3 Speaker Replacement: 4 단계, 이미지 3/3
    • Pry off the bottom cover using a plastic opening tool.

  5. Samsung Chromebook Series 3 Speaker Replacement, Battery: 5 단계, 이미지 1/3 Samsung Chromebook Series 3 Speaker Replacement, Battery: 5 단계, 이미지 2/3 Samsung Chromebook Series 3 Speaker Replacement, Battery: 5 단계, 이미지 3/3
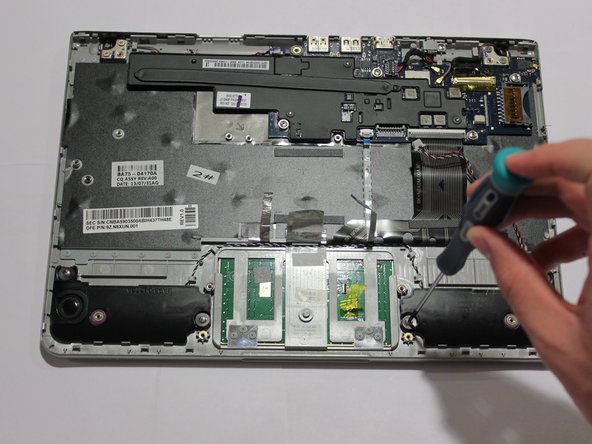
    • Remove six 3.5 mm screws holding the battery using a Phillips #00 screwdriver.

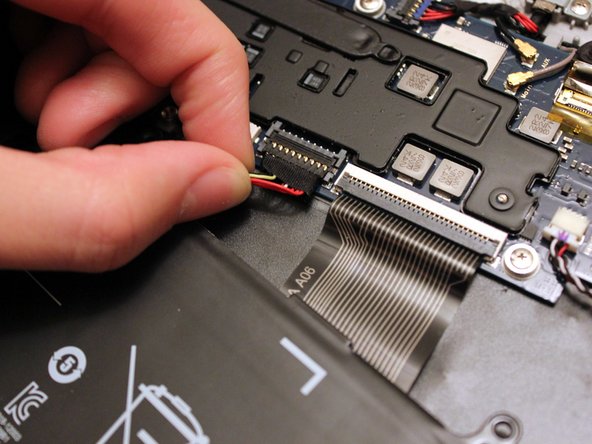
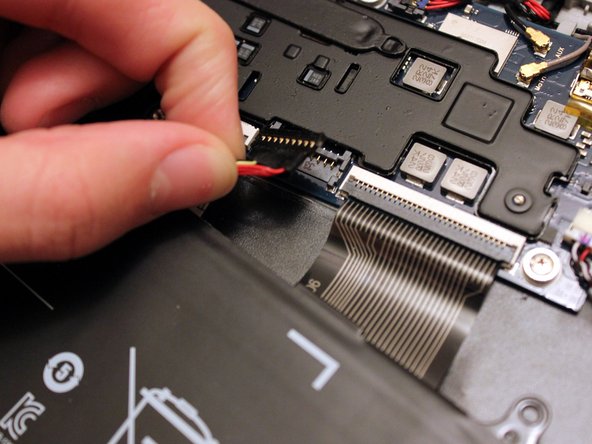
    • Pull out the battery partway in order to easily get to the battery connector.

  6. Samsung Chromebook Series 3 Speaker Replacement: 6 단계, 이미지 1/3 Samsung Chromebook Series 3 Speaker Replacement: 6 단계, 이미지 2/3 Samsung Chromebook Series 3 Speaker Replacement: 6 단계, 이미지 3/3
    • Disconnect the battery connector by pulling straight up at its base.

    • When reassembling, simply position the connector above it's original place, and push down.

  7. Samsung Chromebook Series 3 Speaker Replacement: 7 단계, 이미지 1/2 Samsung Chromebook Series 3 Speaker Replacement: 7 단계, 이미지 2/2
    • You can now remove the battery.

  8. Samsung Chromebook Series 3 Speaker Replacement, Speaker: 8 단계, 이미지 1/3 Samsung Chromebook Series 3 Speaker Replacement, Speaker: 8 단계, 이미지 2/3 Samsung Chromebook Series 3 Speaker Replacement, Speaker: 8 단계, 이미지 3/3
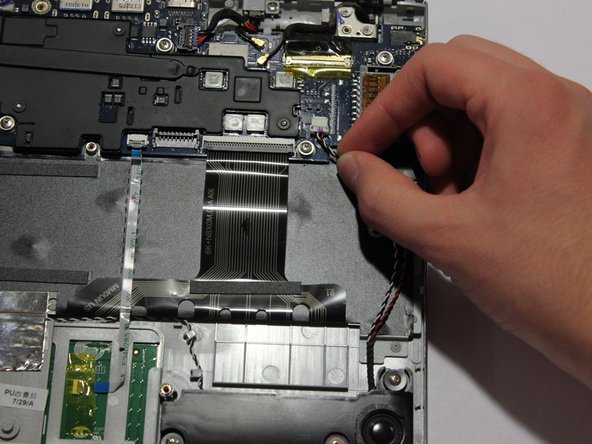
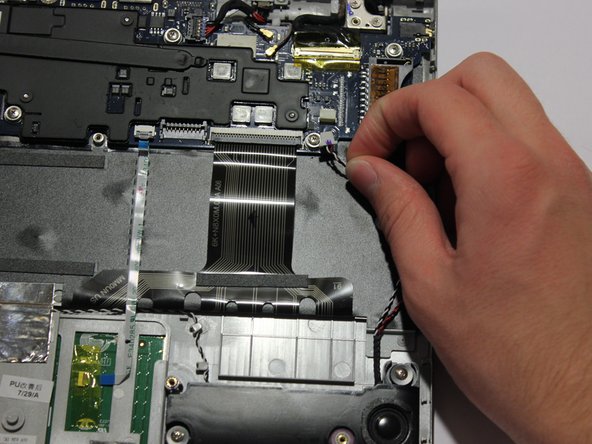
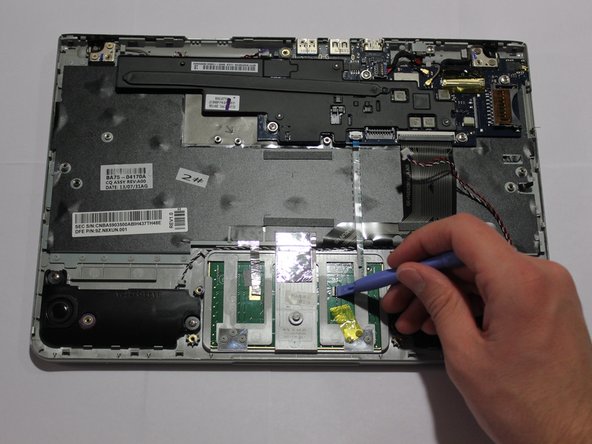
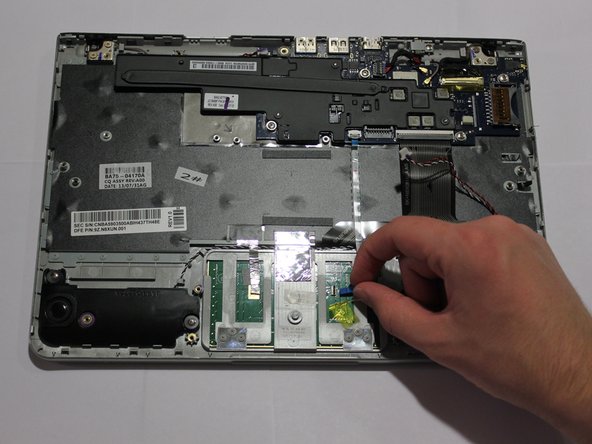
    • Disconnect the cable connecting the speakers to the motherboard by pulling on it away from the motherboard.

  9. Samsung Chromebook Series 3 Speaker Replacement: 9 단계, 이미지 1/3 Samsung Chromebook Series 3 Speaker Replacement: 9 단계, 이미지 2/3 Samsung Chromebook Series 3 Speaker Replacement: 9 단계, 이미지 3/3
    • Lift up the piece of tape covering the trackpad ribbon cable.

    • Lift up the lock on the trackpad ribbon cable using a plastic opening tool.

    • Disconnect the trackpad ribbon cable by pulling it out.

  10. Samsung Chromebook Series 3 Speaker Replacement: 10 단계, 이미지 1/2 Samsung Chromebook Series 3 Speaker Replacement: 10 단계, 이미지 2/2
    • Lift up the trackpad ribbon cable so that it is not covering the speaker wire.

    • Lift up the two pieces of metallic tape so that they no longer cover the speaker wire.

    • When reassembling the device, make sure to lay down the metallic tape in the same place it was prior to disassembly. The tape serves as a connector for certain electrical circuits that should not be disconnected.

  11. Samsung Chromebook Series 3 Speaker Replacement: 11 단계, 이미지 1/3 Samsung Chromebook Series 3 Speaker Replacement: 11 단계, 이미지 2/3 Samsung Chromebook Series 3 Speaker Replacement: 11 단계, 이미지 3/3
    • Unscrew the four 3.7 mm screws holding down the speakers using a Phillips #00 screwdriver.

  12. Samsung Chromebook Series 3 Speaker Replacement: 12 단계, 이미지 1/2 Samsung Chromebook Series 3 Speaker Replacement: 12 단계, 이미지 2/2
    • Pull the speakers up to remove them.

결론

To reassemble your device, follow these instructions in reverse order.

다른 7명이 해당 안내서를 완성하였습니다.

Andrey Radchishin

회원 가입일: 01/21/15

1,833 평판

안내서 4개 작성하였습니다

UWT Liner: Group 1 UWT Liner: Group 1 회원

Community

5 회원들

안내서 8개 작성하였습니다

댓글 한 개

Many thanks.

Excellent guide .

Triumph Trident - 답글

댓글 쓰기

조회 통계:

24 시간 전: 0

7일 전: 1

30일 전: 2

전체 시간: 1,573