주요 콘텐츠로 건너뛰기

Samsung Chromebook XE500C21-A03US SD Card Reader Replacement

필요한 것

  1. Samsung Chromebook XE500C21-A03US SD Card Reader Replacement, Back Cover: 1 단계, 이미지 1/3 Samsung Chromebook XE500C21-A03US SD Card Reader Replacement, Back Cover: 1 단계, 이미지 2/3 Samsung Chromebook XE500C21-A03US SD Card Reader Replacement, Back Cover: 1 단계, 이미지 3/3
    • Turn the power off before beginning this step.

    • Most Chromebooks contain rubber circle pads on each of the four corners to cover the screws. In order to remove the rubber pads, simply use any opening tool.

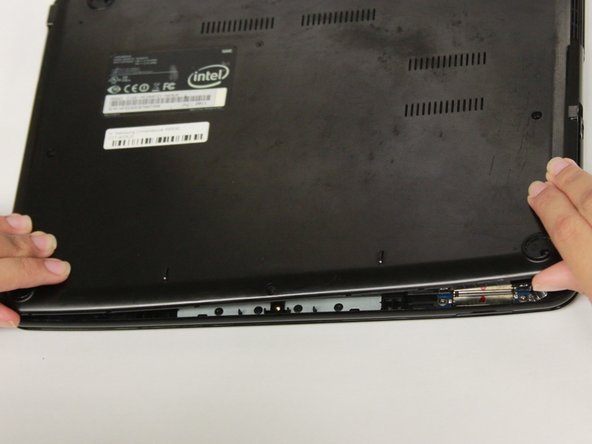
    • Lay the Chromebook down so that the bottom cover is facing upward.

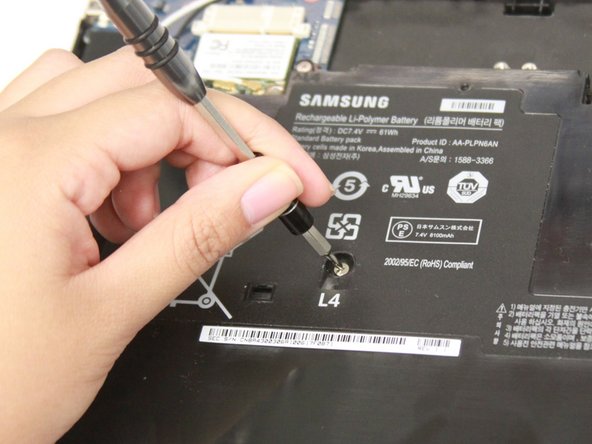
    • Using a Phillips #00 screwdriver, remove all seven 5.5 mm screws from the back cover.

  2. Samsung Chromebook XE500C21-A03US SD Card Reader Replacement: 2 단계, 이미지 1/3 Samsung Chromebook XE500C21-A03US SD Card Reader Replacement: 2 단계, 이미지 2/3 Samsung Chromebook XE500C21-A03US SD Card Reader Replacement: 2 단계, 이미지 3/3
    • Place the opening tool in the divot between the spine of the Chromebook and the back cover.

    • Slowly glide and push down the end of the opening tool along all sides of the Chromebook to detach the brackets. You will hear the brackets detach.

  3. Samsung Chromebook XE500C21-A03US SD Card Reader Replacement: 3 단계, 이미지 1/2 Samsung Chromebook XE500C21-A03US SD Card Reader Replacement: 3 단계, 이미지 2/2
    • Using the opening tool, pry off the back cover of the Chromebook

    • Be gentle while prying to avoid breaking the back cover.

  4. Samsung Chromebook XE500C21-A03US SD Card Reader Replacement, Battery: 4 단계, 이미지 1/2 Samsung Chromebook XE500C21-A03US SD Card Reader Replacement, Battery: 4 단계, 이미지 2/2
    • Remove the four 3 mm screws using a Phillips #000 screwdriver.

  5. Samsung Chromebook XE500C21-A03US SD Card Reader Replacement: 5 단계, 이미지 1/2 Samsung Chromebook XE500C21-A03US SD Card Reader Replacement: 5 단계, 이미지 2/2
    • Carefully lift the top of the battery then pull it away from you to remove it.

    • Some batteries may be attached via a battery connector. Disconnect the battery connector by simply pulling straight up at its base.

  6. Samsung Chromebook XE500C21-A03US SD Card Reader Replacement, SD Card Reader: 6 단계, 이미지 1/2 Samsung Chromebook XE500C21-A03US SD Card Reader Replacement, SD Card Reader: 6 단계, 이미지 2/2
    • Remove both 3 mm screws using a Phillips #000 screwdriver.

  7. Samsung Chromebook XE500C21-A03US SD Card Reader Replacement: 7 단계, 이미지 1/3 Samsung Chromebook XE500C21-A03US SD Card Reader Replacement: 7 단계, 이미지 2/3 Samsung Chromebook XE500C21-A03US SD Card Reader Replacement: 7 단계, 이미지 3/3
    • Remove the yellow tape on the left ribbon cable with a spudger.

    • Use a blunt precision tweezer to remove both ribbon cables attached to the SD card reader.

  8. Samsung Chromebook XE500C21-A03US SD Card Reader Replacement: 8 단계, 이미지 1/3 Samsung Chromebook XE500C21-A03US SD Card Reader Replacement: 8 단계, 이미지 2/3 Samsung Chromebook XE500C21-A03US SD Card Reader Replacement: 8 단계, 이미지 3/3
    • Gently lift the top portion of the SD card reader and pull it away from you to remove it.

    • To reassemble, first insert the bottom of the SD card reader then carefully push downward.

결론

To reassemble your device, follow these instructions in reverse order.

huy

회원 가입일: 09/11/17

337 평판

안내서 3개 작성하였습니다

CSU Fullerton, Team S2-G5, Bruce Fall 2017 CSU Fullerton, Team S2-G5, Bruce Fall 2017 회원

CSUF-BRUCE-F17S2G5

4 회원들

안내서 12개 작성하였습니다

댓글 0개

댓글 쓰기

조회 통계:

24 시간 전: 0

7일 전: 0

30일 전: 0

전체 시간: 310