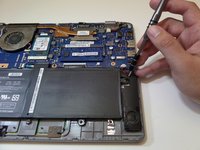
주요 콘텐츠로 건너뛰기

Samsung Chromebook series 5 XE550C22 SSD Replacement

필요한 것

  1. Samsung Chromebook series 5 XE550C22 SSD Replacement, Back Panel: 1 단계, 이미지 3개 중 1개 Samsung Chromebook series 5 XE550C22 SSD Replacement, Back Panel: 1 단계, 이미지 3개 중 2개 Samsung Chromebook series 5 XE550C22 SSD Replacement, Back Panel: 1 단계, 이미지 3개 중 3개
    • Turn the power off before beginning this step.

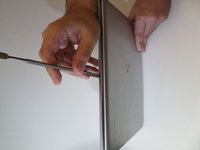
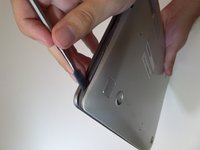
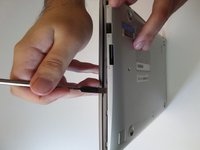
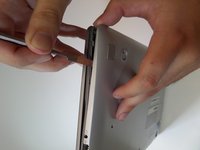
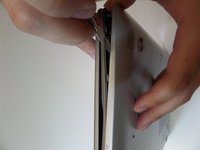
    • Using the spudger, remove the four 1/2 inch skid pads from the back of the laptop.

  2. Samsung Chromebook series 5 XE550C22 SSD Replacement: 2 단계, 이미지 2개 중 1개 Samsung Chromebook series 5 XE550C22 SSD Replacement: 2 단계, 이미지 2개 중 2개
    • Remove the eight 7mm screws using the J0 Screwdriver.

  3. Samsung Chromebook series 5 XE550C22 SSD Replacement: 3 단계, 이미지 3개 중 1개 Samsung Chromebook series 5 XE550C22 SSD Replacement: 3 단계, 이미지 3개 중 2개 Samsung Chromebook series 5 XE550C22 SSD Replacement: 3 단계, 이미지 3개 중 3개
    • Starting at the center front of the laptop, insert the metal spudger between the keyboard panel and the bottom panel, separating the bottom panel from the laptop.

    • Continue prying around the sides to release more brackets.

  4. Samsung Chromebook series 5 XE550C22 SSD Replacement: 4 단계, 이미지 2개 중 1개 Samsung Chromebook series 5 XE550C22 SSD Replacement: 4 단계, 이미지 2개 중 2개
    • After deconnecting all the brackets, pull the back panel away from the laptop.

    • Note: The back panel has some flex to it, don't be afraid to use some force.

  5. Samsung Chromebook series 5 XE550C22 SSD Replacement, Battery: 5 단계, 이미지 2개 중 1개 Samsung Chromebook series 5 XE550C22 SSD Replacement, Battery: 5 단계, 이미지 2개 중 2개
    • Remove the four 3mm screws holding the battery with the J0 screwdriver.

  6. Samsung Chromebook series 5 XE550C22 SSD Replacement: 6 단계, 이미지 2개 중 1개 Samsung Chromebook series 5 XE550C22 SSD Replacement: 6 단계, 이미지 2개 중 2개
    • Lift the battery up at an angle to disconnect the battery from the motherboard, then pull it away from the laptop.

    • Do not lift the battery straight up. This will damage the battery's connectors.

  7. Samsung Chromebook series 5 XE550C22 SSD Replacement, SSD: 7 단계, 이미지 1개 중 1개
    • Locate the SSD in the center of the Chromebook.

  8. Samsung Chromebook series 5 XE550C22 SSD Replacement: 8 단계, 이미지 3개 중 1개 Samsung Chromebook series 5 XE550C22 SSD Replacement: 8 단계, 이미지 3개 중 2개 Samsung Chromebook series 5 XE550C22 SSD Replacement: 8 단계, 이미지 3개 중 3개
    • Remove the single 3.5mm screw using the J0 screwdriver.

    • The SSD should "pop-up" on its own after it's unscrewed.

  9. Samsung Chromebook series 5 XE550C22 SSD Replacement: 9 단계, 이미지 2개 중 1개 Samsung Chromebook series 5 XE550C22 SSD Replacement: 9 단계, 이미지 2개 중 2개
    • Pull the SSD up and away from the Chromebook

결론

To reassemble your device, follow these instructions in reverse order.

다른 4명이 해당 안내서를 완성하였습니다.

작성자

6다른 기여자 명과 함께

Abel Osorio

회원 가입일: 09/11/17

330 평판

안내서 2개를 작성함

CSU Fullerton, Team S2-G7, Bruce Fall 2017 CSU Fullerton, Team S2-G7, Bruce Fall 2017 회원

CSUF-BRUCE-F17S2G7

3 회원들

안내서 14개를 작성함

5가이드 댓글

Hello where can I get I higher SSD to buy

aduboa moses - 답글

The SSD on the Chromebook 3 is non-upgradable. This is a different model. Please post this guide in the model you have.

frontiergds - 답글

If you want to get more storage out of your chromebook get a sd card and you will only need it if you have a chrultrabook.

Will F - 답글

The samsung chromebook shown on this guide is Samsung Chromebook XE550C22. The samsung chromebook 3 ( XE500C13 ), is totally different model. I have edited the title and description to match the actual model.

coldspring21 - 답글

You have instructions for model XE520QB?

Jimmy Soon - 답글

댓글 쓰기

조회 통계:

지난 24시간: 3

지난 7일: 13

지난 30일: 59

전체 시간: 5,782