주요 콘텐츠로 건너뛰기

Samsung Galaxy A5 (2016) Back Cover Replacement

필요한 것

  1. Samsung Galaxy A5 (2016) Back Cover Replacement, Back Cover: 1 단계, 이미지 1/3 Samsung Galaxy A5 (2016) Back Cover Replacement, Back Cover: 1 단계, 이미지 2/3 Samsung Galaxy A5 (2016) Back Cover Replacement, Back Cover: 1 단계, 이미지 3/3
    • Start by switching off your phone.

    • Take an iOpener to heat up and soften the glue behind the back cover.

    • With a suction handle lift the back cover to insert an opening pick.

  2. Samsung Galaxy A5 (2016) Back Cover Replacement: 2 단계, 이미지 1/3 Samsung Galaxy A5 (2016) Back Cover Replacement: 2 단계, 이미지 2/3 Samsung Galaxy A5 (2016) Back Cover Replacement: 2 단계, 이미지 3/3
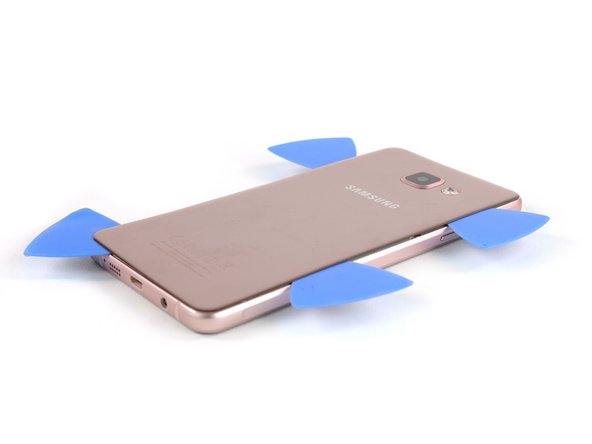
    • Slide the pick up to the middle to separate the back cover from the frame.

    • Insert a second opening pick and move around the right corner along the bottom and around the left corner.

  3. Samsung Galaxy A5 (2016) Back Cover Replacement: 3 단계, 이미지 1/3 Samsung Galaxy A5 (2016) Back Cover Replacement: 3 단계, 이미지 2/3 Samsung Galaxy A5 (2016) Back Cover Replacement: 3 단계, 이미지 3/3
    • Take another opening pick and continue towards the top corner.

    • Here you want to use one more pick for the last part at the top.

  4. Samsung Galaxy A5 (2016) Back Cover Replacement: 4 단계, 이미지 1/3 Samsung Galaxy A5 (2016) Back Cover Replacement: 4 단계, 이미지 2/3 Samsung Galaxy A5 (2016) Back Cover Replacement: 4 단계, 이미지 3/3
    이 단계에 사용된 도구:
    Plastic Cards
    $2.99
    구매
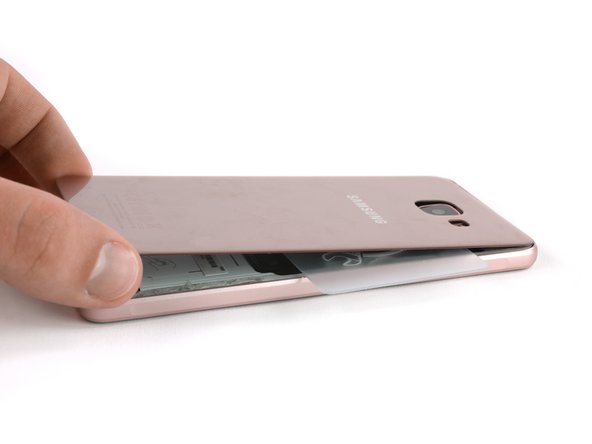
    • Insert a plastic card at the bottom and slide it underneath the back cover.

  5. Samsung Galaxy A5 (2016) Back Cover Replacement: 5 단계, 이미지 1/3 Samsung Galaxy A5 (2016) Back Cover Replacement: 5 단계, 이미지 2/3 Samsung Galaxy A5 (2016) Back Cover Replacement: 5 단계, 이미지 3/3
    • Heat up the back cover once again so you can slide the plastic card towards the top.

    • Always take a peek underneath the back cover to not damage any parts like the NFC antenna.

    • Move the plastic card until you reach the camera bump. Now slowly lift up the back cover and finally remove it.

    • Be sure to remove any residue from the glue and apply new adhesive when reassembling.

결론

To reassemble your device, follow these instructions in reverse order.

다른 25명이 해당 안내서를 완성하였습니다.

Tobias Isakeit

회원 가입일: 03/31/14

119,540 평판

안내서 189개 작성하였습니다

Tobias Isakeit - Repairability Engineer Tobias Isakeit - Repairability Engineer 회원

Business

1 회원

안내서 1,093개 작성하였습니다

댓글 0개

댓글 쓰기

조회 통계:

24 시간 전: 3

7일 전: 15

30일 전: 54

전체 시간: 48,446