주요 콘텐츠로 건너뛰기

이 안내서에는 최근 변경 사항이 더 있습니다. 최신 비검증 버전으로 전환하십시오.

Samsung Galaxy Attain 4G Front Camera Replacement

필요한 것

  1. Samsung Galaxy Attain 4G Front Camera Replacement, Placement: 1 단계, 이미지 1/1
    • Begin by turn the device over to it's back, with the screen facing down.

  2. Samsung Galaxy Attain 4G Front Camera Replacement, Battery Door Removal: 2 단계, 이미지 1/2 Samsung Galaxy Attain 4G Front Camera Replacement, Battery Door Removal: 2 단계, 이미지 2/2
    • At the top of the device there is a small notch that is used to remove the battery door.

    • Using a pry tool or your fingernail, pry off the battery door from the main housing.

  3. Samsung Galaxy Attain 4G Front Camera Replacement, Battery Removal: 3 단계, 이미지 1/3 Samsung Galaxy Attain 4G Front Camera Replacement, Battery Removal: 3 단계, 이미지 2/3 Samsung Galaxy Attain 4G Front Camera Replacement, Battery Removal: 3 단계, 이미지 3/3
    • Place the battery door to the side.

    • Using a pry tool or your fingernail, pry the battery up towards you.

    • You have now removed the battery!

  4. Samsung Galaxy Attain 4G Front Camera Replacement, Heads Up!: 4 단계, 이미지 1/1
    • Make sure when replacing the battery that the arrow on the bottom is facing down.

  5. Samsung Galaxy Attain 4G Front Camera Replacement, Screw Removal: 5 단계, 이미지 1/1
    • Remove the 6 Phillips head screws that hold the rear housing in place.

  6. Samsung Galaxy Attain 4G Front Camera Replacement, Prying: 6 단계, 이미지 1/1
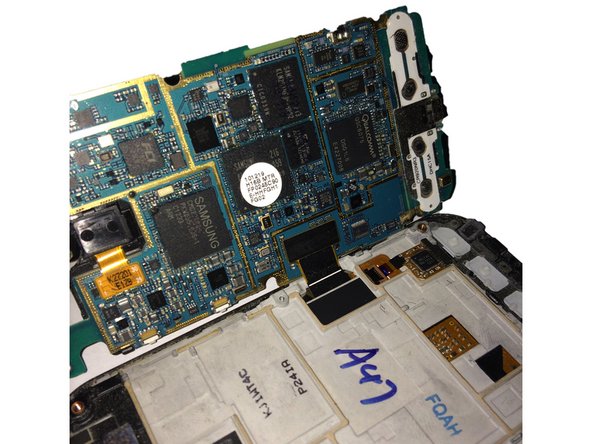
    • Using a spudger or plastic pry tool, slowly go around the phone between the display & rear housing to release the clips.

  7. Samsung Galaxy Attain 4G Front Camera Replacement, Remove Housing: 7 단계, 이미지 1/1
    • Lift the rear housing from the display assembly.

  8. Samsung Galaxy Attain 4G Front Camera Replacement, Logic Board: 8 단계, 이미지 1/2 Samsung Galaxy Attain 4G Front Camera Replacement, Logic Board: 8 단계, 이미지 2/2
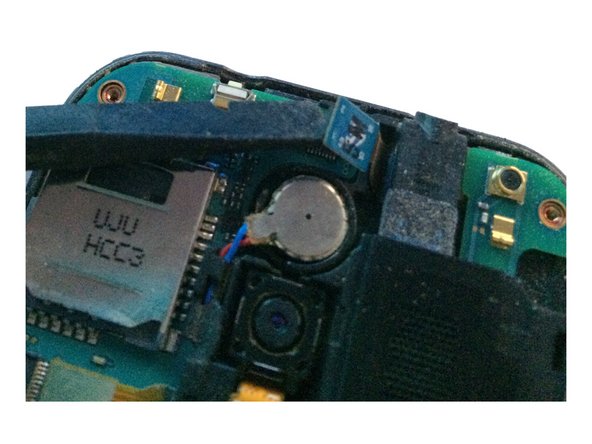
    • Using your spudger/plastic pry tool, disconnect the headphone jack flex cable.

  9. Samsung Galaxy Attain 4G Front Camera Replacement: 9 단계, 이미지 1/2 Samsung Galaxy Attain 4G Front Camera Replacement: 9 단계, 이미지 2/2
    • Using your spudger/plastic pry tool, disconnect the rear speaker flex cable.

  10. Samsung Galaxy Attain 4G Front Camera Replacement: 10 단계, 이미지 1/1
    • Using a spudger/pry tool, carefully remove the vibration motor from its housing. This has a mild adhesive on the bottom.

  11. Samsung Galaxy Attain 4G Front Camera Replacement: 11 단계, 이미지 1/2 Samsung Galaxy Attain 4G Front Camera Replacement: 11 단계, 이미지 2/2
    • After removing both flex cables, slowly move the logic board to the left of the screen assembly.

    • Do not try and remove the logic board all the way, as you still have to remove the display assembly flex cable!

  12. Samsung Galaxy Attain 4G Front Camera Replacement: 12 단계, 이미지 1/1
    • Using your spudger/plastic pry tool, disconnect the LCD/Digitizer flex cable.

  13. Samsung Galaxy Attain 4G Front Camera Replacement: 13 단계, 이미지 1/2 Samsung Galaxy Attain 4G Front Camera Replacement: 13 단계, 이미지 2/2
    • You have now removed the logic board from the display assembly.

  14. Samsung Galaxy Attain 4G Front Camera Replacement, Front Camera: 14 단계, 이미지 1/1
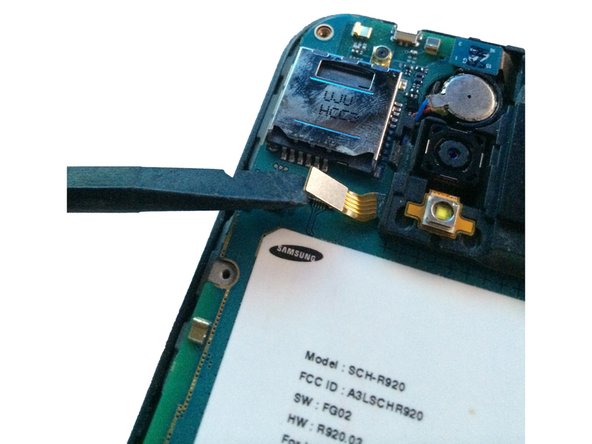
    • Using a spudger/plastic pry tool lift the brown ZIF tab on the front-facing camera connector.

    • Do not pry at the black part, as this will damage the connector on the board.

  15. Samsung Galaxy Attain 4G Front Camera Replacement: 15 단계, 이미지 1/1
    • Carefully pull the camera out of it's connector and set to the side.

결론

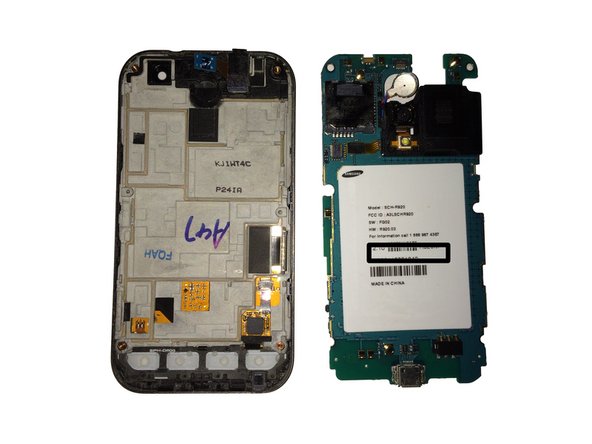
To reassemble your device, follow these instructions in reverse order.

다른 3명이 해당 안내서를 완성하였습니다.

Josh Forester

회원 가입일: 11/28/10

2,497 평판

안내서 10개 작성하였습니다

댓글 0개

댓글 쓰기

조회 통계:

24 시간 전: 0

7일 전: 3

30일 전: 6

전체 시간: 318