주요 콘텐츠로 건너뛰기

이 버전에는 잘못된 편집 사항이 있을 수 있습니다. 최신 확인된 스냅샷으로 전환하십시오.

필요한 것

  1. 이 단계는 번역되지 않았습니다. 번역을 도와주십시오

    : 1 단계, 이미지 1/2 : 1 단계, 이미지 2/2
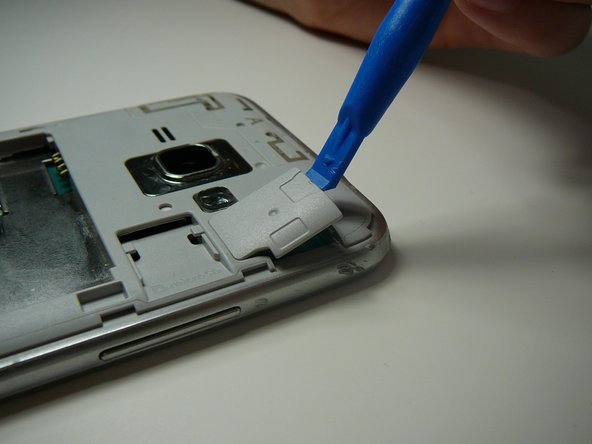
    • Locate the indent area highlighted in red and use either your fingernail or a Prying Tool (such as a guitar pick) to separate the back from the body of the phone.

  2. 이 단계는 번역되지 않았습니다. 번역을 도와주십시오

    : 2 단계, 이미지 1/3 : 2 단계, 이미지 2/3 : 2 단계, 이미지 3/3
    • Once the cover is removed, locate the battery that reads "SAMSUNG."

    • Use either your fingernail or a Plastic Prying Tool (such as a guitar pick) to lift up the bottom indent of the battery.

    • Do not use a metal tool, as it can cause injury.

  3. 이 단계는 번역되지 않았습니다. 번역을 도와주십시오

    : 3 단계, 이미지 1/2 : 3 단계, 이미지 2/2
    • Use a Plastic Prying Tool (such as a spudger) to pop out piece shown.

  4. 이 단계는 번역되지 않았습니다. 번역을 도와주십시오

    : 4 단계, 이미지 1/1
    • Detach the screen connector.

  5. 이 단계는 번역되지 않았습니다. 번역을 도와주십시오

    : 5 단계, 이미지 1/2 : 5 단계, 이미지 2/2
    • Use a blow dryer or heating pad to heat up the screen.

    • Do not skip this step, as it may result in a broken screen and/or LCD.

    • This step loosens the glue holding the screen in place.

  6. 이 단계는 번역되지 않았습니다. 번역을 도와주십시오

    : 6 단계, 이미지 1/3 : 6 단계, 이미지 2/3 : 6 단계, 이미지 3/3
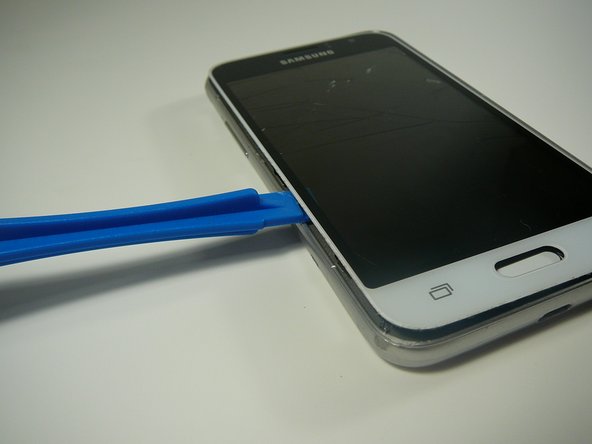
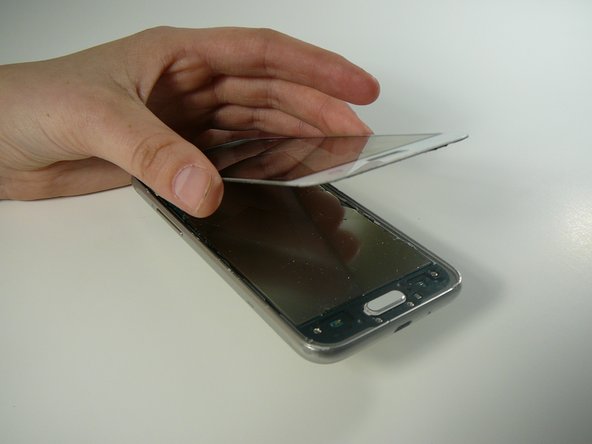
    • Use a Thin Plastic Tool (such as a guitar pick) or Plastic Prying Tool (such as a spudger) to lift out the glass digitizer and LCD screen around the edges.

    • Do this slowly and carefully, as both parts can crack very easily.

    • Ensure your tool is plastic, as a metal tool can damage the screen easily.

  7. 이 단계는 번역되지 않았습니다. 번역을 도와주십시오

    : 7 단계, 이미지 1/2 : 7 단계, 이미지 2/2
    • Use a plastic tool to remove back and/or recent tabs circuit buttons.

    • Use a plastic tool as a metal tool can be dangerous to the phone or you.

결승점

Mack Johnson

회원 가입일: 04/05/18

996 평판

안내서 6개 작성하였습니다

댓글 0개

댓글 쓰기

조회 통계:

24 시간 전: 0

7일 전: 1

30일 전: 2

전체 시간: 541