주요 콘텐츠로 건너뛰기

Samsung Galaxy J3 Luna Pro Front and Back Camera Replacement

필요한 것

  1. Samsung Galaxy J3 Luna Pro Front and Back Camera  Replacement, Motherboard Change: 1 단계, 이미지 1/1
    • Turn off the phone.

    • Remove the back cover and battery

  2. Samsung Galaxy J3 Luna Pro Front and Back Camera  Replacement: 2 단계, 이미지 1/3 Samsung Galaxy J3 Luna Pro Front and Back Camera  Replacement: 2 단계, 이미지 2/3 Samsung Galaxy J3 Luna Pro Front and Back Camera  Replacement: 2 단계, 이미지 3/3
    • Attach a suction cup to the screen and pry upwards.

    • Insert the plastic opening tool into the gap under the screen and work your way around the perimeter.

    • Don't remove the screen completely as there are cables still connection the two pieces.

  3. Samsung Galaxy J3 Luna Pro Front and Back Camera  Replacement: 3 단계, 이미지 1/3 Samsung Galaxy J3 Luna Pro Front and Back Camera  Replacement: 3 단계, 이미지 2/3 Samsung Galaxy J3 Luna Pro Front and Back Camera  Replacement: 3 단계, 이미지 3/3
    • Use the pointy end of a spudger to remove the white plastic cover from the display cover.

    • Use the spudger to pry up the display cable from the motherboard.

    • Remove the screen.

  4. Samsung Galaxy J3 Luna Pro Front and Back Camera  Replacement: 4 단계, 이미지 1/3 Samsung Galaxy J3 Luna Pro Front and Back Camera  Replacement: 4 단계, 이미지 2/3 Samsung Galaxy J3 Luna Pro Front and Back Camera  Replacement: 4 단계, 이미지 3/3
    • Remove the eleven JIS 00 screws from the mid-frame.

    • Using a spudger, pry the mid-frame from the screen.

  5. Samsung Galaxy J3 Luna Pro Front and Back Camera  Replacement: 5 단계, 이미지 1/3 Samsung Galaxy J3 Luna Pro Front and Back Camera  Replacement: 5 단계, 이미지 2/3 Samsung Galaxy J3 Luna Pro Front and Back Camera  Replacement: 5 단계, 이미지 3/3
    • Remove the motherboard from the mid-frame.

  6. Samsung Galaxy J3 Luna Pro Front and Back Camera  Replacement, Front and Back Camera: 6 단계, 이미지 1/3 Samsung Galaxy J3 Luna Pro Front and Back Camera  Replacement, Front and Back Camera: 6 단계, 이미지 2/3 Samsung Galaxy J3 Luna Pro Front and Back Camera  Replacement, Front and Back Camera: 6 단계, 이미지 3/3
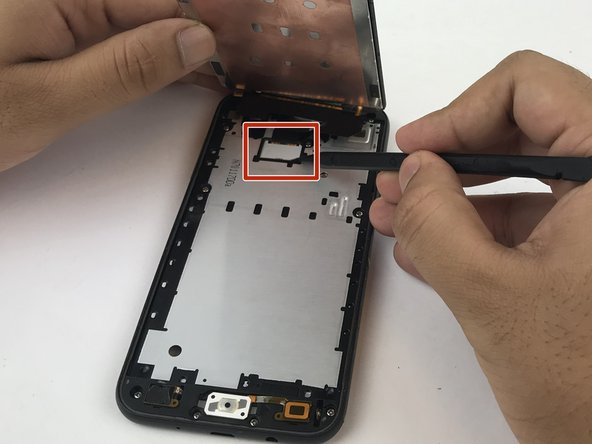
    • Use a spudger to flip up the retaining flaps on the front and rear camera ribbon cable ZIF sockets.

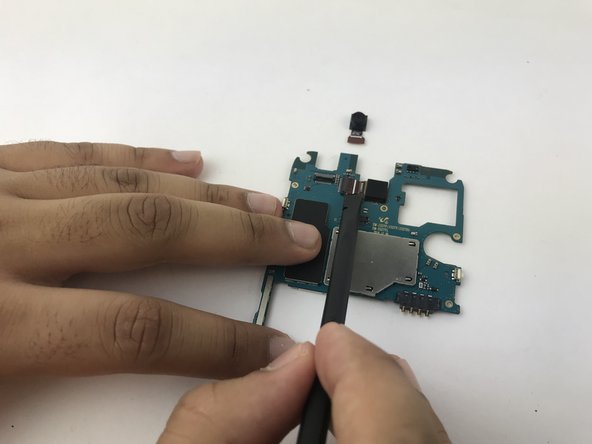
    • Pull the cables outs of the ZIF sockets.

결론

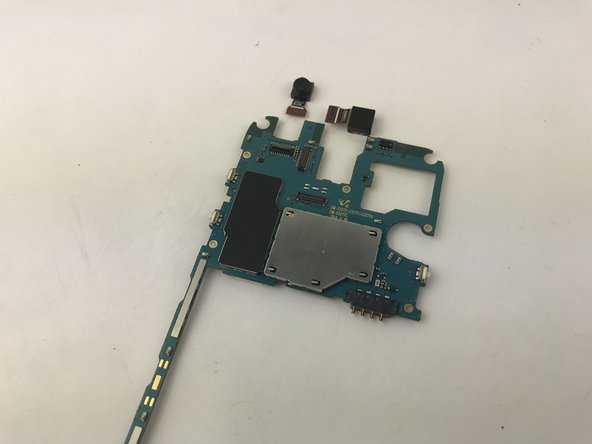
To reassemble your device, follow these instructions in reverse order.

다른 2명이 해당 안내서를 완성하였습니다.

Jay Patel

회원 가입일: 01/29/18

150 평판

안내서 1개 작성함

USF Tampa, Team S5-G5, Passmore Spring 2018 USF Tampa, Team S5-G5, Passmore Spring 2018 회원

USFT-PASSMORE-S18S5G5

5 회원들

안내서 5개 작성하였습니다

댓글 0개

댓글 쓰기

조회 통계:

24 시간 전: 1

7일 전: 9

30일 전: 17

전체 시간: 1,340