주요 콘텐츠로 건너뛰기

Samsung Galaxy J7 Front Facing Camera Replacement

필요한 것

  1. Samsung Galaxy J7 Front Facing Camera Replacement, Back Cover: 1 단계, 이미지 1/2 Samsung Galaxy J7 Front Facing Camera Replacement, Back Cover: 1 단계, 이미지 2/2
    • Remove the back of the device by pulling on the tab in the top left.

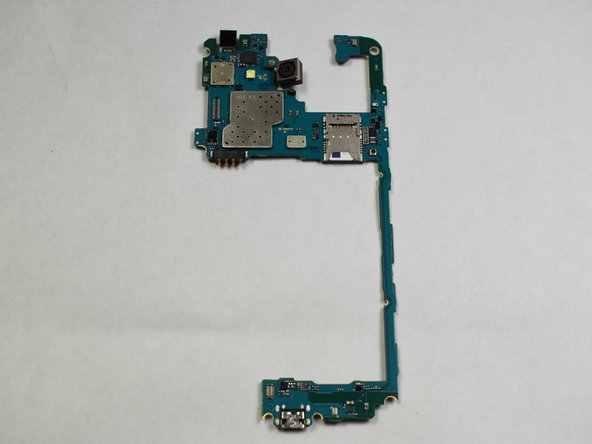
  2. Samsung Galaxy J7 Front Facing Camera Replacement, Midframe: 2 단계, 이미지 1/1
    • Using the Phillips #000 screwdriver, remove ten 4.2 mm screws.

  3. Samsung Galaxy J7 Front Facing Camera Replacement: 3 단계, 이미지 1/3 Samsung Galaxy J7 Front Facing Camera Replacement: 3 단계, 이미지 2/3 Samsung Galaxy J7 Front Facing Camera Replacement: 3 단계, 이미지 3/3
    • Lift up the back of the device with the iFixit opening tool and disconnect it from the front.

  4. Samsung Galaxy J7 Front Facing Camera Replacement, Front Facing Camera: 4 단계, 이미지 1/1
    • Remove single screw from back of device. This is the only screw that must be removed to take off this piece.

  5. Samsung Galaxy J7 Front Facing Camera Replacement: 5 단계, 이미지 1/1
    • Make sure to pull up all of these parts in order to properly take off the next piece.

  6. Samsung Galaxy J7 Front Facing Camera Replacement: 6 단계, 이미지 1/2 Samsung Galaxy J7 Front Facing Camera Replacement: 6 단계, 이미지 2/2
    • Pull the blue/green piece away from the black piece. They should not need any force to be removed. The next step will deal with using the green/blue piece from the second picture.

  7. Samsung Galaxy J7 Front Facing Camera Replacement: 7 단계, 이미지 1/2 Samsung Galaxy J7 Front Facing Camera Replacement: 7 단계, 이미지 2/2
    • Flip over the piece (180 degrees). Remove the boxed out piece. This is the front facing camera.

결론

To reassemble your device, follow these instructions in reverse order.

다른 한 분이 해당 안내서를 완성하였습니다.

Justin Thompson

회원 가입일: 02/05/19

190 평판

안내서 2개 작성하였습니다

댓글 0개

댓글 쓰기

조회 통계:

24 시간 전: 0

7일 전: 0

30일 전: 1

전체 시간: 319