주요 콘텐츠로 건너뛰기

Samsung Galaxy Note 4 Headphone Jack Replacement

필요한 것

  1. Samsung Galaxy Note 4 Headphone Jack Replacement, Rear Case: 1 단계, 이미지 1/2 Samsung Galaxy Note 4 Headphone Jack Replacement, Rear Case: 1 단계, 이미지 2/2
    • Insert a fingernail or plastic opening tool into the divot to the left of the rear-facing camera.

    • Gently pry and twist the flexible rear cover off the back of the phone.

  2. Samsung Galaxy Note 4 Headphone Jack Replacement, Battery: 2 단계, 이미지 1/1
    • Insert a fingernail or plastic opening tool into the recess in the bottom right corner of the battery and lift upward.

    • Remove the battery.

  3. Samsung Galaxy Note 4 Headphone Jack Replacement, SIM Card: 3 단계, 이미지 1/2 Samsung Galaxy Note 4 Headphone Jack Replacement, SIM Card: 3 단계, 이미지 2/2
    • Remove the SIM card by first pushing the card slightly out of its housing, then pulling it the rest of the way.

  4. Samsung Galaxy Note 4 Headphone Jack Replacement, Midframe: 4 단계, 이미지 1/1
    • Remove the sixteen 4.0 mm Phillips #00 screws securing the midframe to the display assembly.

    • Grasp the cap of the S Pen and remove it from its slot in the midframe.

  5. Samsung Galaxy Note 4 Headphone Jack Replacement: 5 단계, 이미지 1/3 Samsung Galaxy Note 4 Headphone Jack Replacement: 5 단계, 이미지 2/3 Samsung Galaxy Note 4 Headphone Jack Replacement: 5 단계, 이미지 3/3
    • Insert a plastic opening tool between the midframe and the display assembly.

    • Work the plastic opening tool around the perimeter of the phone to break the adhesive.

    • This adhesive is relatively weak, so no heat gun should be necessary.

    • Be careful to not separate the front glass panel from the rest of the display assembly, as it is still held together with adhesive.

  6. Samsung Galaxy Note 4 Headphone Jack Replacement: 6 단계, 이미지 1/1
    • Use a plastic opening tool to loosen the clasps around the battery housing.

  7. Samsung Galaxy Note 4 Headphone Jack Replacement: 7 단계, 이미지 1/3 Samsung Galaxy Note 4 Headphone Jack Replacement: 7 단계, 이미지 2/3 Samsung Galaxy Note 4 Headphone Jack Replacement: 7 단계, 이미지 3/3
    • Push on the battery housing to separate the midframe from the display assembly.

    • You will have to apply a reasonable amount of pressure to separate the two parts.

    • If your new midframe does not come with a headphone jack assembly, you'll need to transfer the one from the old midframe into the new one. It can be pried loose with plastic opening tools, as it is held in place with several plastic pins.

  8. Samsung Galaxy Note 4 Headphone Jack Replacement, Headphone Jack: 8 단계, 이미지 1/3 Samsung Galaxy Note 4 Headphone Jack Replacement, Headphone Jack: 8 단계, 이미지 2/3 Samsung Galaxy Note 4 Headphone Jack Replacement, Headphone Jack: 8 단계, 이미지 3/3
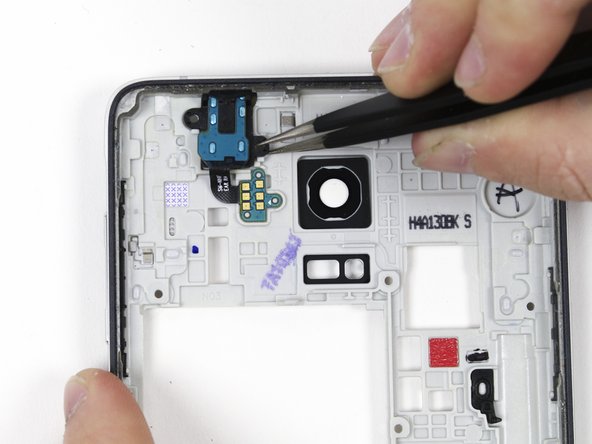
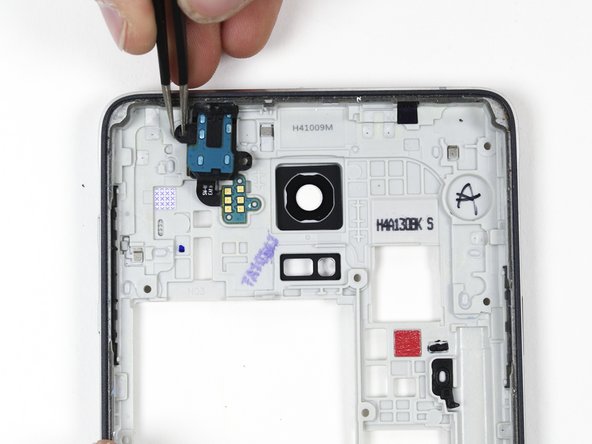
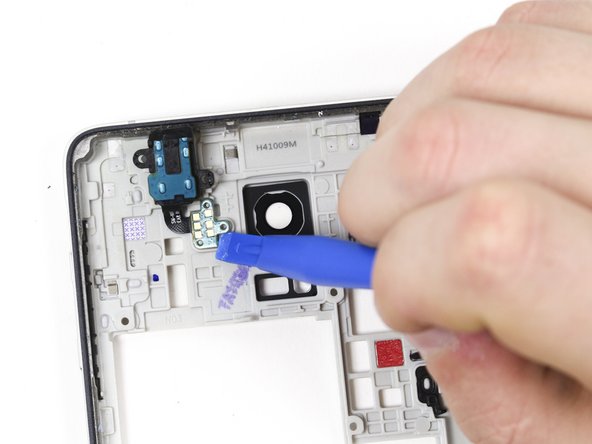
    • Use the plastic spudger and tweezers to remove the headphone jack from the middle housing.

  9. Samsung Galaxy Note 4 Headphone Jack Replacement: 9 단계, 이미지 1/2 Samsung Galaxy Note 4 Headphone Jack Replacement: 9 단계, 이미지 2/2
    • Pry the headphone jack up from the midframe.

결론

To reassemble your device, follow these instructions in reverse order.

다른 21명이 해당 안내서를 완성하였습니다.

Derek Nola

회원 가입일: 01/06/15

2,244 평판

안내서 5개 작성하였습니다

Cal Poly, Team 70-6, Forte Winter 2015 Cal Poly, Team 70-6, Forte Winter 2015 회원

CPSU-FORTE-W15S70G6

4 회원들

안내서 16개 작성하였습니다

댓글 0개

댓글 쓰기

조회 통계:

24 시간 전: 0

7일 전: 2

30일 전: 6

전체 시간: 20,044