이 버전에는 잘못된 편집 사항이 있을 수 있습니다. 최신 확인된 스냅샷으로 전환하십시오.
필요한 것
-
이 단계는 번역되지 않았습니다. 번역을 도와주십시오
-
Grasp the cap of the stylus and remove it from its slot in the midframe.
-
-
이 단계는 번역되지 않았습니다. 번역을 도와주십시오
-
Pry with a plastic opening tool, or your fingernail, in the divot to the right of the rear-facing camera, near the volume rocker.
-
-
이 단계는 번역되지 않았습니다. 번역을 도와주십시오
-
Insert your finger in the notch of the battery compartment.
-
Press the battery toward the rear facing camera while pulling outward.
-
-
이 단계는 번역되지 않았습니다. 번역을 도와주십시오
-
Use the flat end of a spudger, or your fingernail, to press the microSD card slightly deeper into its slot until you hear a click.
-
After the click, release the card and it will pop out of its slot.
-
-
-
이 단계는 번역되지 않았습니다. 번역을 도와주십시오
-
Use a plastic opening tool, or your fingernail, to push the SIM card out of its compartment.
-
-
이 단계는 번역되지 않았습니다. 번역을 도와주십시오
-
Slide the SIM card out the rest of the way with your thumb and remove it from the device.
-
-
이 단계는 번역되지 않았습니다. 번역을 도와주십시오
-
Remove the nine 3.4 mm Phillips #00 screws securing the midframe to the display assembly.
-
-
이 단계는 번역되지 않았습니다. 번역을 도와주십시오
-
Insert your plastic opening tool to the left of the power button between the midframe and the front panel assembly and pry.
-
-
이 단계는 번역되지 않았습니다. 번역을 도와주십시오
-
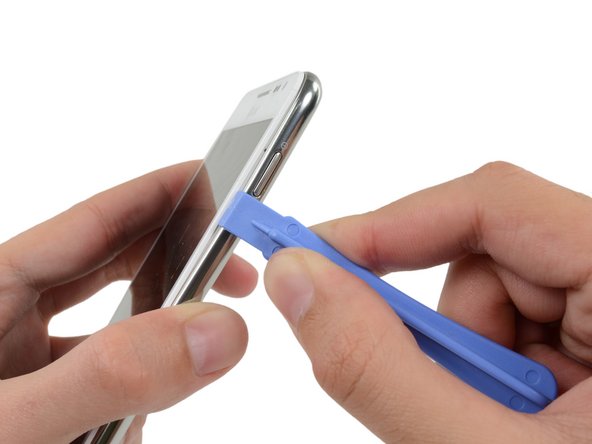
Insert your plastic opening tool to the left of the headphone jack between the midframe and the display assembly.
-
Slide the opening tool along the top edge of the phone.
-
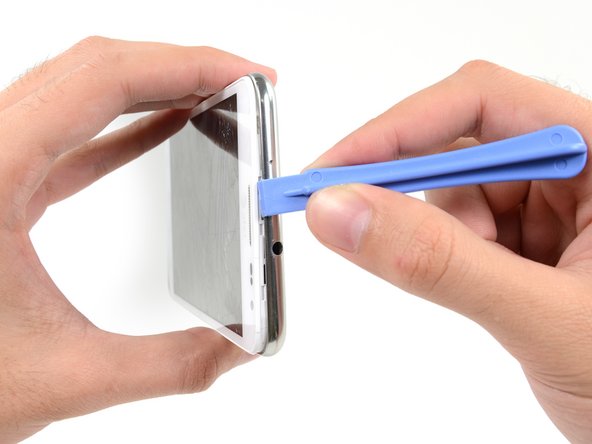
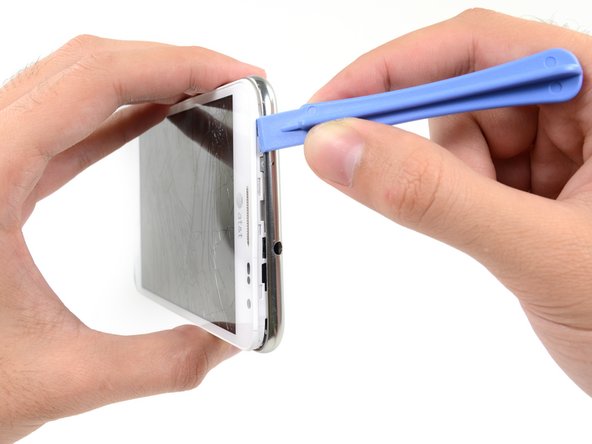
Continue to run the plastic opening tool around the perimeter of the phone until the midframe is separated.
-
-
이 단계는 번역되지 않았습니다. 번역을 도와주십시오
-
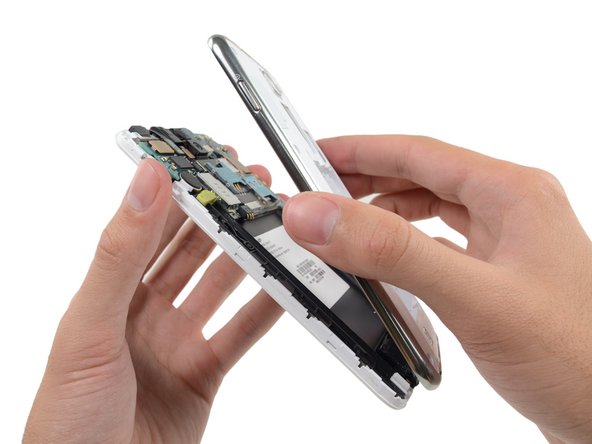
Use the flat end of a spudger to disconnect the headphone jack/earpiece speaker assembly cable connector.
-
-
이 단계는 번역되지 않았습니다. 번역을 도와주십시오
-
Remove the two 3 mm Phillips #00 screws securing the upper display assembly bracket.
-
-
이 단계는 번역되지 않았습니다. 번역을 도와주십시오
-
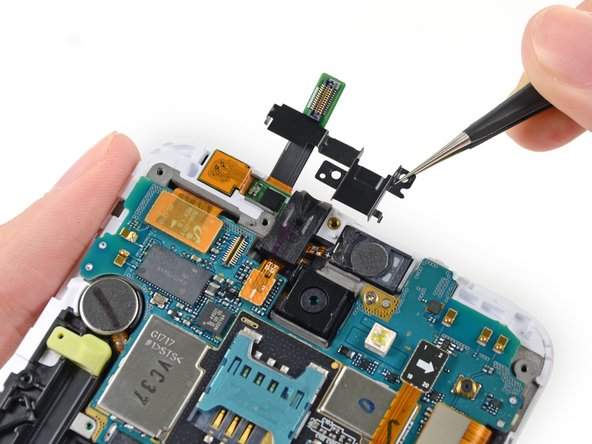
Use a pair of tweezers, or your fingers, to remove the upper display assembly bracket.
-
-
이 단계는 번역되지 않았습니다. 번역을 도와주십시오
-
Using tweezers, or your fingers, remove the front-facing camera assembly.
-


다른 6명이 해당 안내서를 완성하였습니다.

