이 버전에는 잘못된 편집 사항이 있을 수 있습니다. 최신 확인된 스냅샷으로 전환하십시오.
필요한 것
-
이 단계는 번역되지 않았습니다. 번역을 도와주십시오
-
Grasp the end of the stylus and remove it from its slot in the midframe.
-
-
이 단계는 번역되지 않았습니다. 번역을 도와주십시오
-
Pry with a plastic opening tool, or your fingernail, in the divot to the left of the rear-facing camera, near the power button.
-
-
이 단계는 번역되지 않았습니다. 번역을 도와주십시오
-
Lift the rear case by the corner nearest the divot and remove it from the phone.
-
-
이 단계는 번역되지 않았습니다. 번역을 도와주십시오
-
If you have an SD card inserted, use the flat end of a spudger, or your fingernail, to press the microSD card slightly deeper into its slot until you hear a click.
-
After the click, release the card and it will pop out of its slot.
-
Remove the microSD card.
-
-
이 단계는 번역되지 않았습니다. 번역을 도와주십시오
-
Insert a plastic opening tool, or your finger, into the notch of the battery compartment and lift the battery upward.
-
-
-
이 단계는 번역되지 않았습니다. 번역을 도와주십시오
-
Remove the eleven 4.0 mm Phillips #00 screws securing the midframe to the display assembly.
-
-
이 단계는 번역되지 않았습니다. 번역을 도와주십시오
-
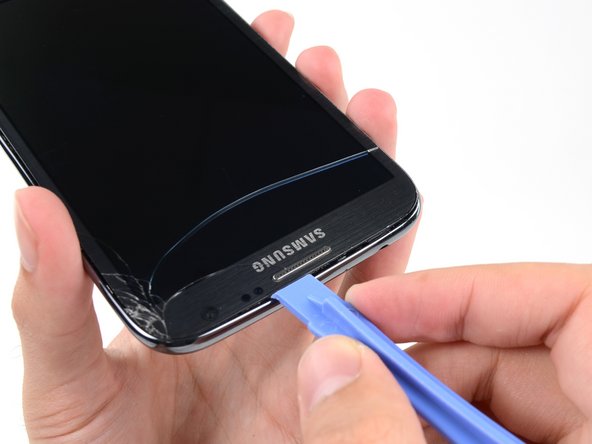
Insert your plastic opening tool between the midframe and front panel assembly on the side of the phone.
-
Slide the plastic opening tool down the seam.
-
-
이 단계는 번역되지 않았습니다. 번역을 도와주십시오
-
Push the plastic opening tool down to free the corner of the midframe from the display assembly.
-
-
이 단계는 번역되지 않았습니다. 번역을 도와주십시오
-
Free the clips along the power button side of the phone.
-
Lastly, free the two clips along the top and bottom edge of battery compartment.
-


다른 9명이 해당 안내서를 완성하였습니다.


댓글 한 개
This is an awesome guide! Cheers Sam. I have never done any electrical fixes before so I was a phone fixing virgin. I bought both the tools and the speaker for £5.80 on ebay, followed your guide carefully and had no problems. It was an easy process. Thanks to the confidence I had in your guide I didn’t have to go and buy a new phone so you saved me the £180 I thought I was going to have to spend!
Cheers, Nick (UK)