주요 콘텐츠로 건너뛰기

Samsung Galaxy Note Pro 12.2 SD Port Replacement

필요한 것

  1. Samsung Galaxy Note Pro 12.2 SD Port Replacement, SD Port: 1 단계, 이미지 1/1
    • Turn off your device before starting your repair.

    • Carefully remove the back cover with the plastic opening tool.

    • It is best to start with one corner and work your way around the device slowly.

  2. Samsung Galaxy Note Pro 12.2 SD Port Replacement: 2 단계, 이미지 1/2 Samsung Galaxy Note Pro 12.2 SD Port Replacement: 2 단계, 이미지 2/2
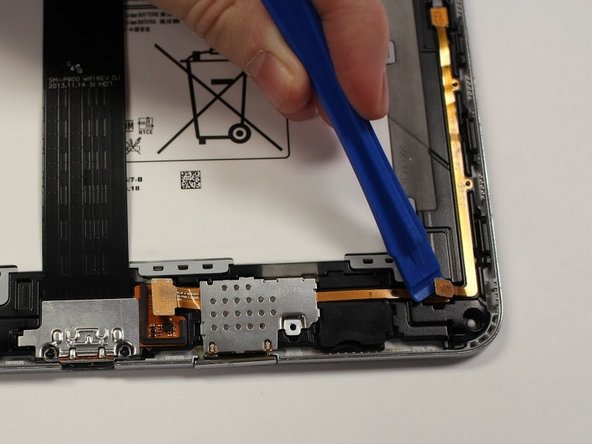
    • Pop up the orange tab connected to the SD port with the plastic opening tool.

  3. Samsung Galaxy Note Pro 12.2 SD Port Replacement: 3 단계, 이미지 1/2 Samsung Galaxy Note Pro 12.2 SD Port Replacement: 3 단계, 이미지 2/2
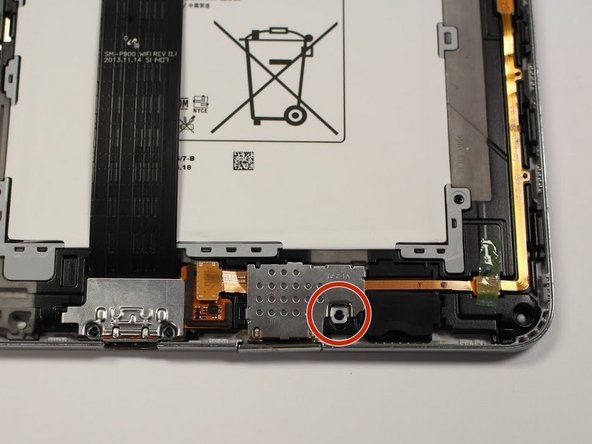
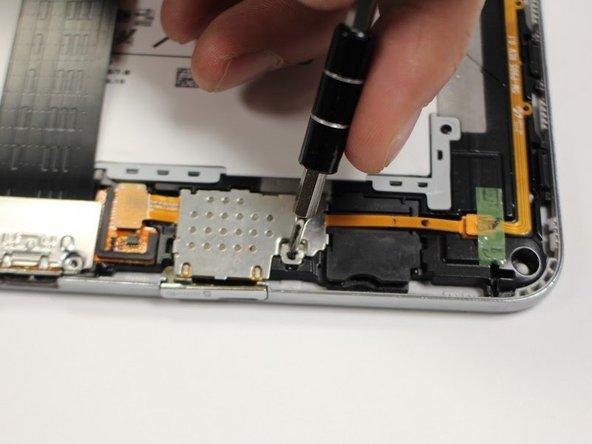
    • Remove the one 3mm Phillips #00 screw connected to the SD port.

  4. Samsung Galaxy Note Pro 12.2 SD Port Replacement: 4 단계, 이미지 1/2 Samsung Galaxy Note Pro 12.2 SD Port Replacement: 4 단계, 이미지 2/2
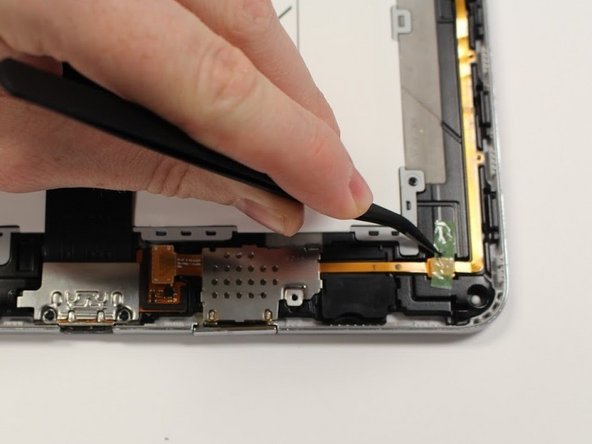
    • Pop open the orange wire tab connected to the SD port with the plastic opening tool.

    • If there is tape covering your tab, remove it with the tweezers before you pop open the tab.

  5. Samsung Galaxy Note Pro 12.2 SD Port Replacement: 5 단계, 이미지 1/2 Samsung Galaxy Note Pro 12.2 SD Port Replacement: 5 단계, 이미지 2/2
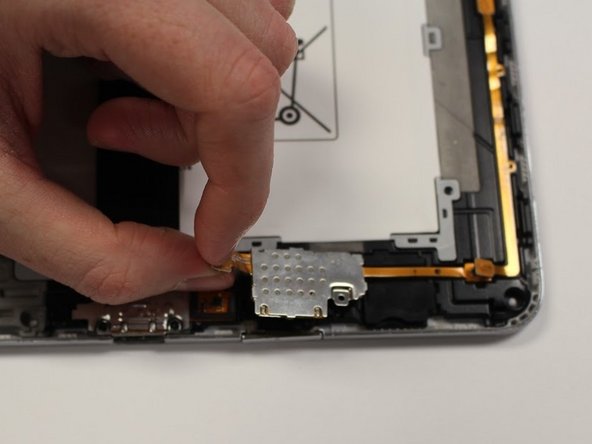
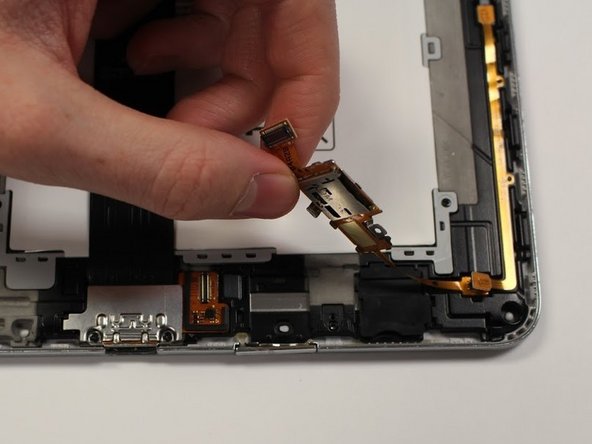
    • Using the orange tab, pull the SD port up and away from the device.

  6. Samsung Galaxy Note Pro 12.2 SD Port Replacement: 6 단계, 이미지 1/1
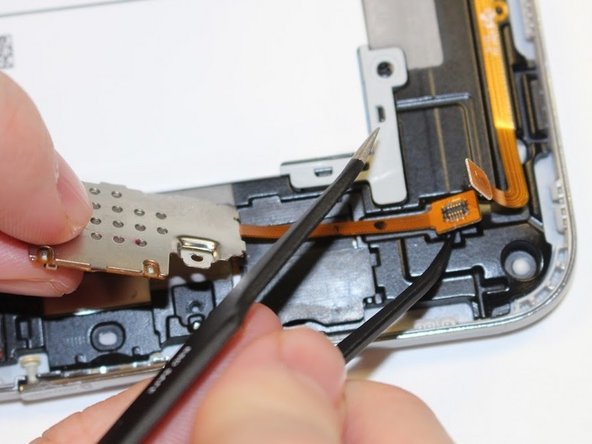
    • Using the plastic end of the tweezers pop up the orange tab connecting the SD port to the device.

    • There is a little indent below the orange tab to help get under this piece. It may be difficult to remove, push up hard.

결론

To reassemble your device, follow these instructions in reverse order.

Tina Kong

회원 가입일: 09/22/17

1,278 평판

안내서 5개 작성하였습니다

댓글 0개

댓글 쓰기

조회 통계:

24 시간 전: 1

7일 전: 4

30일 전: 4

전체 시간: 493