이 버전에는 잘못된 편집 사항이 있을 수 있습니다. 최신 확인된 스냅샷으로 전환하십시오.
필요한 것
-
이 단계는 번역되지 않았습니다. 번역을 도와주십시오
-
Looking at the back of your phone, use your finger to remove back cover.
-
-
이 단계는 번역되지 않았습니다. 번역을 도와주십시오
-
With a small phillips-head screw driver, remove the six screws holding the back panel in place.
-
-
이 단계는 번역되지 않았습니다. 번역을 도와주십시오
-
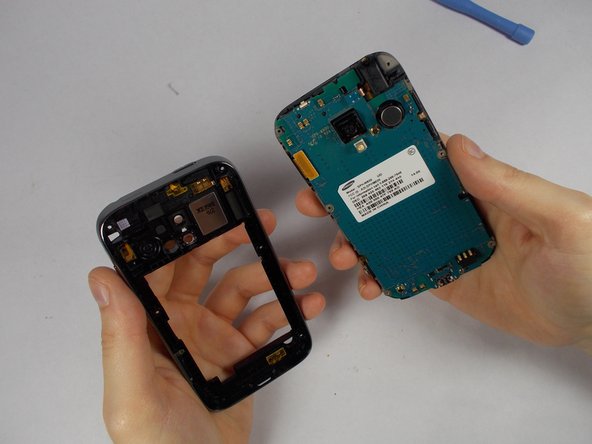
Use the pry tool to pry the back panel from the rest of the phone. Pry from the edge closest to the screen for simplicity.
-
-
-
이 단계는 번역되지 않았습니다. 번역을 도와주십시오
-
Using tweezers, gently lift connectors from motherboard.
-
A connector will be on the upper left
-
The second connector is located towards the top of the phone. Above the camera. It comes off with ease.
-
-
이 단계는 번역되지 않았습니다. 번역을 도와주십시오
-
Use the tweezers to carefully remove the 2 adhesive orange ribbons.
-
These stay attached to the motherboard so be careful not to break them.
-
They are on the side of the phone.
-
-
이 단계는 번역되지 않았습니다. 번역을 도와주십시오
-
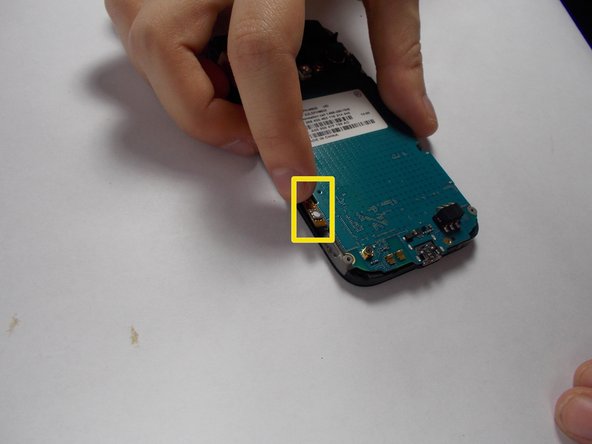
Use a philips-head screwdriver to remove the single screw on the bottom of the phone. Located to the right of the charging port.
-


팀

UMass Dartmouth, Team 6-4, Vijaybhaskar Fall 2014 UMass Dartmouth, Team 6-4, Vijaybhaskar Fall 2014 회원
UMASSD-VIJAYBHASKAR-F14S6G4
3 회원들
안내서 5개 작성하였습니다