이 버전에는 잘못된 편집 사항이 있을 수 있습니다. 최신 확인된 스냅샷으로 전환하십시오.
필요한 것
-
이 단계는 번역되지 않았습니다. 번역을 도와주십시오
-
Pry with a plastic opening tool, or your fingernail, in the divot to the left of the rear-facing camera, near the power button.
-
-
이 단계는 번역되지 않았습니다. 번역을 도와주십시오
-
Lift the rear case by the corner nearest the divot and remove it from the phone.
-
-
이 단계는 번역되지 않았습니다. 번역을 도와주십시오
-
Use the flat end of a spudger, or your fingernail, to press the microSD card slightly deeper into its slot until you hear a click.
-
After the click, release the card and it will pop out of its slot.
-
Remove the microSD card.
-
-
이 단계는 번역되지 않았습니다. 번역을 도와주십시오
-
Insert a plastic opening tool, or your finger, into the notch of the battery compartment and lift the battery upward.
-
Remove the battery from your phone.
-
-
이 단계는 번역되지 않았습니다. 번역을 도와주십시오
-
Use a plastic opening tool, or your fingernail, to press the SIM card slightly deeper into its slot until you hear a click.
-
After the click, release the card and it will pop out of its slot.
-
Remove the SIM card.
-
-
이 단계는 번역되지 않았습니다. 번역을 도와주십시오
-
Remove the nine 4.0 mm Phillips #00 screws securing the midframe to the display assembly.
-
-
이 단계는 번역되지 않았습니다. 번역을 도와주십시오
-
Starting on the volume button side of the phone, insert your plastic opening tool between the chrome bezel around the display glass and the larger chrome border piece. Look for the seam between the two.
-
Slide the opening tool along the seam, separating the plastic clips as you go.
-
-
이 단계는 번역되지 않았습니다. 번역을 도와주십시오
-
Continue prying around the corner of the phone.
-
Slide your opening tool along the seam between the midframe and display along the bottom of the device, releasing more of the plastic clips.
-
-
이 단계는 번역되지 않았습니다. 번역을 도와주십시오
-
Again, pry around the corner, to the power button side.
-
Slide the opening tool along the seam.
-
-
-
이 단계는 번역되지 않았습니다. 번역을 도와주십시오
-
Continue sliding the opening tool around the top of the phone, releasing the last of the clips and freeing the midframe from the display assembly.
-
-
이 단계는 번역되지 않았습니다. 번역을 도와주십시오
-
Use the flat end of a spudger to disconnect the USB board connector.
-
Disconnect the front-facing camera cable connector.
-
Disconnect the earpiece speaker assembly cable connector.
-
-
이 단계는 번역되지 않았습니다. 번역을 도와주십시오
-
Disconnect the headphone jack assembly cable connector.
-
Disconnect the display/digitizer cable connector.
-
Disconnect the antenna cable connector.
-
-
이 단계는 번역되지 않았습니다. 번역을 도와주십시오
-
Remove the single 2.4 mm Phillips #00 screw from the motherboard assembly.
-
-
이 단계는 번역되지 않았습니다. 번역을 도와주십시오
-
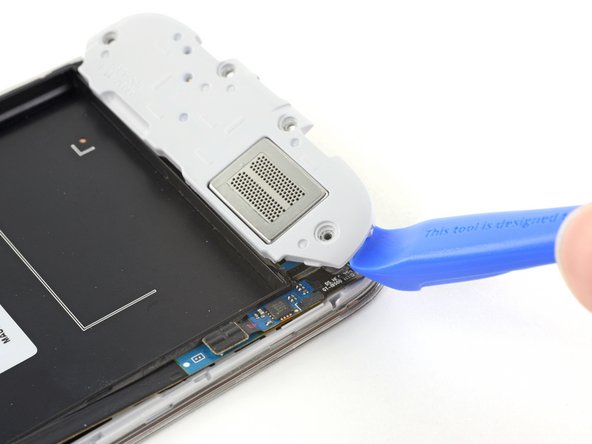
Use an opening tool to unclip the speaker assembly on the bottom of the phone.
-
Remove the speaker assembly.
-
-
이 단계는 번역되지 않았습니다. 번역을 도와주십시오
-
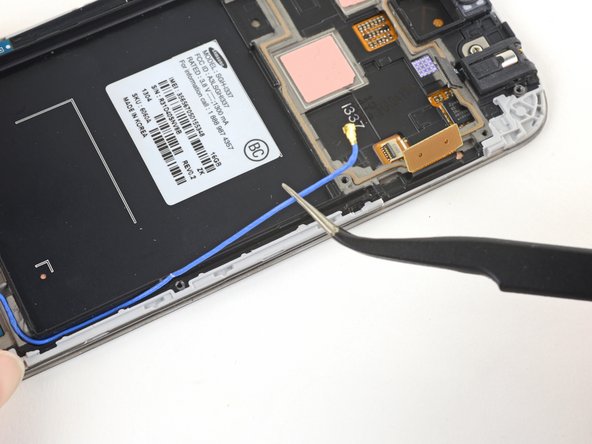
Use tweezers to lift and de-route the antenna cable from the edge of the case.
-
-
이 단계는 번역되지 않았습니다. 번역을 도와주십시오
-
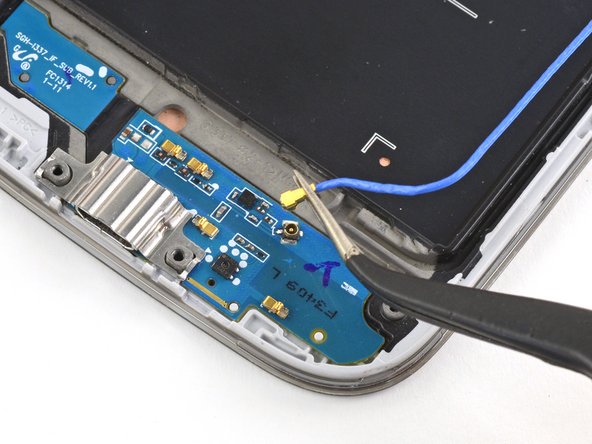
Lift directly up on the antenna connection to remove it from the speaker daughter board.
-
Completely remove the antenna cable.
-
-
이 단계는 번역되지 않았습니다. 번역을 도와주십시오
-
Prepare an iOpener (or use a hair dryer or heat gun) and heat the screen side of the phone to loosen the display adhesive.
-
Leave the iOpener on the phone for at least two minutes to fully heat the screen and soften the adhesive holding it to the case.
-
-
이 단계는 번역되지 않았습니다. 번역을 도와주십시오
-
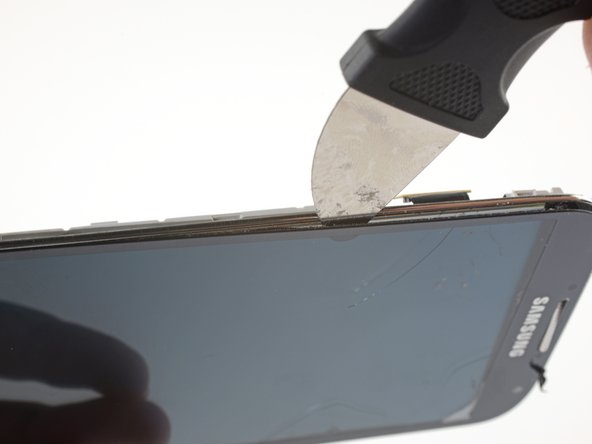
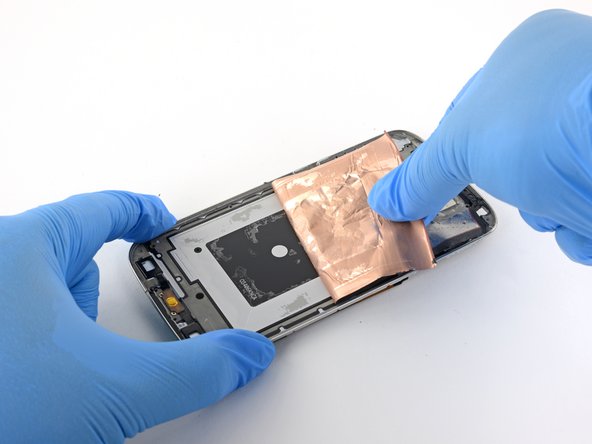
With the adhesive lose, insert the blade into the small gap between the frame and the screen, near the volume rocker.
-
Slowly slide the blade down the length of the phone towards the charge port to release the screen glass from the LCD.
-
-
이 단계는 번역되지 않았습니다. 번역을 도와주십시오
-
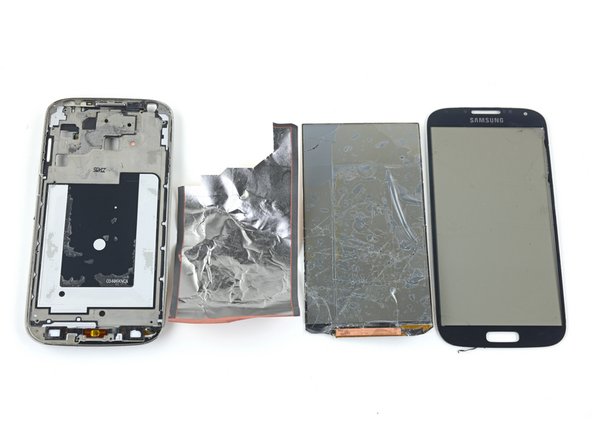
With the screen glass completely loosened around the edges, remove it from the phone.
-
-
이 단계는 번역되지 않았습니다. 번역을 도와주십시오
-
Use tweezers to remove all old adhesive from the phone case before installing the new display.
-


다른 27명이 해당 안내서를 완성하였습니다.

