주요 콘텐츠로 건너뛰기

Samsung Galaxy S4 Mini Motherboard Replacement [Verizon]

필요한 것

  1. Samsung Galaxy S4 Mini Motherboard Replacement [Verizon], Battery: 1 단계, 이미지 1/1
    • Press and hold the END key to power the phone down.

  2. Samsung Galaxy S4 Mini Motherboard Replacement [Verizon]: 2 단계, 이미지 1/1
    • Remove the back cover of the cell phone using a plastic opening tool.

  3. Samsung Galaxy S4 Mini Motherboard Replacement [Verizon]: 3 단계, 이미지 1/1
    • Pry the battery out using a plastic opening tool.

  4. Samsung Galaxy S4 Mini Motherboard Replacement [Verizon], SIM Card: 4 단계, 이미지 1/2 Samsung Galaxy S4 Mini Motherboard Replacement [Verizon], SIM Card: 4 단계, 이미지 2/2
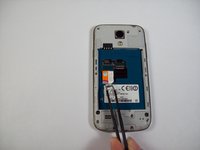
    • Using tweezers, remove the SIM card by sliding it towards the bottom of the device.

  5. Samsung Galaxy S4 Mini Motherboard Replacement [Verizon], SD Card: 5 단계, 이미지 1/1
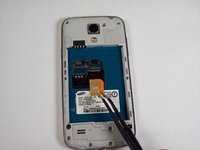
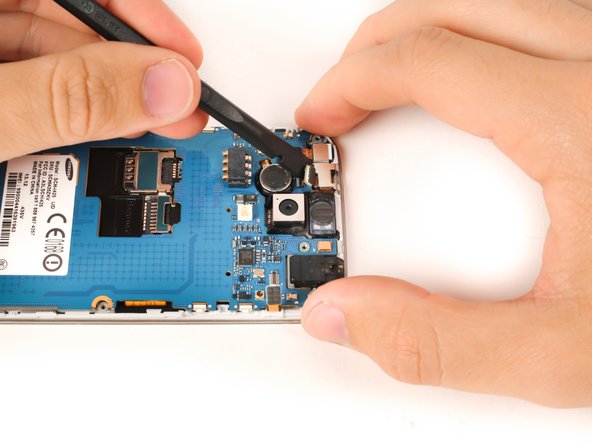
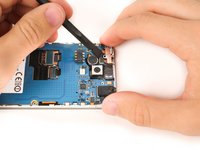
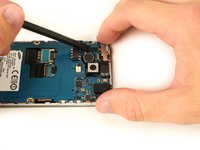
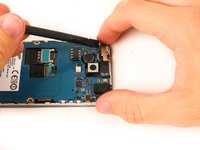
    • Using a nylon spudger, push through the hole at the top of the memory card holder to slide it out.

  6. Samsung Galaxy S4 Mini Motherboard Replacement [Verizon], Motherboard [Verizon]: 6 단계, 이미지 1/1
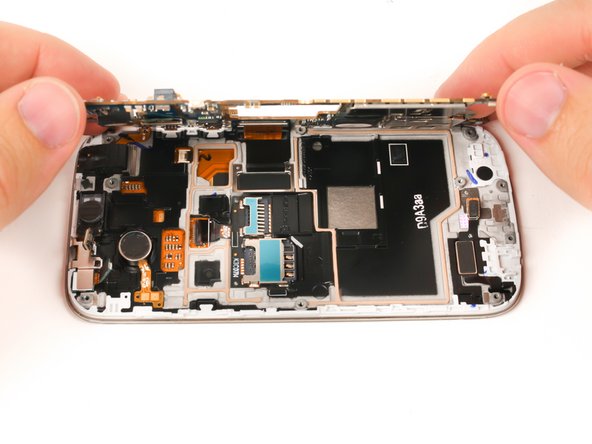
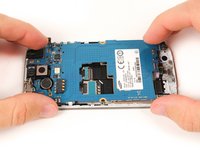
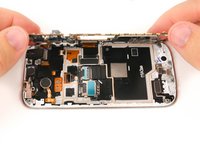
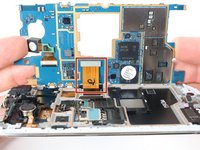
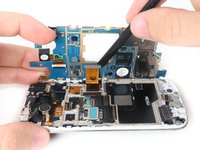
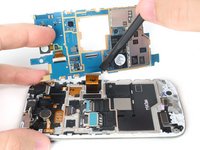
    • Remove the ten 4.0 mm screws on the back of the phone using the #00 Phillips screwdriver.

  7. Samsung Galaxy S4 Mini Motherboard Replacement [Verizon]: 7 단계, 이미지 1/2 Samsung Galaxy S4 Mini Motherboard Replacement [Verizon]: 7 단계, 이미지 2/2
    • Starting at the USB port, slide a plastic opening tool around the perimeter of the phone between the rear housing and frame. As you work your way around the edge, you will feel the clips release.

    • Carefully separate the rear housing and the mid-frame to reveal the inside of the phone.

  8. Samsung Galaxy S4 Mini Motherboard Replacement [Verizon]: 8 단계, 이미지 1/1
    • Use a pair of tweezers to lift the two charging assembly press fit connectors free.

  9. Samsung Galaxy S4 Mini Motherboard Replacement [Verizon]: 9 단계, 이미지 1/2 Samsung Galaxy S4 Mini Motherboard Replacement [Verizon]: 9 단계, 이미지 2/2
    • Use the flat end of a nylon spudger to lift the headphone jack press-fit connector up to release the ribbon cable.

    • This part might be different if your device is using duo SIM

  10. Samsung Galaxy S4 Mini Motherboard Replacement [Verizon]: 10 단계, 이미지 1/2 Samsung Galaxy S4 Mini Motherboard Replacement [Verizon]: 10 단계, 이미지 2/2
    • Use the flat end of a nylon spudger to lift the infrared sensor press-fit connector up to release the ribbon cable.

  11. Samsung Galaxy S4 Mini Motherboard Replacement [Verizon]: 11 단계, 이미지 1/2 Samsung Galaxy S4 Mini Motherboard Replacement [Verizon]: 11 단계, 이미지 2/2
    • Use the flat end of a nylon spudger to lift the front-facing camera press-fit connector up to release the ribbon cable.

  12. Samsung Galaxy S4 Mini Motherboard Replacement [Verizon]: 12 단계, 이미지 1/3 Samsung Galaxy S4 Mini Motherboard Replacement [Verizon]: 12 단계, 이미지 2/3 Samsung Galaxy S4 Mini Motherboard Replacement [Verizon]: 12 단계, 이미지 3/3
    • Gently lift the motherboard up and partially away from the device.

    • The digitizer ribbon cable is still attached to the underside of the motherboard.

  13. Samsung Galaxy S4 Mini Motherboard Replacement [Verizon]: 13 단계, 이미지 1/2 Samsung Galaxy S4 Mini Motherboard Replacement [Verizon]: 13 단계, 이미지 2/2
    • Put the flat end of a nylon spudger under the lip of the digitizer press-fit connector and lift up to release the connector and free the motherboard.

결론

To reassemble your device, follow these instructions in reverse order.

다른 3명이 해당 안내서를 완성하였습니다.

Richard

회원 가입일: 02/07/17

29,761 평판

안내서 11개 작성하였습니다

iFixit iFixit 회원

Staff

136 회원들

안내서 16,586개 작성하였습니다

댓글 한 개

Thank You so much!

Peter Handless - 답글

댓글 쓰기

조회 통계:

24 시간 전: 0

7일 전: 7

30일 전: 29

전체 시간: 5,160