주요 콘텐츠로 건너뛰기

이 버전에는 잘못된 편집 사항이 있을 수 있습니다. 최신 확인된 스냅샷으로 전환하십시오.

보관된 가이드
해당 안내서는 단지 역사적인 목적으로 보관됩니다. 최신 버전 안내서를 사용하여 수리 하십시오.

필요한 것

  1. 이 단계는 번역되지 않았습니다. 번역을 도와주십시오

    : 1 단계, 이미지 1/3 : 1 단계, 이미지 2/3 : 1 단계, 이미지 3/3
    • Remove the rear case by using moderate force to pry the divot on the left of the rear facing camera with a plastic opening tool or your fingernail.

    • Continue to lift the case, working your way around the perimeter until the entire rear cover is removed.

  2. 이 단계는 번역되지 않았습니다. 번역을 도와주십시오

    : 2 단계, 이미지 1/2 : 2 단계, 이미지 2/2
    • Lift the battery upward with your finger or plastic opening tool by pushing on the notch located on the bottom of the battery.

    • Remove the battery from the phone.

  3. 이 단계는 번역되지 않았습니다. 번역을 도와주십시오

    : 3 단계, 이미지 1/3 : 3 단계, 이미지 2/3 : 3 단계, 이미지 3/3
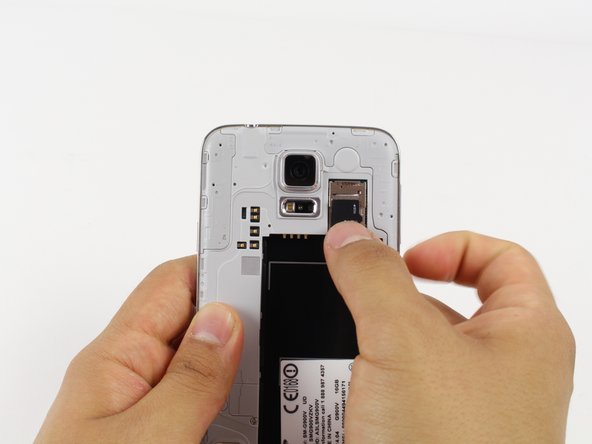
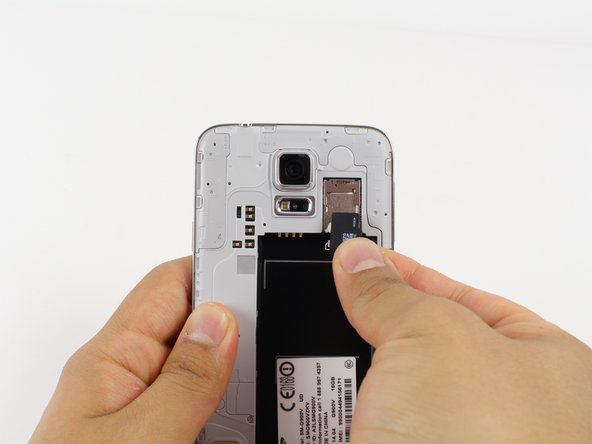
    • Gently slide out the SD card using your fingernail or a plastic opening tool.

    • For reassembly, gently slide in the microSD card until it stops.

결승점

다른 5명이 해당 안내서를 완성하였습니다.

Justin Uchimura

회원 가입일: 04/22/14

4,428 평판

안내서 7개 작성하였습니다

Cal Poly, Team 10-57, Amido Spring 2014 Cal Poly, Team 10-57, Amido Spring 2014 회원

CPSU-AMIDO-S14S10G57

4 회원들

안내서 9개 작성하였습니다

댓글 한 개

Actually the battery does not even have to be removed (just unmount in settings first to avoid corruption)

Simply slide the card back until it runs into the battery, then just lift out.

BFeely - 답글

댓글 쓰기

조회 통계:

24 시간 전: 0

7일 전: 0

30일 전: 13

전체 시간: 4,622