소개
This guide is going to show you how to replace the screen assembly on a Samsung Galaxy S7, complete with screw locations, and finer details.
필요한 것
-
-
Heat the back of the phone to melt the adhesive holding the back plate on. I use an electronic heating pad, set to 60° Celsius. You can also use a heat gun, but I do not like using them. Be extra careful if using a heat gun, as they are easier to burn yourself with, and holding one over a phone for even just a little too long can damage it.
-
-
-
Use a suction cup on the bottom half of the back plate to begin to lift the bottom edge of the plate up, being careful not to apply to much pressure.
-
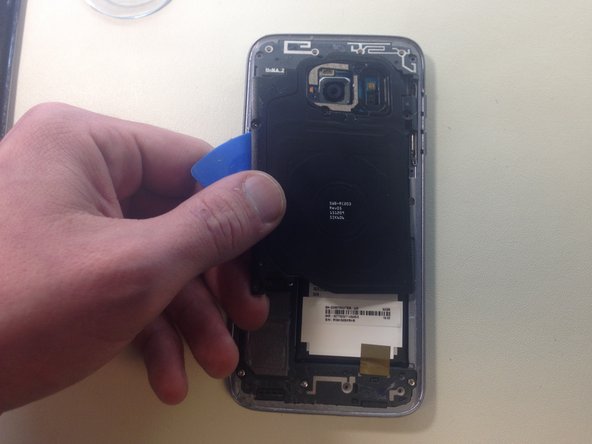
Once you have enough of the back plate lifted to fit a guitar pick, insert one underneath. Slide the guitar pick around the entire edge of the phone to break the adhesive.
-
Remove the back plate.
-
-
-
Using a Phillips #00 screw driver bit, remove the 11 screws holding the plastic covers, loudspeaker, and NFC antenna on.
-
Using a guitar pick to break some light adhesive, remove the top two plastic plates, and the NFC antenna.
-
NOTE: If the adhesive is too strong, try applying more heat.
-
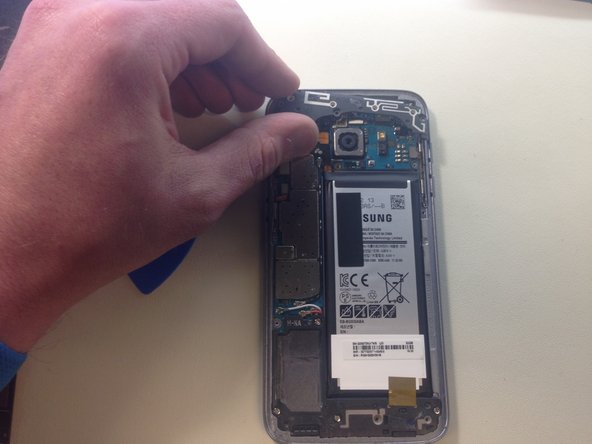
Remove the loudspeaker assembly. You may have to peel up a small piece of gold/copper tape holding the assembly to the battery.
-
-
-
-
Using the flat end of a spudger, disconnect the battery from the logic board.
-
-
-
Disconnect all other flex cables connected to the top of the logic board using the flat end of a plastic spudger.
-
-
-
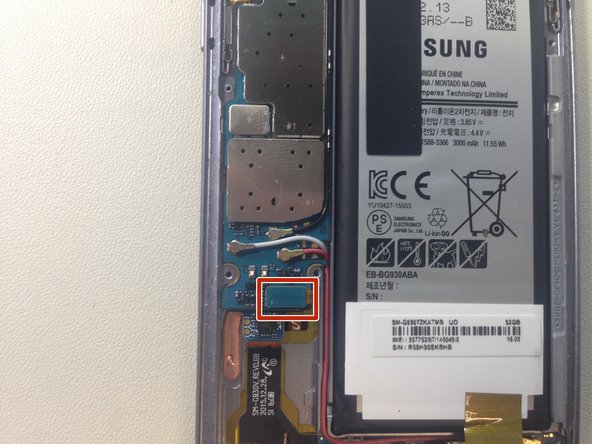
Using the pointed end of a plastic spudger, disconnect the white and red antenna cables from the logic board.
-
Using a SIM card removal tool, eject the SIM Card/SD Card tray (Image 2 of this step. This tray is attached to the back of the logic board. Removing the logic board before doing this may damage it.)
-
-
-
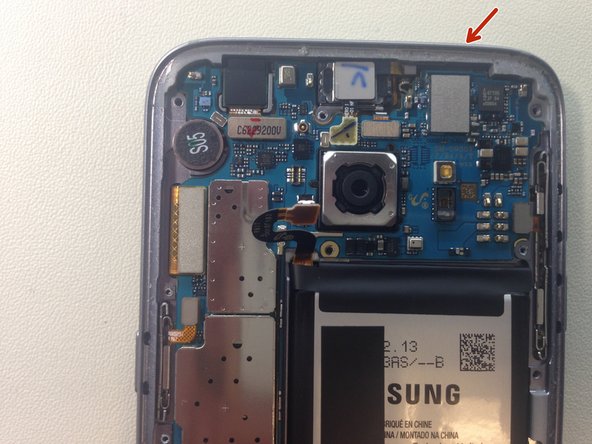
Gently lift the logic board up from the top of the phone towards the battery. DO NOT completely remove the logic board yet.
-
NOTE: As you lift the logic board out, the front facing camera may fall out of the phone. If it does, set it to the side, on an anti-static mat.
-
Using the flat end of a spudger, disconnect the USB daughter board connector from the back of the logic board.
-
Remove the logic board, placing it to the side on an anti-static surface.
-
-
-
Insert a guitar pick between the screen and the bezel of the phone. You may have to apply heat to loosen up the adhesive before this step.
-
If necessary, use a small suction cup to slightly lift the screen so you can insert the guitar pick.
-
Gently rotate the guitar pick around the outside of the phone to break the adhesive holding the screen on.
-
Be extremely careful around the sides and bottom of the phone. If done incorrectly, you may damage the screen flex cable, or the softkey flex cables.
-
Also be careful around the LCD. Make sure the guitar pick slides BEHIND the LCD, not in front of it, and that you have the guitar pick as flat as possible.
-
Remove the screen.
-


To reassemble your device, follow these instructions in reverse order using a new screen assembly.
To reassemble your device, follow these instructions in reverse order using a new screen assembly.
다른 16명이 해당 안내서를 완성하였습니다.