주요 콘텐츠로 건너뛰기

Samsung Galaxy S9 Back Cover Replacement

보관된 가이드
해당 안내서는 단지 역사적인 목적으로 보관됩니다. 최신 버전 안내서를 사용하여 수리 하십시오.

필요한 것

  1. Samsung Galaxy S9 Back Cover Replacement, Back Cover: 1 단계, 이미지 1/1
    • Heat the iOpener in the microwave for 30-60 seconds.

    • Apply the iOpener to the backside edge and let it sit for 2-3 minutes.

  2. Samsung Galaxy S9 Back Cover Replacement: 2 단계, 이미지 1/1
    • Press the suction handle firmly on to the back cover.

    • Insert an opening pick between the back cover and the device's body while pulling upwards on the suction handle.

  3. Samsung Galaxy S9 Back Cover Replacement: 3 단계, 이미지 1/2 Samsung Galaxy S9 Back Cover Replacement: 3 단계, 이미지 2/2
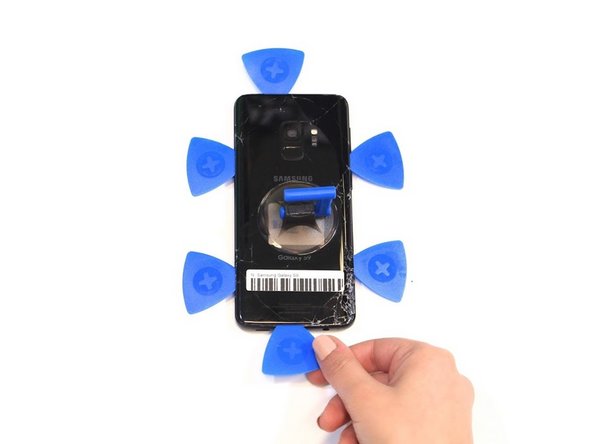
    • Apply more opening picks to the edges of the phone, heating the other sides as needed.

    • Be patient. This step requires quite a bit of work. The adhesive is difficult to melt, making it time-consuming to remove the back of the phone.

    • Because the back panel is made of glass, inserting and sliding the opening picks is likely to crack the glass. If the glass does shatter, please cover it with packing tape to protect your hands from the sharp edges and fragments.

  4. Samsung Galaxy S9 Back Cover Replacement: 4 단계, 이미지 1/3 Samsung Galaxy S9 Back Cover Replacement: 4 단계, 이미지 2/3 Samsung Galaxy S9 Back Cover Replacement: 4 단계, 이미지 3/3
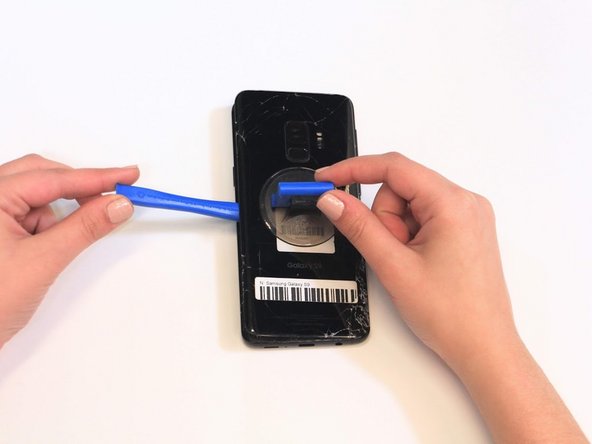
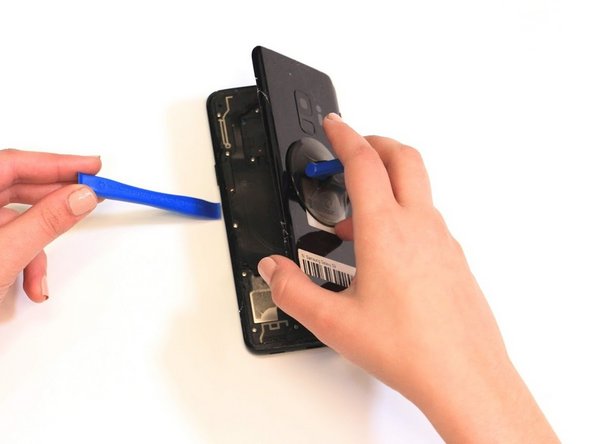
    • Use the iFixit opening tool to separate the back cover from the rest of the device.

  5. Samsung Galaxy S9 Back Cover Replacement: 5 단계, 이미지 1/1
    • Remove the back cover.

결론

To reassemble your device, follow these instructions in reverse order.

Ani Svadjian

회원 가입일: 01/24/19

928 평판

안내서 2개 작성하였습니다

Cal Poly, Team S1-G6, White Winter 2019 Cal Poly, Team S1-G6, White Winter 2019 회원

CPSU-WHITE-W19S1G6

4 회원들

안내서 29개 작성하였습니다

댓글 0개

댓글 쓰기

조회 통계:

24 시간 전: 0

7일 전: 4

30일 전: 5

전체 시간: 78