주요 콘텐츠로 건너뛰기

Samsung Galaxy SIII Mini Display Assembly Replacement

필요한 것

동영상 개요

  1. Samsung Galaxy SIII Mini Display Assembly Replacement, Display Assembly: 1 단계, 이미지 1/2 Samsung Galaxy SIII Mini Display Assembly Replacement, Display Assembly: 1 단계, 이미지 2/2
    • LCD Display + Touch screen (Display Assemblay) for Samsung Galaxy S III mini / i8190.

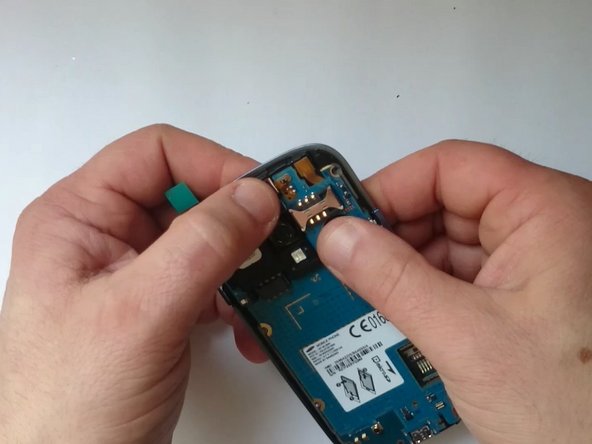
    • Switch off the phone, remove the battery and any SIM and memory card.

  2. Samsung Galaxy SIII Mini Display Assembly Replacement: 2 단계, 이미지 1/3 Samsung Galaxy SIII Mini Display Assembly Replacement: 2 단계, 이미지 2/3 Samsung Galaxy SIII Mini Display Assembly Replacement: 2 단계, 이미지 3/3
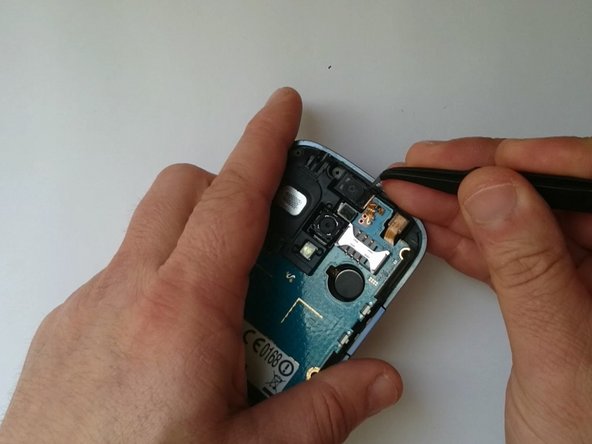
    • Remove 10x Phillips screws.

    • With a plastic tool remove the Middle frame.

    Screw size is PH00, and they're all the same size, so don't worry about getting any of them mixed up! :)

    Craig Jessup - 답글

  3. Samsung Galaxy SIII Mini Display Assembly Replacement: 3 단계, 이미지 1/3 Samsung Galaxy SIII Mini Display Assembly Replacement: 3 단계, 이미지 2/3 Samsung Galaxy SIII Mini Display Assembly Replacement: 3 단계, 이미지 3/3
    • Disconnect:

    • Menu buttons flex cable

    • Micro SD Card reader flex cable

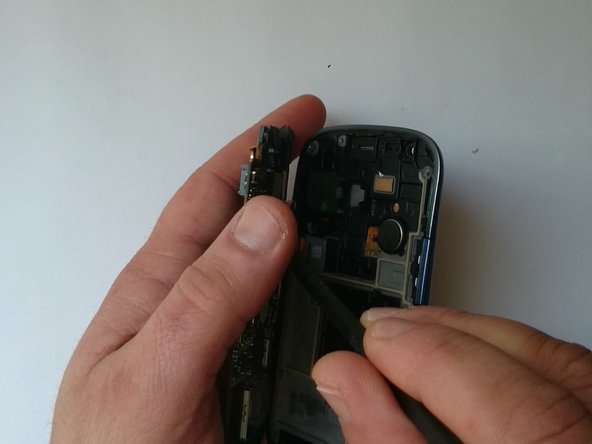
    • Lift up slightly the mother board from the right edge.

    • Unstick the Earpiece and Main camera from the display frame. Be careful, don't break flex cables.

    • Now disconnect the LCD Display flex cable which is located on the underside of the board.

  4. Samsung Galaxy SIII Mini Display Assembly Replacement: 4 단계, 이미지 1/1
    • Front camera

    • Main / Rear camera

    • Earpiece

    • Loudspeaker

    • Vibro motor

    • Micro SD Card reader

  5. Samsung Galaxy SIII Mini Display Assembly Replacement: 5 단계, 이미지 1/3 Samsung Galaxy SIII Mini Display Assembly Replacement: 5 단계, 이미지 2/3 Samsung Galaxy SIII Mini Display Assembly Replacement: 5 단계, 이미지 3/3
    • Let's test the new spare part.

    • First connect the Display assembly, grab the phone comfortably and then put the battery.

  6. Samsung Galaxy SIII Mini Display Assembly Replacement: 6 단계, 이미지 1/3 Samsung Galaxy SIII Mini Display Assembly Replacement: 6 단계, 이미지 2/3 Samsung Galaxy SIII Mini Display Assembly Replacement: 6 단계, 이미지 3/3
    • Warm the touchscreen to make adhesive tape soft. You can use a hair dryer.

    • If the glass is cracked, put the tape in order not to scatter pieces.

    • Use the front camera hole to separate the glass at the corner.

    • Continue with separation with plastic tools, from up to down.

  7. Samsung Galaxy SIII Mini Display Assembly Replacement: 7 단계, 이미지 1/3 Samsung Galaxy SIII Mini Display Assembly Replacement: 7 단계, 이미지 2/3 Samsung Galaxy SIII Mini Display Assembly Replacement: 7 단계, 이미지 3/3
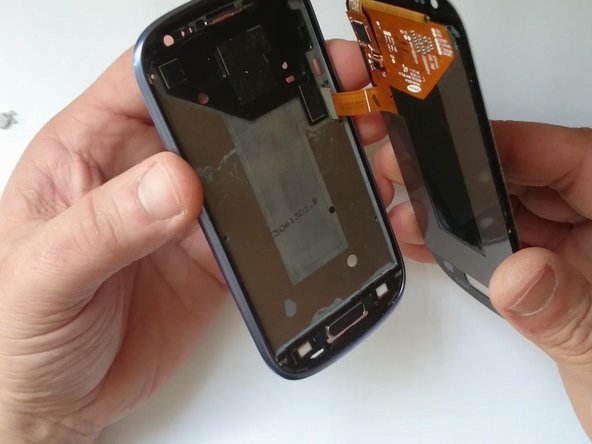
    • Gently separate the menu buttons flex cable from the touchscreen.

  8. Samsung Galaxy SIII Mini Display Assembly Replacement: 8 단계, 이미지 1/3 Samsung Galaxy SIII Mini Display Assembly Replacement: 8 단계, 이미지 2/3 Samsung Galaxy SIII Mini Display Assembly Replacement: 8 단계, 이미지 3/3
    • If the display is left on the frame, use the same techniques to remove it.

  9. Samsung Galaxy SIII Mini Display Assembly Replacement: 9 단계, 이미지 1/3 Samsung Galaxy SIII Mini Display Assembly Replacement: 9 단계, 이미지 2/3 Samsung Galaxy SIII Mini Display Assembly Replacement: 9 단계, 이미지 3/3
    • Clean the frame from the remnants of tape and install new.

    • Be careful with the menu buttons and the holes for the camera and the light sensor, don't cover them.

  10. Samsung Galaxy SIII Mini Display Assembly Replacement: 10 단계, 이미지 1/3 Samsung Galaxy SIII Mini Display Assembly Replacement: 10 단계, 이미지 2/3 Samsung Galaxy SIII Mini Display Assembly Replacement: 10 단계, 이미지 3/3
    • Will be easier if you use adhesive, ready for the model.

    • Install the new display assembly and start with reassembling.

  11. Samsung Galaxy SIII Mini Display Assembly Replacement: 11 단계, 이미지 1/1
    • That's all.

    • .

    • .

    • .

    • .

    • .

    • Did you do it successfully?

결론

To reassemble your device, follow these instructions in reverse order.

다른 18명이 해당 안내서를 완성하였습니다.

ZFix

회원 가입일: 12/09/13

191,182 평판

안내서 330개 작성하였습니다

Master Techs Master Techs 회원

Community

322 회원들

안내서 2,521개 작성하였습니다

댓글 2개

Followed the VDO exactly and managed to fix the screen. Getting the right glue for the screen delivered took the longest time.

Erick Ogam - 답글

Worked perfectly, used regular glue I had at home and it worked just fine. Thanks!!

Elisa Díaz Ipes - 답글

댓글 쓰기

조회 통계:

24 시간 전: 1

7일 전: 4

30일 전: 15

전체 시간: 17,494