이 버전에는 잘못된 편집 사항이 있을 수 있습니다. 최신 확인된 스냅샷으로 전환하십시오.
필요한 것
-
이 단계는 번역되지 않았습니다. 번역을 도와주십시오
-
Screen side facing you, rotate device 180 degrees so the "SAMSUNG" logo is upside down.
-
-
이 단계는 번역되지 않았습니다. 번역을 도와주십시오
-
Using the plastic opening tool, start in the center near the charge port and wedge the angled tip between the plastic back and the glass screen.
-
Create a wedge and apply pressure. Use the tool to separate the screen from the back until you hear an audible “pop."
-
Continue to wedge the tool about every inch along the current edge.
-
-
이 단계는 번역되지 않았습니다. 번역을 도와주십시오
-
Once the bottom edge has been loosened, work towards a bottom corner from the other edge and continue to wedge gently until you can “pop” the corner out.
-
Continue this process on the other bottom corner until it can be popped out as well.
-
-
이 단계는 번역되지 않았습니다. 번역을 도와주십시오
-
Place your hand between the device and the back panel. Then continue the wedging motion along the top edge of the device until the back panel comes loose.
-
-
-
이 단계는 번역되지 않았습니다. 번역을 도와주십시오
-
The connection between the battery and motherboard is a group of four wires in black housing that can be found near the top middle of the device. Using a plastic spudger or a flat, slim tool, lift the black connector housing upwards to disconnect it.
-
-
이 단계는 번역되지 않았습니다. 번역을 도와주십시오
-
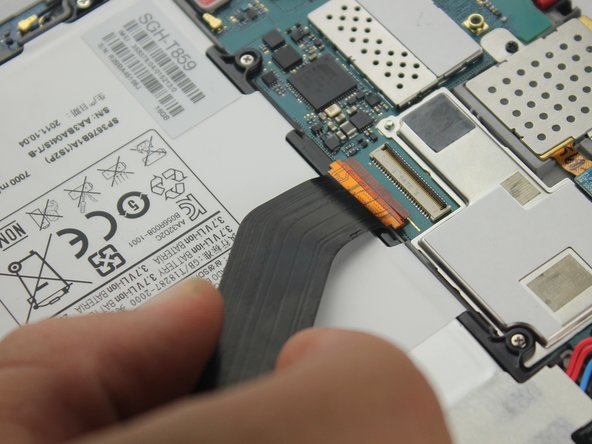
Remove the small piece of tape covering the ribbon connector.
-
You don't need to save this piece of tape.
-
-
이 단계는 번역되지 않았습니다. 번역을 도와주십시오
-
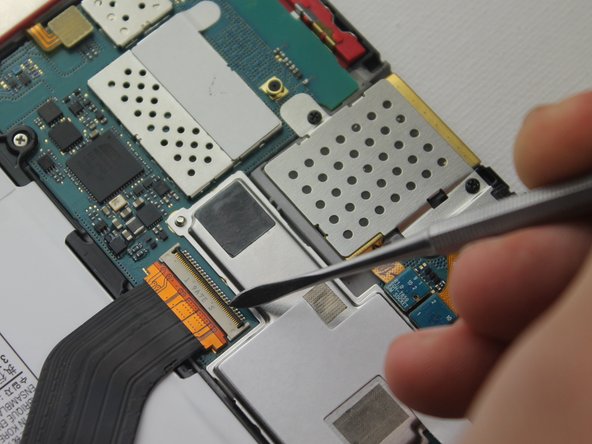
Carefully slide a plastic spudger under the black strip of plastic on the far side of the ribbon connector housing.
-
Lift the black strip upwards. This will release the ribbon.
-
Slide the ribbon out of the connector.
-
Repeat this step to release the other two ribbons.
-
You will need to remove the tape from covering those connectors, too.
-
-
이 단계는 번역되지 않았습니다. 번역을 도와주십시오
-
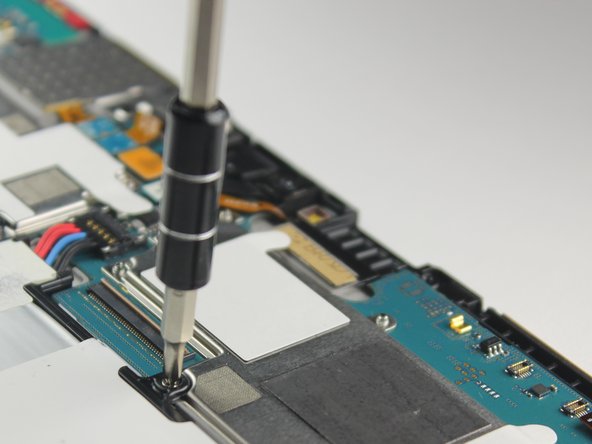
Use the Phillips #00 screwdriver to unscrew the 10 3mm screws holding the battery in place.
-


다른 7명이 해당 안내서를 완성하였습니다.
팀

Baylor, Team 10-11, Williams Fall 2015 Baylor, Team 10-11, Williams Fall 2015 회원
BU-WILLIAMS-F15S10G11
3 회원들
안내서 16개 작성하였습니다