주요 콘텐츠로 건너뛰기

Samsung Galaxy Tab 10.1 4G Speakers Replacement

필요한 것

  1. Samsung Galaxy Tab 10.1 4G Speakers Replacement, Back Panel: 1 단계, 이미지 1/1
    • Power off your tablet before you begin disassembly.

    • Screen side facing you, rotate device 180 degrees so the "SAMSUNG" logo is upside down.

  2. Samsung Galaxy Tab 10.1 4G Speakers Replacement: 2 단계, 이미지 1/2 Samsung Galaxy Tab 10.1 4G Speakers Replacement: 2 단계, 이미지 2/2
    • Using the plastic opening tool, start in the center near the charge port and wedge the angled tip between the plastic back and the glass screen.

    • Create a wedge and apply pressure. Use the tool to separate the screen from the back until you hear an audible “pop."

    • Continue to wedge the tool about every inch along the current edge.

  3. Samsung Galaxy Tab 10.1 4G Speakers Replacement: 3 단계, 이미지 1/2 Samsung Galaxy Tab 10.1 4G Speakers Replacement: 3 단계, 이미지 2/2
    • Once the bottom edge has been loosened, work towards a bottom corner from the other edge and continue to wedge gently until you can “pop” the corner out.

    • Continue this process on the other bottom corner until it can be popped out as well.

  4. Samsung Galaxy Tab 10.1 4G Speakers Replacement: 4 단계, 이미지 1/1
    • Place your hand between the device and the back panel. Then continue the wedging motion along the top edge of the device until the back panel comes loose.

    • Do not wedge the tool directly on top of the power buttons and headphone jack. Wedge nearby so that you don’t damage internal hardware.

  5. Samsung Galaxy Tab 10.1 4G Speakers Replacement: 5 단계, 이미지 1/1
    • Remove the back from the device.

    • Excessive force shouldn't be necessary here. If the back panel is sticking, find the area of the edge closest to the sticking point and wedge the opening tool there until the back panel pops free.

  6. Samsung Galaxy Tab 10.1 4G Speakers Replacement: 6 단계, 이미지 1/2 Samsung Galaxy Tab 10.1 4G Speakers Replacement: 6 단계, 이미지 2/2
    • When working with electronics, it's important to choose a tool that's ESD-safe to avoid accidental damage to the device. The regular black nylon spudger or a plastic opening tool should be used whenever possible.

    • The connection between the battery and motherboard is a group of four wires in black housing that can be found near the top middle of the device. Using a plastic spudger or a flat, slim tool, lift the black connector housing upwards to disconnect it.

  7. Samsung Galaxy Tab 10.1 4G Speakers Replacement, SIM Card Reader: 7 단계, 이미지 1/1
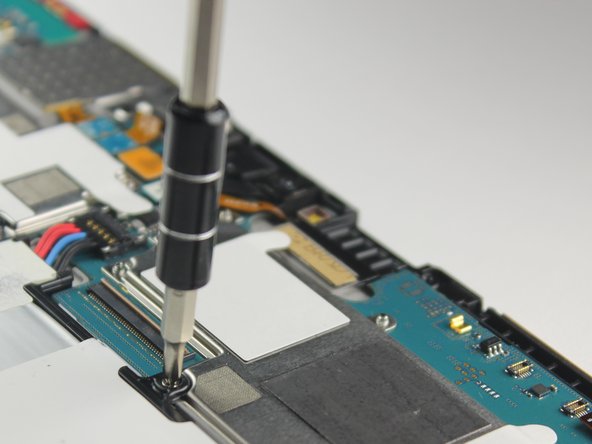
    • Use a Phillips #00 screwdriver to remove all 4 black 2.5mm screws securing the silver SIM card reader to the motherboard.

  8. Samsung Galaxy Tab 10.1 4G Speakers Replacement: 8 단계, 이미지 1/1
    • Using a plastic spudger, gently pop the SIM card reader connection off the motherboard.

    • There are 5 connection points all in a row. The one you want to pull off is the one furthest to the left.

  9. Samsung Galaxy Tab 10.1 4G Speakers Replacement: 9 단계, 이미지 1/1
    • Lift up SIM card reader and remove it.

    • You should be able to just pick it up with your fingers. If the piece is hard to grasp, slide the metal spudger tool under the reader to lift it.

  10. Samsung Galaxy Tab 10.1 4G Speakers Replacement: 10 단계, 이미지 1/1
    • Lift the SIM card reader off the motherboard, and replace it with a new SIM card reader.

    • Be sure to retrieve your SIM card from the old reader.

  11. Samsung Galaxy Tab 10.1 4G Speakers Replacement, Battery: 11 단계, 이미지 1/1
    • Remove the small piece of tape covering the ribbon connector.

    • You don't need to save this piece of tape.

    • When reassembling your device, simply replace this tape with a piece of scotch tape.

  12. Samsung Galaxy Tab 10.1 4G Speakers Replacement: 12 단계, 이미지 1/3 Samsung Galaxy Tab 10.1 4G Speakers Replacement: 12 단계, 이미지 2/3 Samsung Galaxy Tab 10.1 4G Speakers Replacement: 12 단계, 이미지 3/3
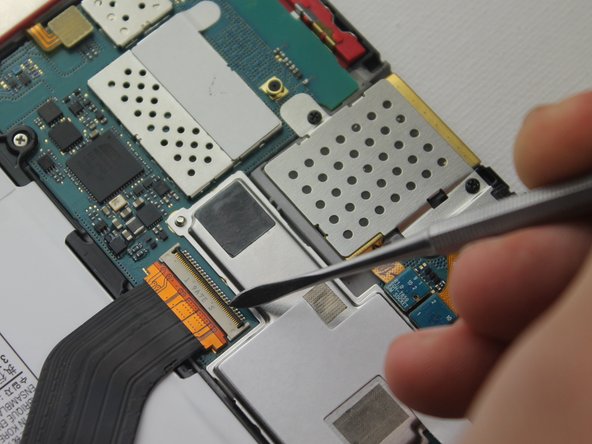
    • Carefully slide a plastic spudger under the black strip of plastic on the far side of the ribbon connector housing.

    • When working with electronics, it's important to choose a tool that's ESD-safe to avoid accidental damage to the device. The regular black nylon spudger or a plastic opening tool should be used whenever possible.

    • Lift the black strip upwards. This will release the ribbon.

    • Slide the ribbon out of the connector.

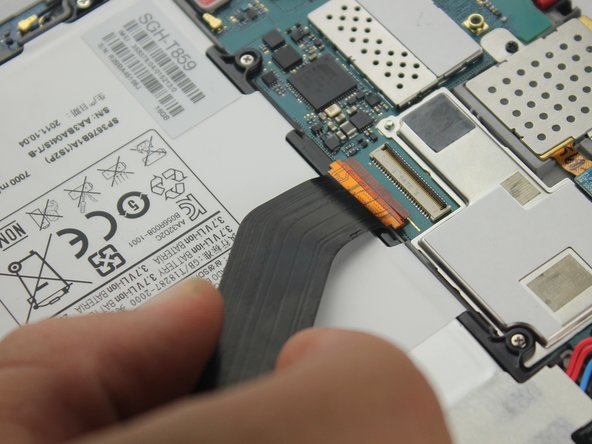
    • Repeat this step to release the other two ribbons.

    • You will need to remove the tape from covering those connectors, too.

  13. Samsung Galaxy Tab 10.1 4G Speakers Replacement: 13 단계, 이미지 1/2 Samsung Galaxy Tab 10.1 4G Speakers Replacement: 13 단계, 이미지 2/2
    • Use the Phillips #00 screwdriver to unscrew the 10 3mm screws holding the battery in place.

  14. Samsung Galaxy Tab 10.1 4G Speakers Replacement: 14 단계, 이미지 1/1
    • Lift the battery out of its housing to remove it.

  15. Samsung Galaxy Tab 10.1 4G Speakers Replacement, Speakers: 15 단계, 이미지 1/1
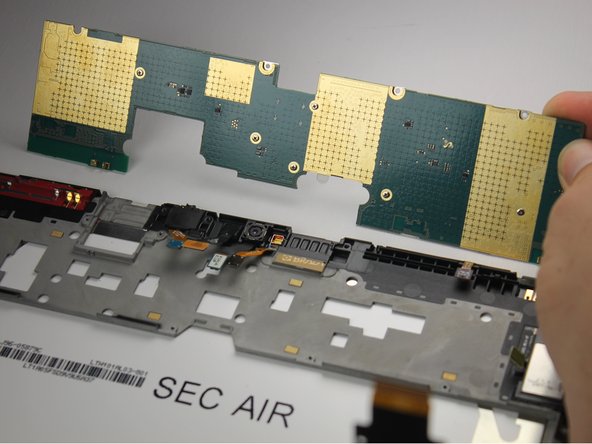
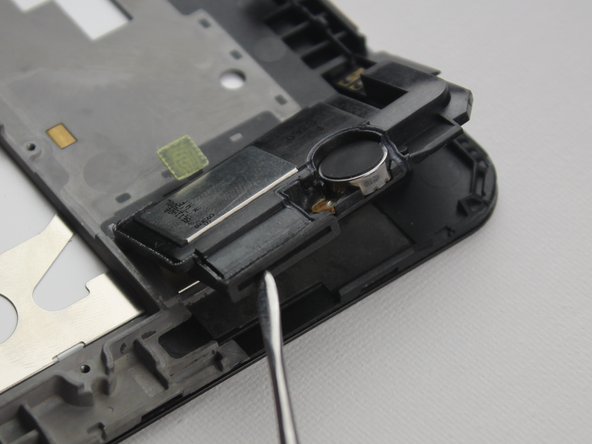
    • Use the metal spudger to disconnect every housing highlighted. There are 14 total disconnections.

    • There are 5 connections inside this box.

    • You've already taken care of several of these in previous steps, so check which ones you've already completed then proceed with the rest.

  16. Samsung Galaxy Tab 10.1 4G Speakers Replacement: 16 단계, 이미지 1/2 Samsung Galaxy Tab 10.1 4G Speakers Replacement: 16 단계, 이미지 2/2
    • Lift the motherboard up and away from the device.

    • The motherboard will be easy to remove as long as all cables are disconnected. If you are having issues removing the motherboard, make sure there are no lingering connections.

  17. Samsung Galaxy Tab 10.1 4G Speakers Replacement: 17 단계, 이미지 1/3 Samsung Galaxy Tab 10.1 4G Speakers Replacement: 17 단계, 이미지 2/3 Samsung Galaxy Tab 10.1 4G Speakers Replacement: 17 단계, 이미지 3/3
    • Using the metal spudger, pry the left speaker off of the device frame.

    • The speaker is adhered to the device frame. You will encounter resistance, so don't be alarmed if you struggle to remove the speaker.

  18. Samsung Galaxy Tab 10.1 4G Speakers Replacement: 18 단계, 이미지 1/2 Samsung Galaxy Tab 10.1 4G Speakers Replacement: 18 단계, 이미지 2/2
    • When you're removing the left speaker, note how the speaker piece fits into the device frame. When rebuilding, you need to slide the speaker under the black extrusion.

    • Also remember to keep the connectors above the speaker so that they can connect to the motherboard.

  19. Samsung Galaxy Tab 10.1 4G Speakers Replacement: 19 단계, 이미지 1/3 Samsung Galaxy Tab 10.1 4G Speakers Replacement: 19 단계, 이미지 2/3 Samsung Galaxy Tab 10.1 4G Speakers Replacement: 19 단계, 이미지 3/3
    • Using the metal spudger, pry the right speaker off of the device frame in the same way.

    • The speaker is adhered to the device frame. You will encounter resistance, so don't be alarmed if you struggle to remove the speaker.

결론

To reassemble your device, follow these instructions in reverse order.

다른 2명이 해당 안내서를 완성하였습니다.

Aaron Lane

회원 가입일: 09/23/15

431 평판

안내서 2개 작성하였습니다

Baylor, Team 10-11, Williams Fall 2015 Baylor, Team 10-11, Williams Fall 2015 회원

BU-WILLIAMS-F15S10G11

3 회원들

안내서 16개 작성하였습니다

댓글 0개

댓글 쓰기

조회 통계:

24 시간 전: 0

7일 전: 0

30일 전: 2

전체 시간: 317