주요 콘텐츠로 건너뛰기

Samsung Galaxy Tab 2 7.0 Auxiliary Port Replacement

필요한 것

  1. Samsung Galaxy Tab 2 7.0 Auxiliary Port Replacement, Auxiliary Port: 1 단계, 이미지 1/1
    • Using a nylon spudger or flat plastic opening tool, pry open the back of the device.

    • It is easy to begin this process by starting at the micro SD card insert.

  2. Samsung Galaxy Tab 2 7.0 Auxiliary Port Replacement: 2 단계, 이미지 1/1
    • Using a Phillips head screwdriver, remove the 6 4mm screws holding holding the battery on the device.

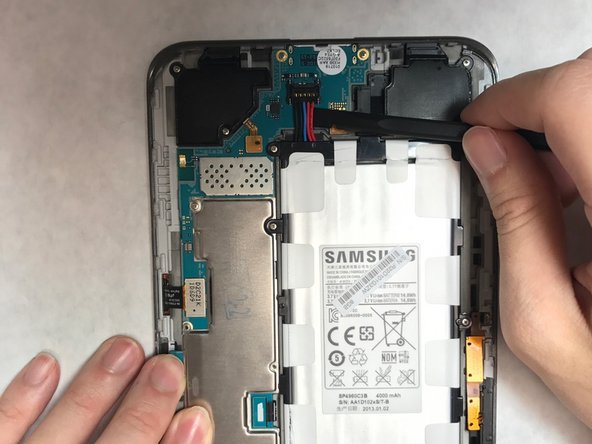
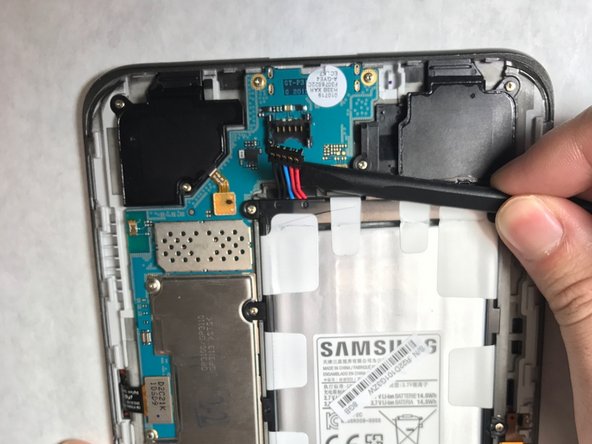
  3. Samsung Galaxy Tab 2 7.0 Auxiliary Port Replacement: 3 단계, 이미지 1/3 Samsung Galaxy Tab 2 7.0 Auxiliary Port Replacement: 3 단계, 이미지 2/3 Samsung Galaxy Tab 2 7.0 Auxiliary Port Replacement: 3 단계, 이미지 3/3
    • Gently detach the set of wires clips connecting the battery to the device using a nylon spudger.

    • Remove the battery and set it aside.

  4. Samsung Galaxy Tab 2 7.0 Auxiliary Port Replacement: 4 단계, 이미지 1/1
    • Using a Phillips head screwdriver, remove the 6 4mm screws holding the motherboard in the device.

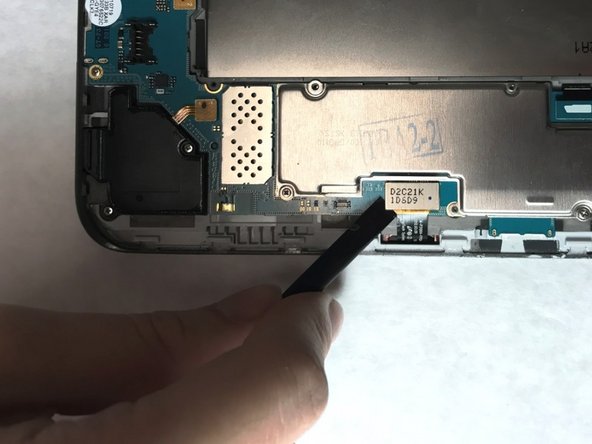
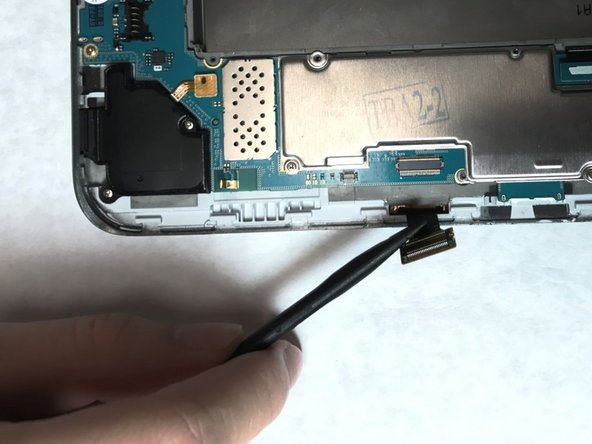
  5. Samsung Galaxy Tab 2 7.0 Auxiliary Port Replacement: 5 단계, 이미지 1/3 Samsung Galaxy Tab 2 7.0 Auxiliary Port Replacement: 5 단계, 이미지 2/3 Samsung Galaxy Tab 2 7.0 Auxiliary Port Replacement: 5 단계, 이미지 3/3
    • Locate the flex cables attached to the motherboard. Using a nylon spudger, gently detach each flex cable from the motherboard.

    • Be careful when detaching flex cables. Excessive force and sharp tools have the potential to damage these components.

    • Lift the motherboard from the device and set it aside.

  6. Samsung Galaxy Tab 2 7.0 Auxiliary Port Replacement: 6 단계, 이미지 1/3 Samsung Galaxy Tab 2 7.0 Auxiliary Port Replacement: 6 단계, 이미지 2/3 Samsung Galaxy Tab 2 7.0 Auxiliary Port Replacement: 6 단계, 이미지 3/3
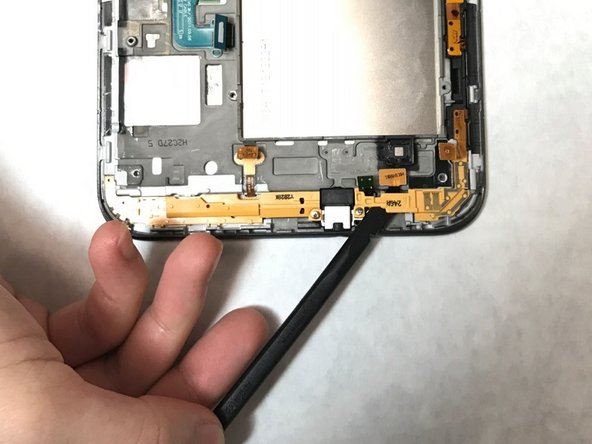
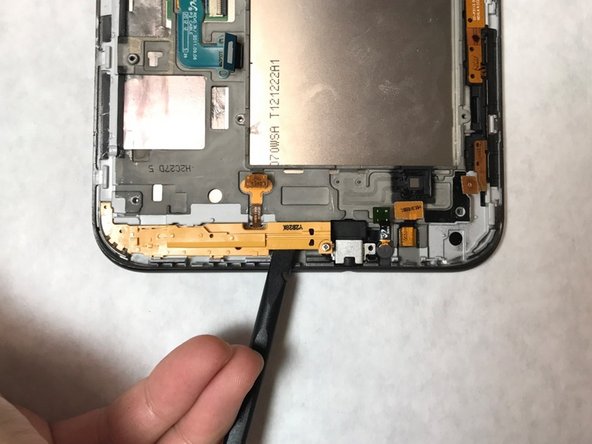
    • Locate the yellow brackets at the bottom of the device.

    • Using a phillips head screwdriver, remove the single 4mm screw on each bracket, located on either side of the auxiliary port.

    • Lift the brackets from the device and set them aside.

    • You may need to use a nylon spudger, or any flat tool, to lift the brackets out of their place.

  7. Samsung Galaxy Tab 2 7.0 Auxiliary Port Replacement: 7 단계, 이미지 1/1
    • Using a nylon spudger, or any flat tool, gently pry and lift the small metal covering off of the auxiliary port.

    • This will reveal a rubber covering.

  8. Samsung Galaxy Tab 2 7.0 Auxiliary Port Replacement: 8 단계, 이미지 1/1
    • Using a nylon spudger, or any flat tool, gently pry and lift the small rubber covering to expose the auxiliary port.

    • This will reveal the auxiliary port.

  9. Samsung Galaxy Tab 2 7.0 Auxiliary Port Replacement: 9 단계, 이미지 1/1
    • Lift the auxiliary port with a nylon spudger.

    • Remove the auxiliary component.

    • It is easiest to lift this piece from the innermost side of the port, opposite of the opening.

결론

To reassemble your device, follow these instructions in reverse order.

다른 5명이 해당 안내서를 완성하였습니다.

Katija Tarailo

회원 가입일: 03/02/17

460 평판

안내서 3개 작성하였습니다

IUPUI, Team S3-G1, Harley Spring 2017 IUPUI, Team S3-G1, Harley Spring 2017 회원

IUPUI-HARLEY-S17S3G1

4 회원들

안내서 3개 작성하였습니다

댓글 0개

댓글 쓰기

조회 통계:

24 시간 전: 0

7일 전: 1

30일 전: 15

전체 시간: 2,018