이 버전에는 잘못된 편집 사항이 있을 수 있습니다. 최신 확인된 스냅샷으로 전환하십시오.
필요한 것
동영상 개요
-
이 단계는 번역되지 않았습니다. 번역을 도와주십시오
-
With a plastic opening tool, gently insert the prying end in between the glass digitizer and the silver frame from the front of the device.
-
-
이 단계는 번역되지 않았습니다. 번역을 도와주십시오
-
Working slowly and carefully, move around the entirety of the face of the device. Small plastic clips should release, if not, apply gentle outwards pressure until you hear the clips popping off.
-
-
-
이 단계는 번역되지 않았습니다. 번역을 도와주십시오
-
To begin actual removal of the battery itself, remove the four designated screws with your screwdriver.
-
Once the screws are removed, use either the tip of your screwdriver or a pair of tweezers to pull up the battery connector. Pull directly up and the connector should pop out.
-
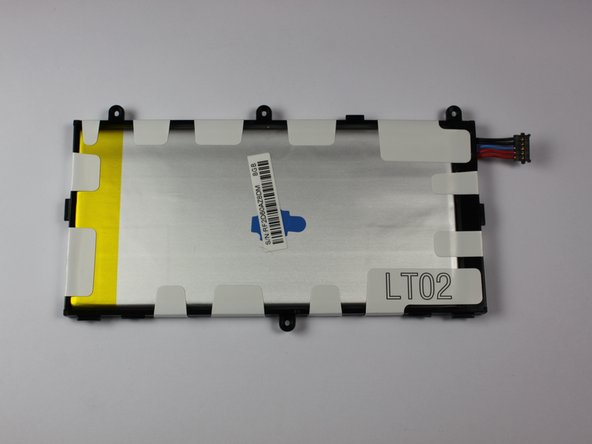
Once the battery is removed, it should look as it does in the third picture.
-
-
이 단계는 번역되지 않았습니다. 번역을 도와주십시오
-
To finish battery replacement, place your new battery where the old battery was in your device, as shown in the picture.
-


다른 57명이 해당 안내서를 완성하였습니다.
팀

Cal Poly, Team 7-20, Regan Spring 2014 Cal Poly, Team 7-20, Regan Spring 2014 회원
CPSU-REGAN-S14S7G20
4 회원들
안내서 10개 작성하였습니다
댓글 6개
good job for making this as least complicated as possible i completed the guide
Great guide..... If you don't have the plastic tool, my thumb nail worked just fine
Thanks for this great guide.
When attaching the new battery it helped me to actually attach the wiring connector before final placement of the battery. Also, I found it easier to put the single screw in first before pushing the battery all the way down and starting the three on the other side. The cscrew holes in the replacement battery have to be PERFECT and if they’re just slightly off you can’t get the one lonely screw started if you put the other three in first.
I enjoied the guide it was realy easy the video was varry helpfull. I do have a question is there any way to test the batery to make sure that is realy the problem, before i go replaycing it?
John Tahos - 답글