주요 콘텐츠로 건너뛰기

Samsung Galaxy Tab 3 Lite Camera Replacement

필요한 것

  1. Samsung Galaxy Tab 3 Lite Camera Replacement, Rear Case: 1 단계, 이미지 1/3 Samsung Galaxy Tab 3 Lite Camera Replacement, Rear Case: 1 단계, 이미지 2/3 Samsung Galaxy Tab 3 Lite Camera Replacement, Rear Case: 1 단계, 이미지 3/3
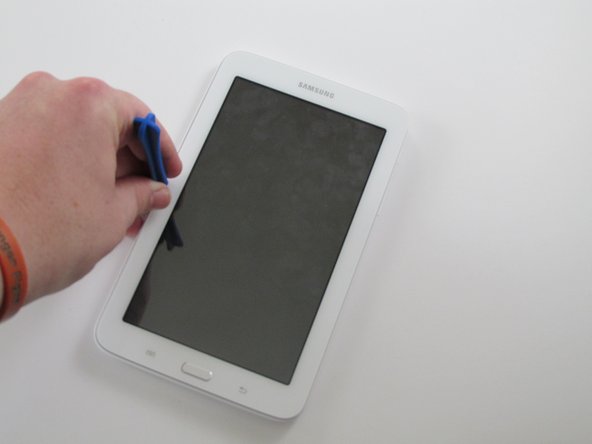
    • Using a plastic opening tool, wedge in the seam between the screen and the case.

    • Rock the tool by moving it towards and away from the middle of the screen, trying to separate the tape holding the screen and case together.

    • This is a long process, so don't try and rush it. Also, be careful about applying pressure.

  2. Samsung Galaxy Tab 3 Lite Camera Replacement: 2 단계, 이미지 1/3 Samsung Galaxy Tab 3 Lite Camera Replacement: 2 단계, 이미지 2/3 Samsung Galaxy Tab 3 Lite Camera Replacement: 2 단계, 이미지 3/3
    • After separating the tape holding the screen and case together, slowly start taking the screen off the case from the opposite side of the side with the buttons

  3. Samsung Galaxy Tab 3 Lite Camera Replacement, Motherboard: 3 단계, 이미지 1/3 Samsung Galaxy Tab 3 Lite Camera Replacement, Motherboard: 3 단계, 이미지 2/3 Samsung Galaxy Tab 3 Lite Camera Replacement, Motherboard: 3 단계, 이미지 3/3
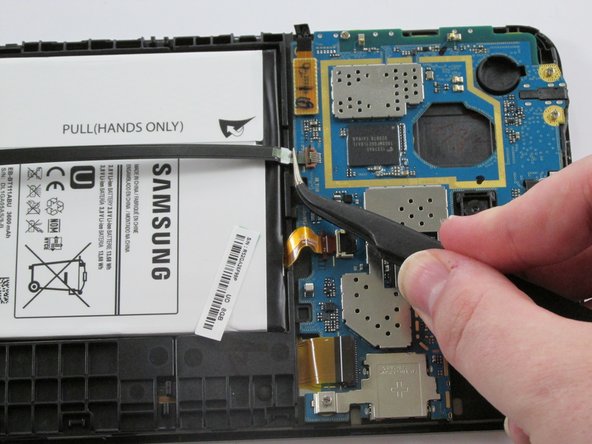
    • Use a plastic opening tool to lift up the zero insertion force (ZIF) connector holding down the ribbon cable.

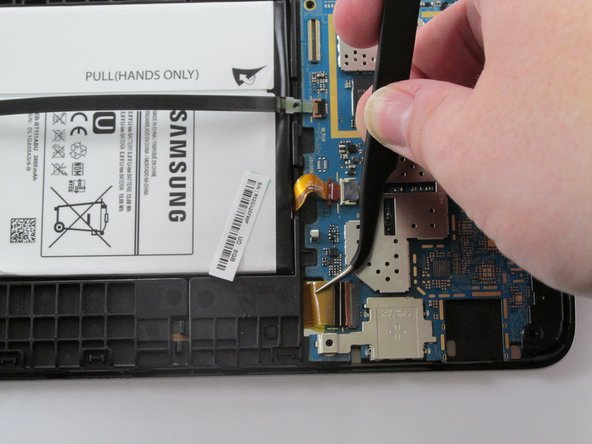
    • Use the precision tweezers to gently pull the ribbon cable out of the ZIF connector.

  4. Samsung Galaxy Tab 3 Lite Camera Replacement: 4 단계, 이미지 1/2 Samsung Galaxy Tab 3 Lite Camera Replacement: 4 단계, 이미지 2/2
    • Use the plastic opening tool to lift up the zero insertion force (ZIF) connector holding down the battery ribbon cable.

    • Use the precision tweezers to remove the ribbon cable from the ZIF connector.

  5. Samsung Galaxy Tab 3 Lite Camera Replacement: 5 단계, 이미지 1/2 Samsung Galaxy Tab 3 Lite Camera Replacement: 5 단계, 이미지 2/2
    • Use the plastic opening tool to lift up the zero insertion force (ZIF) connector holding down the battery ribbon cable.

    • Use the precision tweezers to remove the ribbon cable from the ZIF connector.

  6. Samsung Galaxy Tab 3 Lite Camera Replacement: 6 단계, 이미지 1/1
    • Remove the seven 4mm Phillips J000 screws holding the motherboard in place.

  7. Samsung Galaxy Tab 3 Lite Camera Replacement: 7 단계, 이미지 1/1
    • Use the plastic opening tool and gently pry up the tab holding the motherboard in place.

  8. Samsung Galaxy Tab 3 Lite Camera Replacement: 8 단계, 이미지 1/3 Samsung Galaxy Tab 3 Lite Camera Replacement: 8 단계, 이미지 2/3 Samsung Galaxy Tab 3 Lite Camera Replacement: 8 단계, 이미지 3/3
    • Use the precision tweezers to remove the black plastic corner on top of the motherboard.

    • Use the plastic opening tool to pull the motherboard off the case.

  9. Samsung Galaxy Tab 3 Lite Camera Replacement, Camera: 9 단계, 이미지 1/2 Samsung Galaxy Tab 3 Lite Camera Replacement, Camera: 9 단계, 이미지 2/2
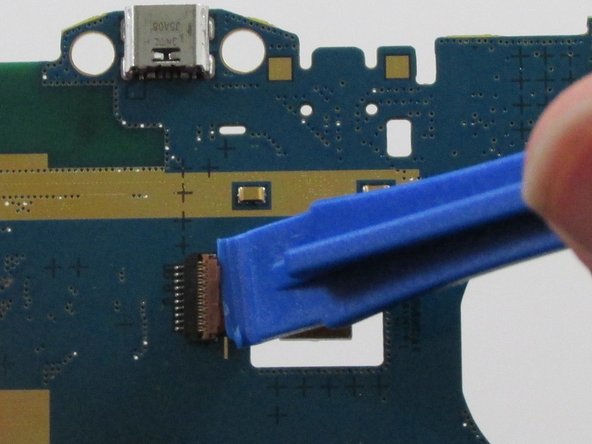
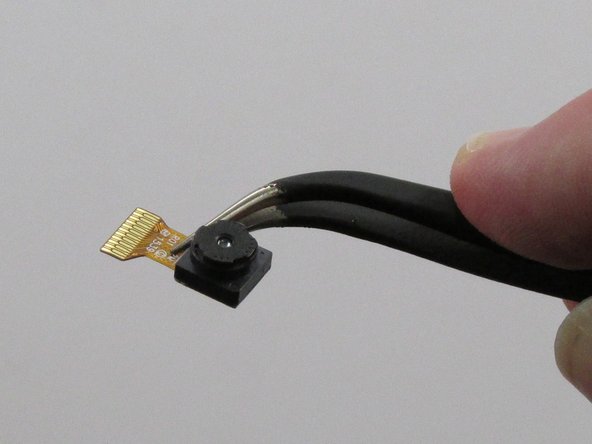
    • Flip the motherboard over and locate the camera in the middle.

    • Use the plastic opening tool to gently lift up the flap holding the camera cable in place.

  10. Samsung Galaxy Tab 3 Lite Camera Replacement: 10 단계, 이미지 1/2 Samsung Galaxy Tab 3 Lite Camera Replacement: 10 단계, 이미지 2/2
    • Using precision tweezers, gently pull the camera off the motherboard.

결론

To reassemble your device, follow these instructions in reverse order.

다른 3명이 해당 안내서를 완성하였습니다.

Patricia Laird

회원 가입일: 02/09/16

921 평판

안내서 4개 작성하였습니다

USF Tampa, Team 11-1, Cheng Spring 2016 USF Tampa, Team 11-1, Cheng Spring 2016 회원

USFT-CHENG-S16S11G1

4 회원들

안내서 12개 작성하였습니다

댓글 0개

댓글 쓰기

조회 통계:

24 시간 전: 1

7일 전: 2

30일 전: 5

전체 시간: 1,093