소개
Replacement guide for the micro USB charging port on a Samsung Galaxy Tab 4 10.1 android tablet.
The battery only needs to be disconnected—skip steps 3, 5, and 6.
필요한 것
-
-
Insert the wedge of the nylon spudger and slide it between the front and back panels until the back comes off.
-
-
-
-
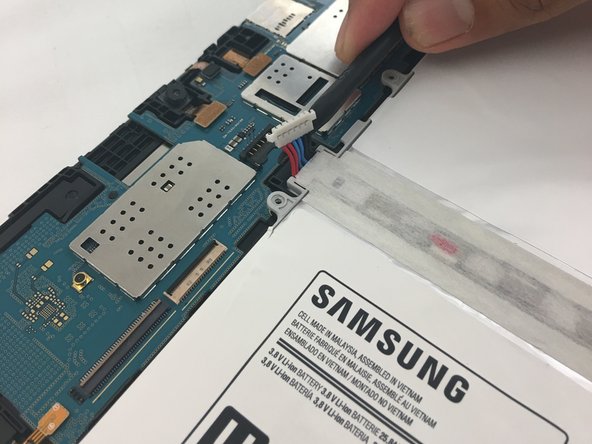
Detach the red, blue, and black cables by prying up on the white connector from the motherboard.
-
If using fingers instead, pull evenly on the full width of the cable so the wires are not overly strained.
Take note of the red warning comment! Very easy to pull up the connector off the board!!!
Unfortunately I just that because I didn’t hold down the connectors with tweezers (or something) and then botched an attempted reflow of the solder, costing even more time and money! :(
-
-
-
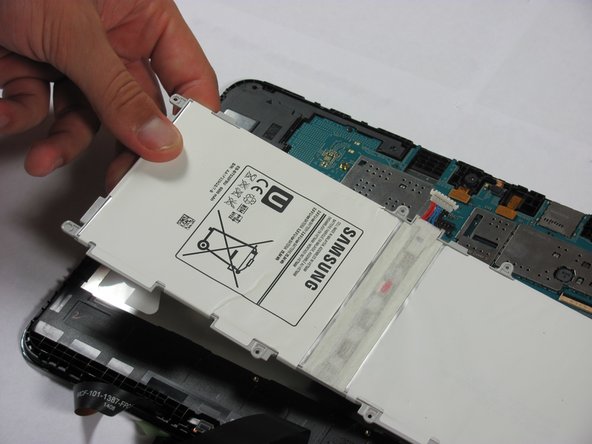
Once the battery is loose, lift it out of the device.
Better disconnect battery before any repairs, therefore reducing the possibility of a short-circuit which could destroy the motherboard.
Isolation tape can also be placed over the connection after disconnecting to prevent any accidental short-circuit mishaps, thus reducing the need to remove the battery.
Cheers Wayne
-
-
-
Remove the two 2.7mm Phillips #00 screws from the micro USB port.
-
Remove the micro USB retaining bracket.
-


To reassemble your device, follow these instructions in reverse order.
To reassemble your device, follow these instructions in reverse order.
다른 12명이 해당 안내서를 완성하였습니다.

댓글 2개
Thank you so much for simplifying this guide for us novices. I have tried watching two videos where they assume I already have some Samsung repair knowledge. I feel confident I will be able to get the tablet up and charging in no time.
There is no need to remove the battery, only detach the power connector, cheers!