이 버전에는 잘못된 편집 사항이 있을 수 있습니다. 최신 확인된 스냅샷으로 전환하십시오.
필요한 것
-
이 단계는 번역되지 않았습니다. 번역을 도와주십시오
-
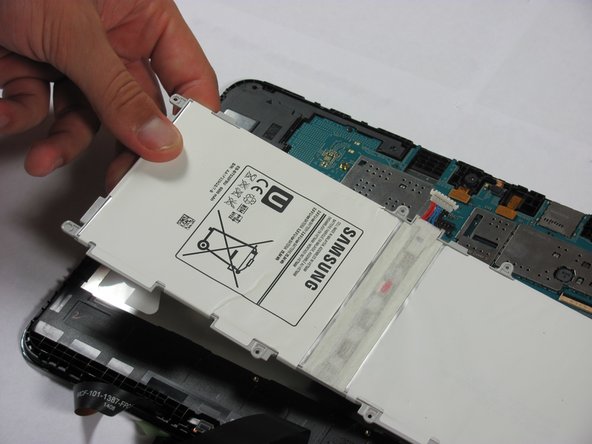
Insert the wedge of the nylon spudger and slide it between the front and back panels until the back comes off.
-
-
이 단계는 번역되지 않았습니다. 번역을 도와주십시오
-
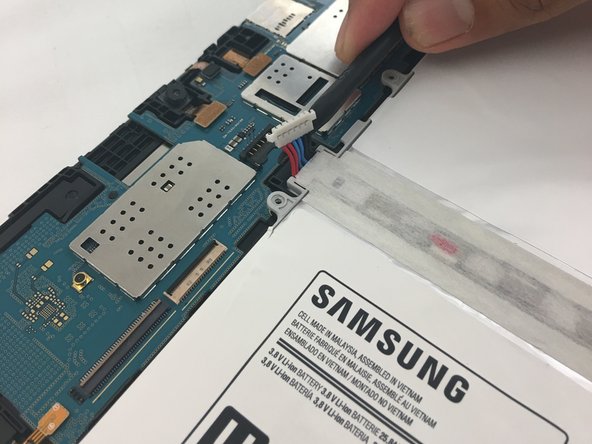
Peel off the green tape that covers the connectors for the three black strips.
-
Use the tip of a spudger or your fingernail to flip up the small retaining flaps.
-
-
-
이 단계는 번역되지 않았습니다. 번역을 도와주십시오
-
Detach the red, blue, and black cables by prying up on the white connector from the motherboard.
-
If using fingers instead, pull evenly on the full width of the cable so the wires are not overly strained.
-
-
이 단계는 번역되지 않았습니다. 번역을 도와주십시오
-
Remove the two 2.7mm Phillips #00 screws from the micro USB port.
-
Remove the micro USB retaining bracket.
-
-
이 단계는 번역되지 않았습니다. 번역을 도와주십시오
-
Use the flat end of a spudger to disconnect the micro USB port.
-
Remove the micro USB port.
-


다른 12명이 해당 안내서를 완성하였습니다.

댓글 2개
Thank you so much for simplifying this guide for us novices. I have tried watching two videos where they assume I already have some Samsung repair knowledge. I feel confident I will be able to get the tablet up and charging in no time.
There is no need to remove the battery, only detach the power connector, cheers!