주요 콘텐츠로 건너뛰기

Samsung Galaxy Tab 4 7.0 Sprint Rear-Facing Camera Replacement

필요한 것

  1. Samsung Galaxy Tab 4 7.0 Sprint Rear-Facing Camera Replacement, Motherboard: 1 단계, 이미지 1/2 Samsung Galaxy Tab 4 7.0 Sprint Rear-Facing Camera Replacement, Motherboard: 1 단계, 이미지 2/2
    • Insert the plastic opening tool into the gap between the device frame and the back panel on any side of the device.

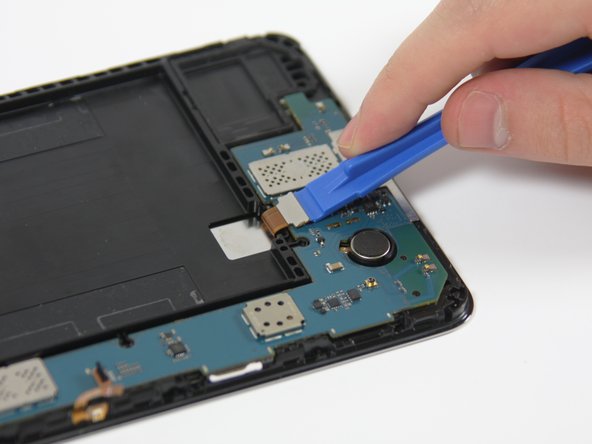
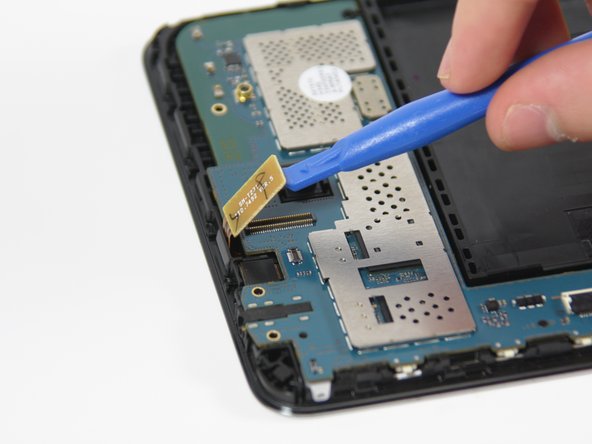
    • Slide the opening tool around the edges of the device to disconnect the back panel from the frame.

  2. Samsung Galaxy Tab 4 7.0 Sprint Rear-Facing Camera Replacement: 2 단계, 이미지 1/3 Samsung Galaxy Tab 4 7.0 Sprint Rear-Facing Camera Replacement: 2 단계, 이미지 2/3 Samsung Galaxy Tab 4 7.0 Sprint Rear-Facing Camera Replacement: 2 단계, 이미지 3/3
    • Carefully remove the back panel from the frame of the device.

  3. Samsung Galaxy Tab 4 7.0 Sprint Rear-Facing Camera Replacement: 3 단계, 이미지 1/3 Samsung Galaxy Tab 4 7.0 Sprint Rear-Facing Camera Replacement: 3 단계, 이미지 2/3 Samsung Galaxy Tab 4 7.0 Sprint Rear-Facing Camera Replacement: 3 단계, 이미지 3/3
    • Using a Phillips #00 Screwdriver, remove the five 4 mm screws connecting the motherboard to the frame of the device.

  4. Samsung Galaxy Tab 4 7.0 Sprint Rear-Facing Camera Replacement: 4 단계, 이미지 1/3 Samsung Galaxy Tab 4 7.0 Sprint Rear-Facing Camera Replacement: 4 단계, 이미지 2/3 Samsung Galaxy Tab 4 7.0 Sprint Rear-Facing Camera Replacement: 4 단계, 이미지 3/3
    • Use the plastic opening tool to unlock the battery wire from the motherboard by flipping-up the small retaining flap.

    • Use the tweezers to carefully remove the battery wire from the motherboard by pulling it away from the retainer flap.

  5. Samsung Galaxy Tab 4 7.0 Sprint Rear-Facing Camera Replacement: 5 단계, 이미지 1/3 Samsung Galaxy Tab 4 7.0 Sprint Rear-Facing Camera Replacement: 5 단계, 이미지 2/3 Samsung Galaxy Tab 4 7.0 Sprint Rear-Facing Camera Replacement: 5 단계, 이미지 3/3
    • Use the plastic opening tool to unlock the wire on the narrow section of the motherboard by flipping-up the retaining flap.

    • Use the tweezers to carefully remove the wire from the motherboard by sliding it away from the retaining flap.

  6. Samsung Galaxy Tab 4 7.0 Sprint Rear-Facing Camera Replacement: 6 단계, 이미지 1/3 Samsung Galaxy Tab 4 7.0 Sprint Rear-Facing Camera Replacement: 6 단계, 이미지 2/3 Samsung Galaxy Tab 4 7.0 Sprint Rear-Facing Camera Replacement: 6 단계, 이미지 3/3
    • Disconnect the wire near the bottom of the motherboard by placing the plastic opening tool under the edge of the connector to flip it up.

  7. Samsung Galaxy Tab 4 7.0 Sprint Rear-Facing Camera Replacement: 7 단계, 이미지 1/3 Samsung Galaxy Tab 4 7.0 Sprint Rear-Facing Camera Replacement: 7 단계, 이미지 2/3 Samsung Galaxy Tab 4 7.0 Sprint Rear-Facing Camera Replacement: 7 단계, 이미지 3/3
    • Disconnect the wire near the top of the motherboard by placing the plastic opening tool under the edge of the connector to flip it up.

  8. Samsung Galaxy Tab 4 7.0 Sprint Rear-Facing Camera Replacement: 8 단계, 이미지 1/3 Samsung Galaxy Tab 4 7.0 Sprint Rear-Facing Camera Replacement: 8 단계, 이미지 2/3 Samsung Galaxy Tab 4 7.0 Sprint Rear-Facing Camera Replacement: 8 단계, 이미지 3/3
    • Gently remove the motherboard from the frame of the device by grabbing the top and bottom ends and pulling it toward you.

    • Several plastic tabs keep the motherboard in place, so you will have to apply some force.

  9. Samsung Galaxy Tab 4 7.0 Sprint Rear-Facing Camera Replacement, Rear-Facing Camera: 9 단계, 이미지 1/3 Samsung Galaxy Tab 4 7.0 Sprint Rear-Facing Camera Replacement, Rear-Facing Camera: 9 단계, 이미지 2/3 Samsung Galaxy Tab 4 7.0 Sprint Rear-Facing Camera Replacement, Rear-Facing Camera: 9 단계, 이미지 3/3
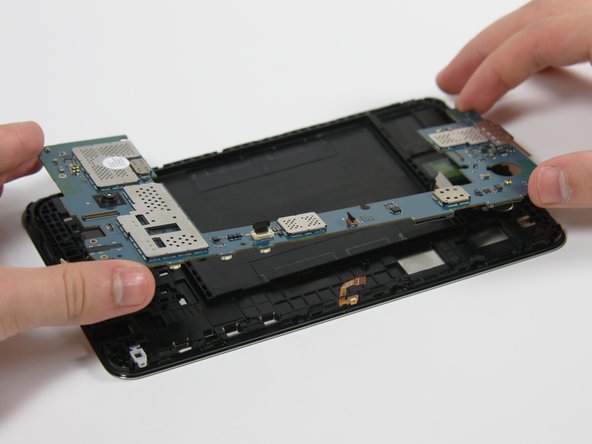
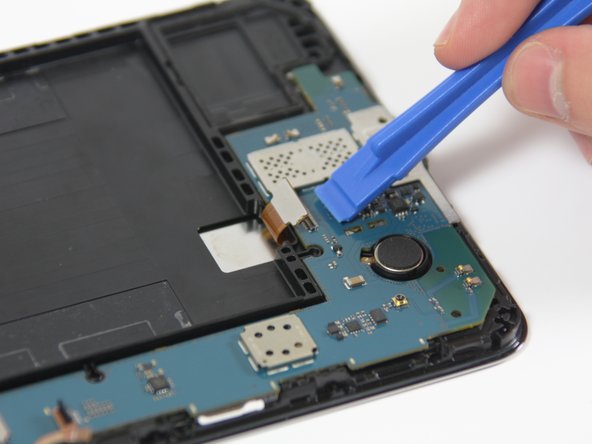
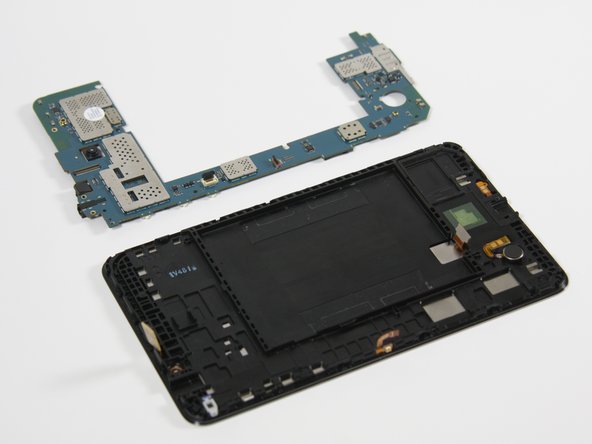
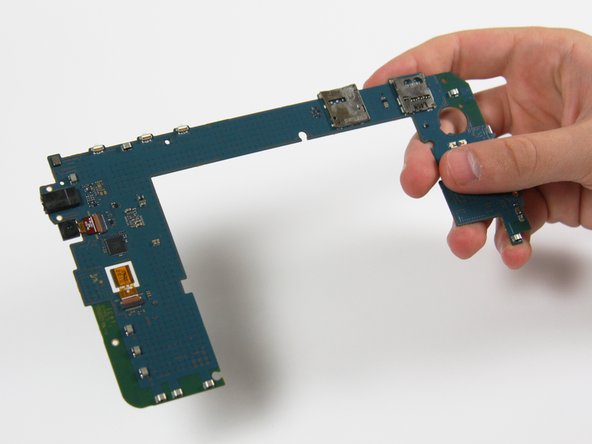
    • Flip the motherboard over to view the back side.

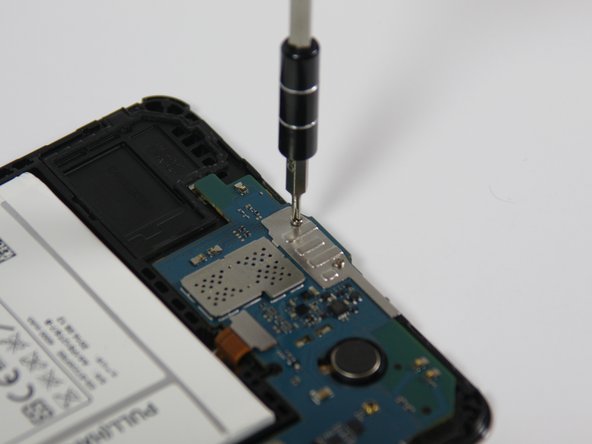
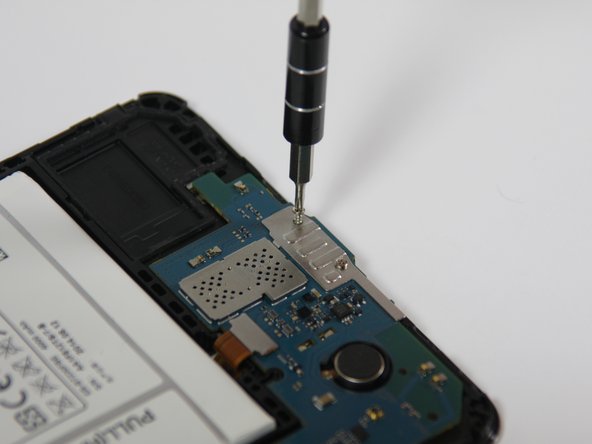
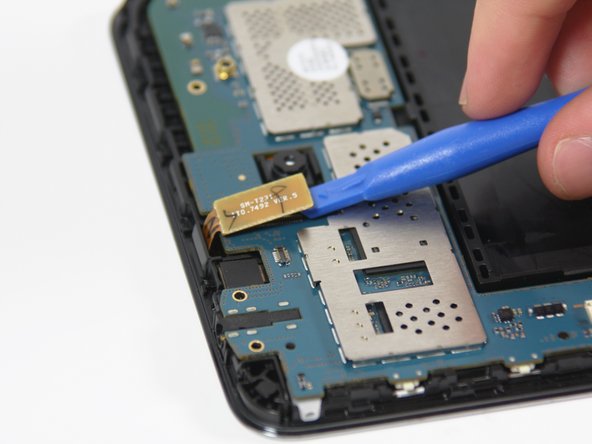
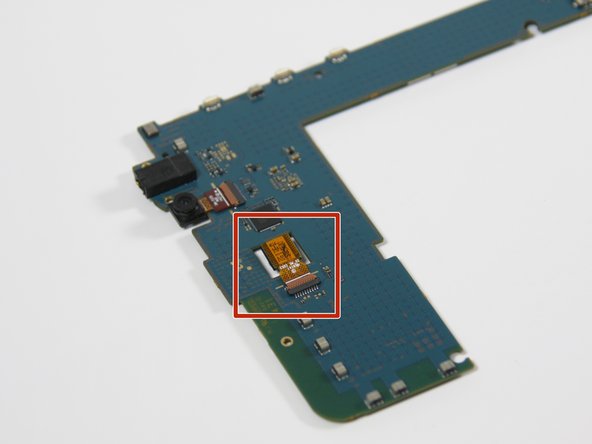
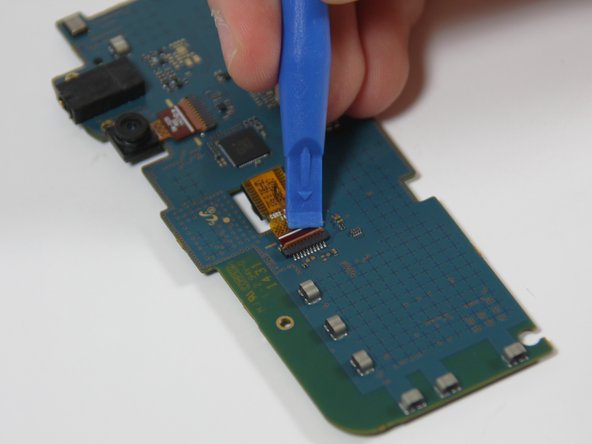
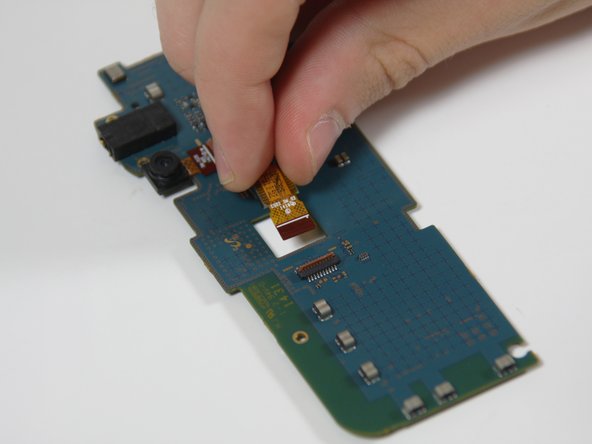
    • Locate the rear-facing camera on the motherboard.

  10. Samsung Galaxy Tab 4 7.0 Sprint Rear-Facing Camera Replacement: 10 단계, 이미지 1/2 Samsung Galaxy Tab 4 7.0 Sprint Rear-Facing Camera Replacement: 10 단계, 이미지 2/2
    • Use a plastic opening tool to unlock the rear-facing camera wire from the motherboard by flipping up the retaining flap.

  11. Samsung Galaxy Tab 4 7.0 Sprint Rear-Facing Camera Replacement: 11 단계, 이미지 1/2 Samsung Galaxy Tab 4 7.0 Sprint Rear-Facing Camera Replacement: 11 단계, 이미지 2/2
    • Use your fingers to grip the camera and carefully pull it out and away from the motherboard

결론

To reassemble your device, follow these instructions in reverse order.

Valentina Franco

회원 가입일: 10/03/16

434 평판

안내서 4개 작성하였습니다

Cal Poly, Team 18-3, Forte Fall 2016 Cal Poly, Team 18-3, Forte Fall 2016 회원

CPSU-FORTE-F16S18G3

4 회원들

안내서 5개 작성하였습니다

댓글 0개

댓글 쓰기

조회 통계:

24 시간 전: 0

7일 전: 0

30일 전: 2

전체 시간: 706