주요 콘텐츠로 건너뛰기

이 안내서에는 최근 변경 사항이 더 있습니다. 최신 비검증 버전으로 전환하십시오.

Samsung Galaxy Tab 4 8.0 Verizon Battery Replacement

필요한 것

  1. Samsung Galaxy Tab 4 8.0 Verizon Battery Replacement, Rear Case: 1 단계, 이미지 1/3 Samsung Galaxy Tab 4 8.0 Verizon Battery Replacement, Rear Case: 1 단계, 이미지 2/3 Samsung Galaxy Tab 4 8.0 Verizon Battery Replacement, Rear Case: 1 단계, 이미지 3/3
    • Before disassembling your Samsung Galaxy Tab 4 8.0, be sure it is powered off and you remove the SIM and Micro SD cards.

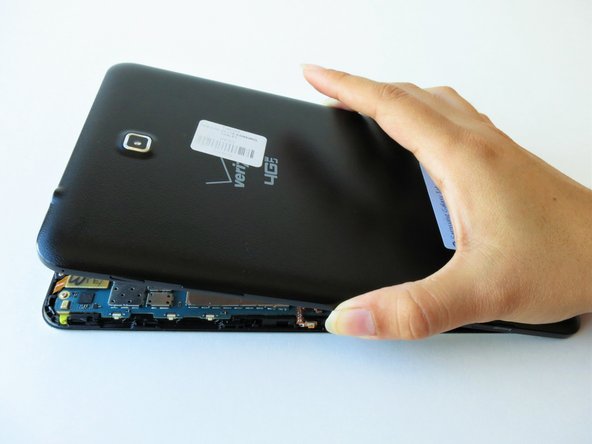
    • At the top of the tablet, nudge the blue plastic opening tool between the back plastic casing and the front panel's metal rim.

    • Do not use excessive force when prying the clips, fastening the casing together, open because they can easily break.

  2. Samsung Galaxy Tab 4 8.0 Verizon Battery Replacement: 2 단계, 이미지 1/2 Samsung Galaxy Tab 4 8.0 Verizon Battery Replacement: 2 단계, 이미지 2/2
    • Continue prying the blue plastic opening tool along the perimeter of the tablet to separate the back plastic casing from the front assembly panel.

    • As right-handers, we found it easiest to move clockwise and use more pressure around the corners to facilitate the process.

    • You might hear several popping noises caused by the plastic clips coming undone.

  3. Samsung Galaxy Tab 4 8.0 Verizon Battery Replacement: 3 단계, 이미지 1/2 Samsung Galaxy Tab 4 8.0 Verizon Battery Replacement: 3 단계, 이미지 2/2
    • To avoid damaging the screen, gently set the tablet with the LCD screen faced down.

    • Firmly grasp the back plastic casing and lift it away from the front assembly panel.

  4. Samsung Galaxy Tab 4 8.0 Verizon Battery Replacement, Battery: 4 단계, 이미지 1/3 Samsung Galaxy Tab 4 8.0 Verizon Battery Replacement, Battery: 4 단계, 이미지 2/3 Samsung Galaxy Tab 4 8.0 Verizon Battery Replacement, Battery: 4 단계, 이미지 3/3
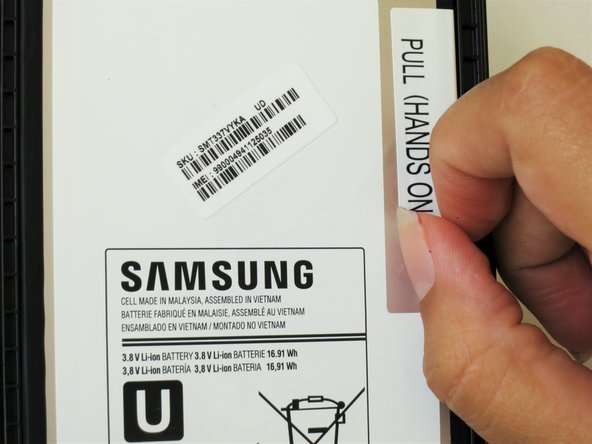
    • Peel up the detachable corner of the white plastic sticker that reads “pull (hands only).”

    • Remove the sticker to form a tab.

  5. Samsung Galaxy Tab 4 8.0 Verizon Battery Replacement: 5 단계, 이미지 1/1
    • Using your thumb and index finger, pinch the tab and pull it up to remove the top right corner of the battery from the front panel assembly.

    • If battery resistance is encountered due to adhesive, use the flat end of a spudger to run in between the battery and the front panel assembly.

    • Do not completely detach the battery just yet, doing so can cause damage to the red and blue cables loacted at the bottom of the battery.

  6. Samsung Galaxy Tab 4 8.0 Verizon Battery Replacement: 6 단계, 이미지 1/2 Samsung Galaxy Tab 4 8.0 Verizon Battery Replacement: 6 단계, 이미지 2/2
    • Starting at the bottom left side of the battery, gently remove the green tape.

    • Salvage the green tape if the replacement battery does not include one.

  7. Samsung Galaxy Tab 4 8.0 Verizon Battery Replacement: 7 단계, 이미지 1/3 Samsung Galaxy Tab 4 8.0 Verizon Battery Replacement: 7 단계, 이미지 2/3 Samsung Galaxy Tab 4 8.0 Verizon Battery Replacement: 7 단계, 이미지 3/3
    • Run the spudger under the battery to disconnect the red and blue cable connector from the circuit.

    • Lift the battery towards you, away from the front panel.

결론

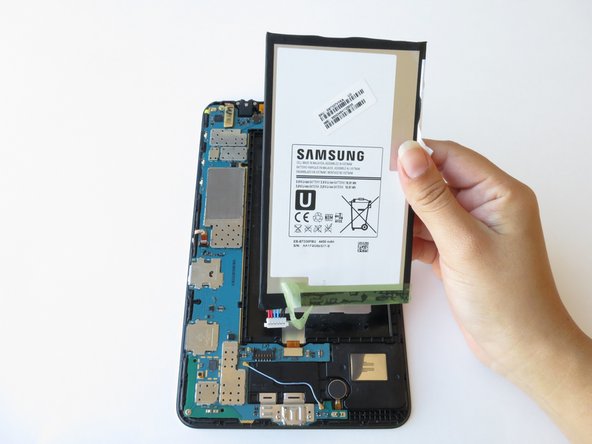
To reassemble your device, follow these instructions in reverse order.

다른 17명이 해당 안내서를 완성하였습니다.

Ofelia Cruz

회원 가입일: 09/14/15

1,119 평판

안내서 5개 작성하였습니다

CSU Fullerton, Team 1-3, Bruce Fall 2015 CSU Fullerton, Team 1-3, Bruce Fall 2015 회원

CSUF-BRUCE-F15S1G3

4 회원들

안내서 12개 작성하였습니다

댓글 3개

Everything in this guide looks pretty good. The only thing I would add to step one is to make sure you remove both the SIM card and the Micro SD card. Failure to do so can result in a broken SIM/SD card, slot or board they are connected to.

Cameron - 답글

Worked great! Would have been better if I had the pry tools though. I am getting them next week :}

Jason Stephens - 답글

In order to open, I did not want to purchase a pry tool so I used a think screwdriver to open abit and inserted an old credit card that made the job without danger.

Carlos Blanquer Bogacz - 답글

댓글 쓰기

조회 통계:

24 시간 전: 0

7일 전: 1

30일 전: 14

전체 시간: 26,223