이 버전에는 잘못된 편집 사항이 있을 수 있습니다. 최신 확인된 스냅샷으로 전환하십시오.
필요한 것
-
이 단계는 번역되지 않았습니다. 번역을 도와주십시오
-
At the top of the tablet, nudge the blue plastic opening tool between the back plastic casing and the front panel's metal rim.
-
-
이 단계는 번역되지 않았습니다. 번역을 도와주십시오
-
Continue prying the blue plastic opening tool along the perimeter of the tablet to separate the back plastic casing from the front assembly panel.
-
-
이 단계는 번역되지 않았습니다. 번역을 도와주십시오
-
To avoid damaging the screen, gently set the tablet with the LCD screen faced down.
-
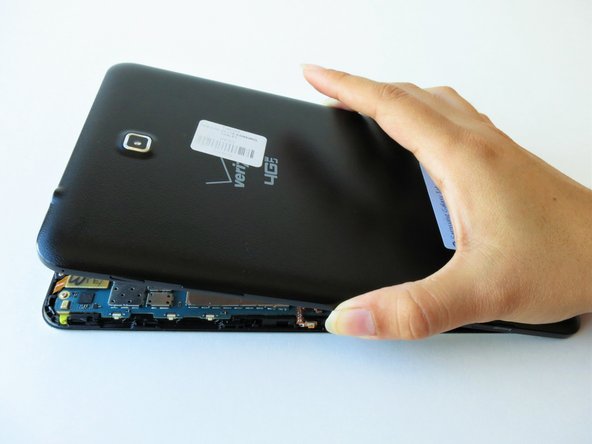
Firmly grasp the back plastic casing and lift it away from the front assembly panel.
-
-
이 단계는 번역되지 않았습니다. 번역을 도와주십시오
-
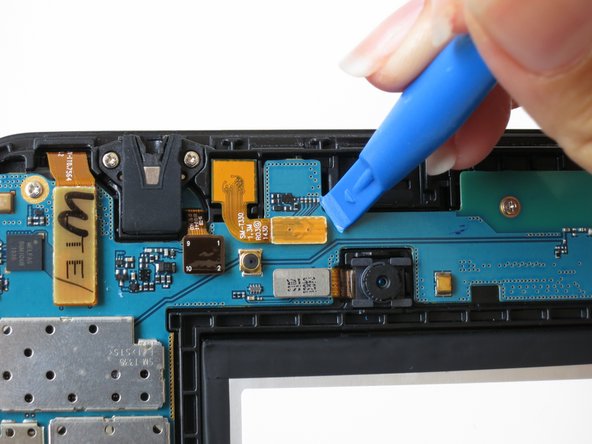
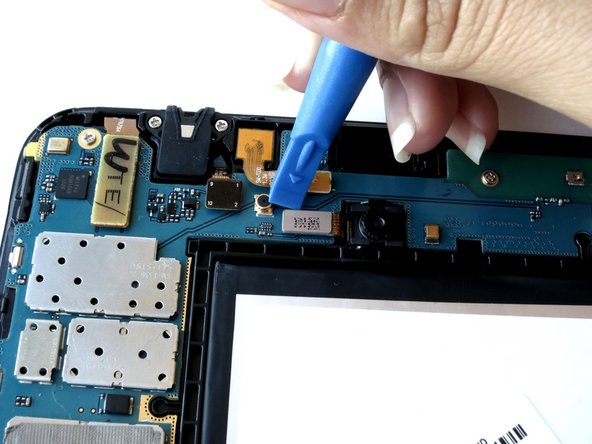
The front camera's ribbon cable is located just above the battery, slightly to the left.
-
Carefully insert the flat end of the blue plastic opening tool under the connector at the end of the ribbon cable.
-
-
이 단계는 번역되지 않았습니다. 번역을 도와주십시오
-
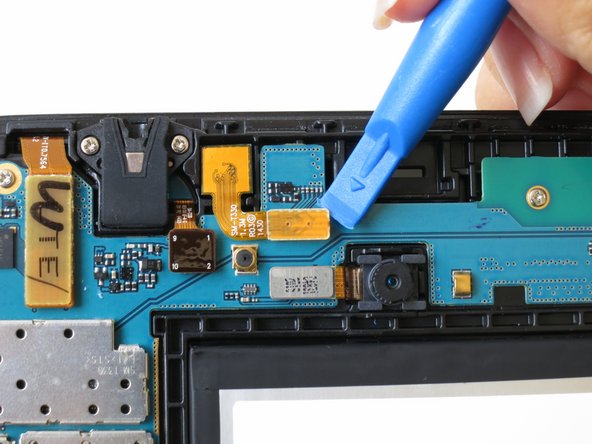
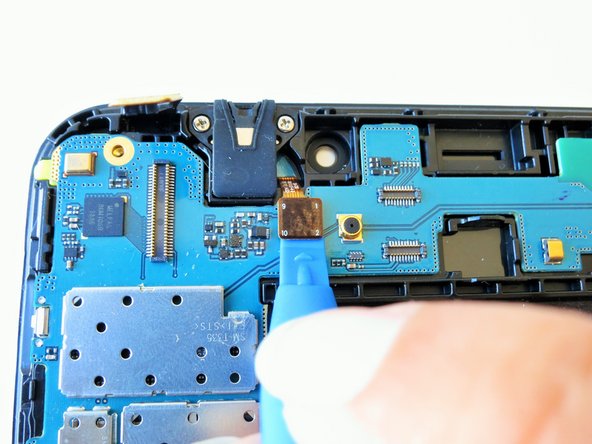
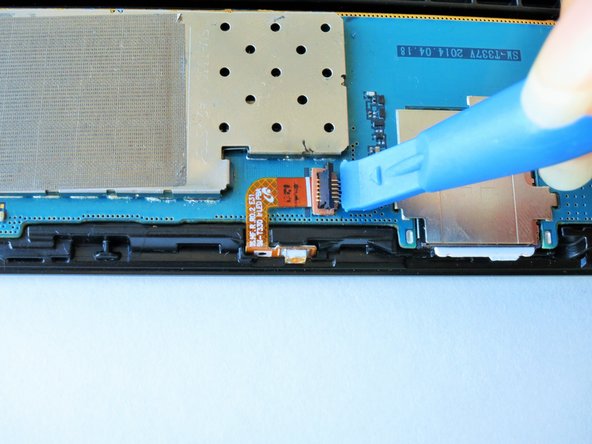
Slightly apply pressure and move the blue plastic opening tool downwards to pop the front camera’s gold rectangular connector from its socket on the motherboard.
-
-
이 단계는 번역되지 않았습니다. 번역을 도와주십시오
-
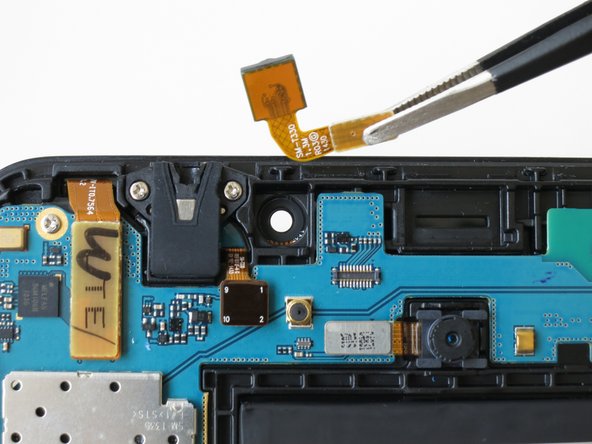
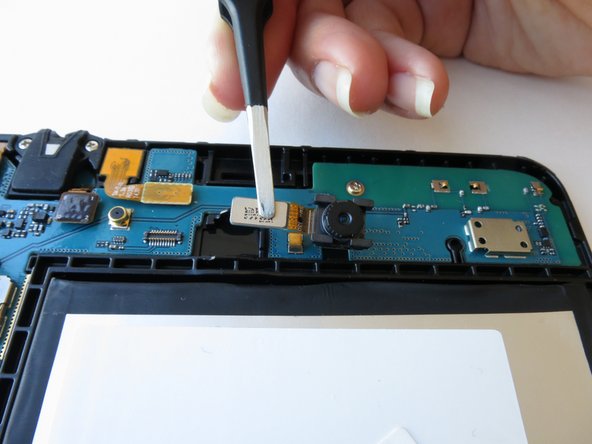
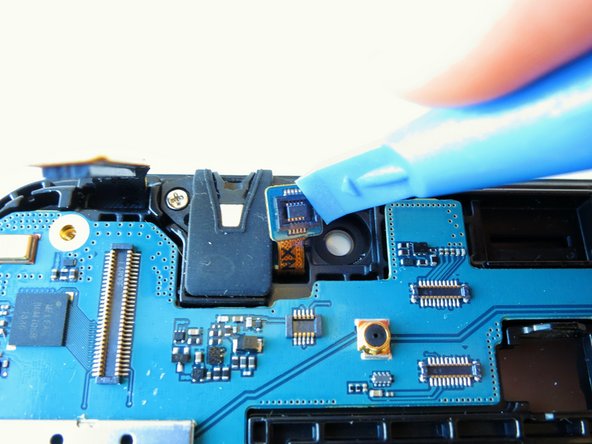
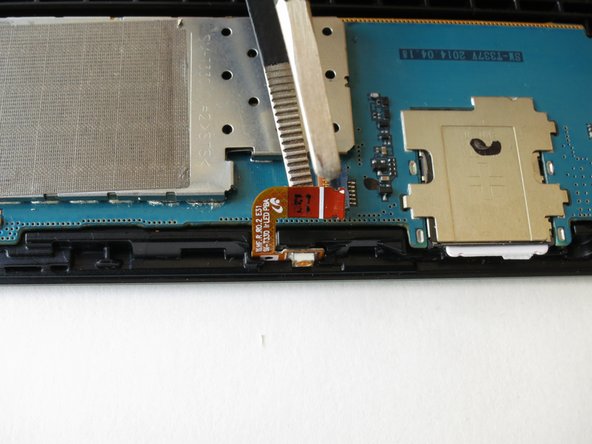
Squeeze the gold rectangular piece with the tweezers to gently lift it from its pit.
-
-
이 단계는 번역되지 않았습니다. 번역을 도와주십시오
-
The back camera will be located near the top of the tablet in the center above the battery.
-
Carefully insert the flat end of the blue plastic opening tool under the metal rectangular end of the back camera’s cable connector.
-
-
이 단계는 번역되지 않았습니다. 번역을 도와주십시오
-
Slightly apply pressure and move the blue plastic opening tool downwards to pop the back camera’s metallic rectangular connector from its socket on the logic board.
-
-
-
이 단계는 번역되지 않았습니다. 번역을 도와주십시오
-
Squeeze the metallic rectangular piece with the tweezers to gently lift it from it's pit.
-
-
이 단계는 번역되지 않았습니다. 번역을 도와주십시오
-
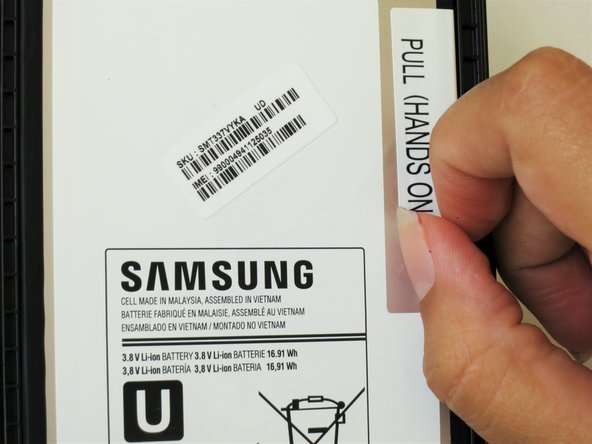
Peel up the detachable corner of the white plastic sticker that reads “pull (hands only).”
-
-
이 단계는 번역되지 않았습니다. 번역을 도와주십시오
-
Using your thumb and index finger, pinch the tab and pull it up to remove the top right corner of the battery from the front panel assembly.
-
-
이 단계는 번역되지 않았습니다. 번역을 도와주십시오
-
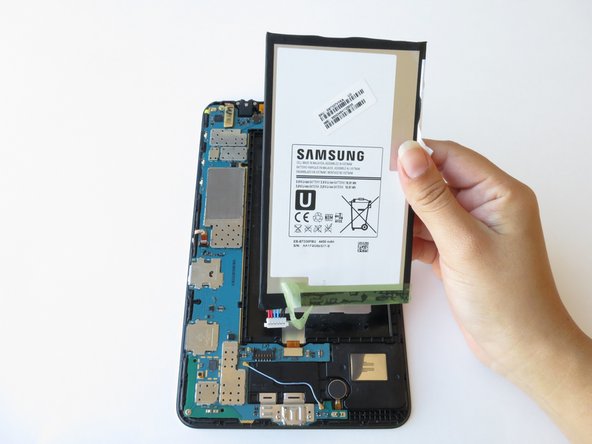
Starting at the bottom left side of the battery, gently remove the green tape.
-
-
이 단계는 번역되지 않았습니다. 번역을 도와주십시오
-
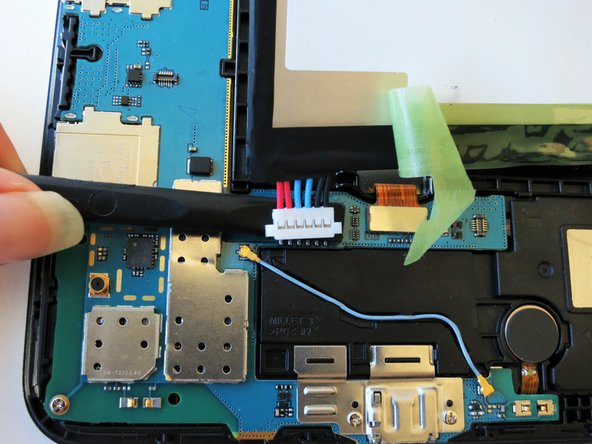
Run the spudger under the battery to disconnect the red and blue cable connector from the circuit.
-
Lift the battery towards you, away from the front panel.
-
-
이 단계는 번역되지 않았습니다. 번역을 도와주십시오
-
Slightly apply pressure and move the blue plastic opening tool downwards to pop the metallic rectangular connector from its socket on the mother board.
-
-
이 단계는 번역되지 않았습니다. 번역을 도와주십시오
-
Slightly apply pressure and move the blue plastic opening tool downwards to pop the gold rectangular connector from its socket on the mother board.
-
-
이 단계는 번역되지 않았습니다. 번역을 도와주십시오
-
Slightly apply pressure and move the blue plastic opening tool downwards to pop the gold square connector from its socket on the mother board.
-
-
이 단계는 번역되지 않았습니다. 번역을 도와주십시오
-
Remove two 2 mm #000 Phillips screws securing the metallic charger port cover to both the logic board and the front panel.
-
-
이 단계는 번역되지 않았습니다. 번역을 도와주십시오
-
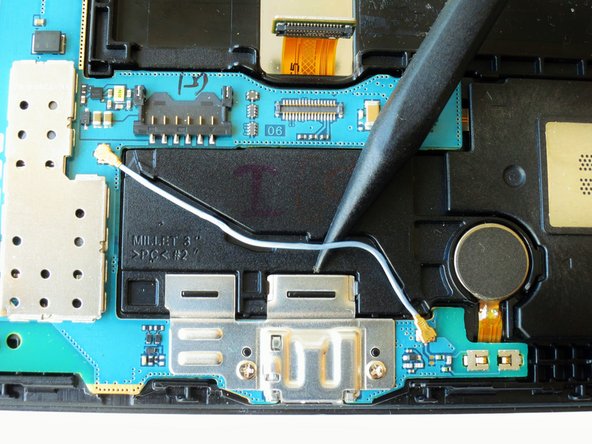
Squeeze the metal charger port cover piece with the tweezers to gently lift it from it's place.
-
-
이 단계는 번역되지 않았습니다. 번역을 도와주십시오
-
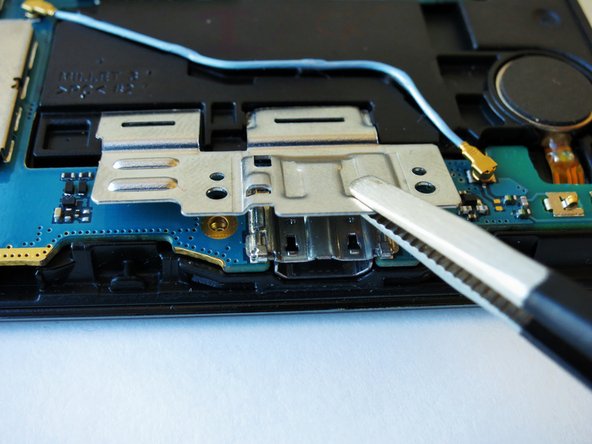
Carefully insert the flat end of the blue plastic opening tool under the black plastic fastener and lift.
-
-
이 단계는 번역되지 않았습니다. 번역을 도와주십시오
-
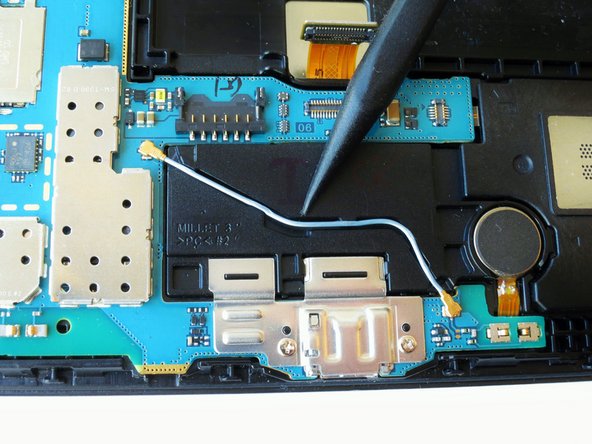
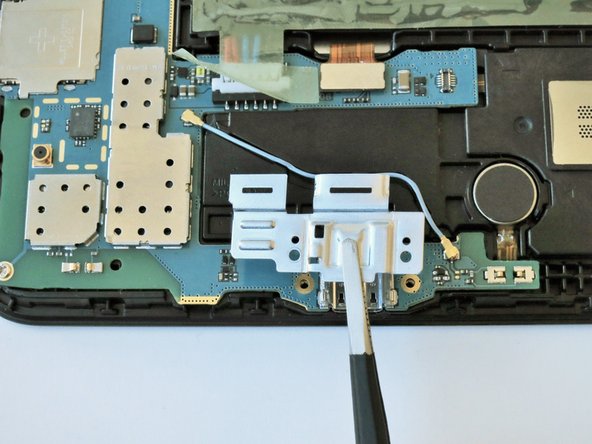
Squeeze the golden cable with the tweezers and gently pull the cable to the left to free the end of the golden cable.
-
-
이 단계는 번역되지 않았습니다. 번역을 도와주십시오
-
Remove three 2 mm #000 Phillips screws securing the mother board to the front panel.
-
-
이 단계는 번역되지 않았습니다. 번역을 도와주십시오
-
Using your hands, hold the opposite ends of the mother board corners, and lift.
-


다른 3명이 해당 안내서를 완성하였습니다.
팀

CSU Fullerton, Team 1-3, Bruce Fall 2015 CSU Fullerton, Team 1-3, Bruce Fall 2015 회원
CSUF-BRUCE-F15S1G3
4 회원들
안내서 12개 작성하였습니다