주요 콘텐츠로 건너뛰기

Samsung Galaxy Tab 8.9 Rear Facing Camera Replacement

필요한 것

  1. Samsung Galaxy Tab 8.9 Rear Facing Camera Replacement, Insert Opening tool: 1 단계, 이미지 1/1
    • Insert a plastic opening tool between the back cover and screen of the Samsung Galaxy Tab 8.9 (as indicated in the photograph).

  2. Samsung Galaxy Tab 8.9 Rear Facing Camera Replacement, Insert second tool: 2 단계, 이미지 1/1
    • Insert a second plastic opening tool 6 cm (~2.4 inches) away from the first tool.

  3. Samsung Galaxy Tab 8.9 Rear Facing Camera Replacement: 3 단계, 이미지 1/1
    • Slide the second plastic opening tool along the edge of the device to separate the back cover.

  4. Samsung Galaxy Tab 8.9 Rear Facing Camera Replacement: 4 단계, 이미지 1/1
    • Using your hands, remove the back cover.

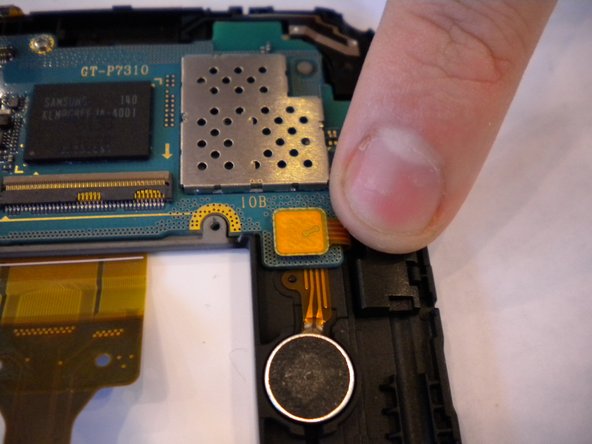
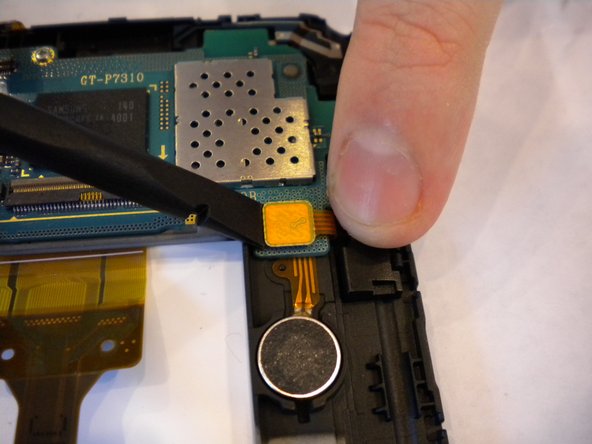
  5. Samsung Galaxy Tab 8.9 Rear Facing Camera Replacement, Motherboard: 5 단계, 이미지 1/3 Samsung Galaxy Tab 8.9 Rear Facing Camera Replacement, Motherboard: 5 단계, 이미지 2/3 Samsung Galaxy Tab 8.9 Rear Facing Camera Replacement, Motherboard: 5 단계, 이미지 3/3
    • Locate the motherboard and 5 connectors on it.

    • Pry up and detach the connector from the motherboard using the flat edge of the spudger.

    • Repeat for the 4 remaining connectors.

  6. Samsung Galaxy Tab 8.9 Rear Facing Camera Replacement: 6 단계, 이미지 1/3 Samsung Galaxy Tab 8.9 Rear Facing Camera Replacement: 6 단계, 이미지 2/3 Samsung Galaxy Tab 8.9 Rear Facing Camera Replacement: 6 단계, 이미지 3/3
    • Using the Phillips #00 screwdriver, unscrew the 3 screws (1mm) that are located near:

    • Camera

    • Power and volume buttons

    • Tilt sensor

  7. Samsung Galaxy Tab 8.9 Rear Facing Camera Replacement: 7 단계, 이미지 1/3 Samsung Galaxy Tab 8.9 Rear Facing Camera Replacement: 7 단계, 이미지 2/3 Samsung Galaxy Tab 8.9 Rear Facing Camera Replacement: 7 단계, 이미지 3/3
    • Using the flat edge of the spudger, pry and lift up the motherboard.

  8. Samsung Galaxy Tab 8.9 Rear Facing Camera Replacement: 8 단계, 이미지 1/2 Samsung Galaxy Tab 8.9 Rear Facing Camera Replacement: 8 단계, 이미지 2/2
    • Pull away the motherboard from the housing.

  9. Samsung Galaxy Tab 8.9 Rear Facing Camera Replacement, Flip Motherboard: 9 단계, 이미지 1/1
    • After removing motherboard from device, flip motherboard over.

  10. Samsung Galaxy Tab 8.9 Rear Facing Camera Replacement, Locate Camera: 10 단계, 이미지 1/1
    • Camera is located in the center of motherboard.

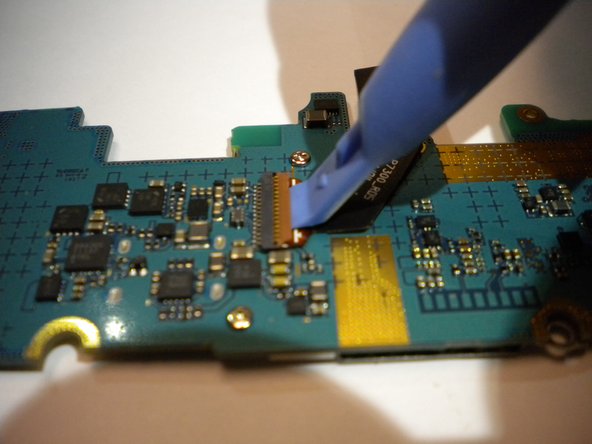
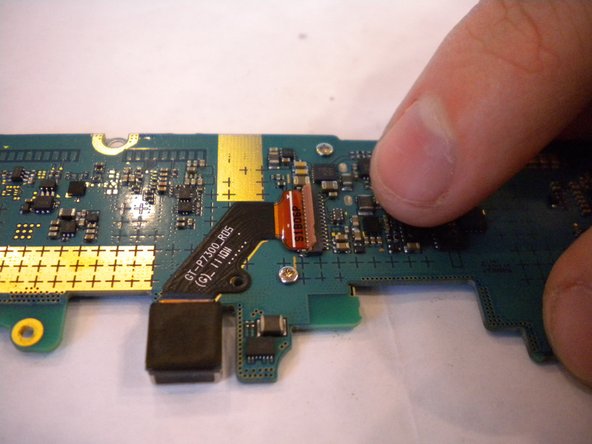
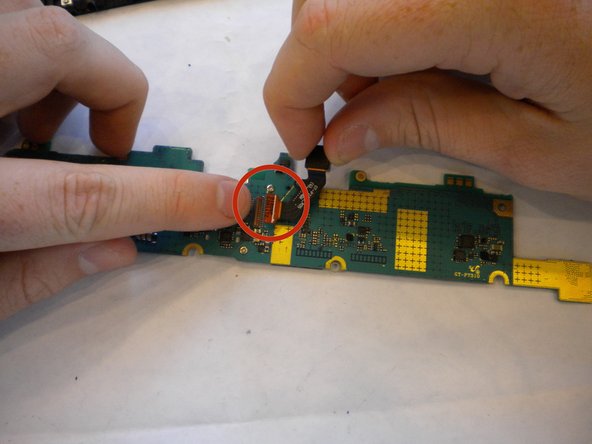
  11. Samsung Galaxy Tab 8.9 Rear Facing Camera Replacement, Disconnect Flex Ribbon: 11 단계, 이미지 1/3 Samsung Galaxy Tab 8.9 Rear Facing Camera Replacement, Disconnect Flex Ribbon: 11 단계, 이미지 2/3 Samsung Galaxy Tab 8.9 Rear Facing Camera Replacement, Disconnect Flex Ribbon: 11 단계, 이미지 3/3
    • Using flat side of Spudger, lift orange tab connecting the flex ribbon of the camera to the motherboard.

  12. Samsung Galaxy Tab 8.9 Rear Facing Camera Replacement, Remove Camera: 12 단계, 이미지 1/2 Samsung Galaxy Tab 8.9 Rear Facing Camera Replacement, Remove Camera: 12 단계, 이미지 2/2
    • Remove the camera from the motherboard.

결론

To reassemble your device, follow these instructions in reverse order.

Aleezee True

회원 가입일: 09/30/14

532 평판

안내서 3개 작성하였습니다

USF Tampa, Team 11-4, Blackwell Fall 2014 USF Tampa, Team 11-4, Blackwell Fall 2014 회원

USFT-BLACKWELL-F14S11G4

4 회원들

안내서 10개 작성하였습니다

댓글 0개

댓글 쓰기

조회 통계:

24 시간 전: 0

7일 전: 0

30일 전: 1

전체 시간: 301