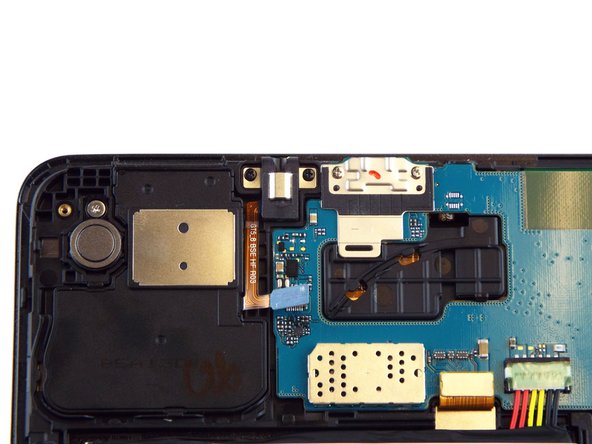
주요 콘텐츠로 건너뛰기

Samsung Galaxy Tab A Earphone Jack Replacement

필요한 것

  1. Samsung Galaxy Tab A Earphone Jack Replacement, Earphone Jack: 1 단계, 이미지 1/1
    • Make sure the device is turned off before attempting to disassemble it.

    • At the top portion of the memory card slot, use the small metal spudger to create separation between the back cover and the rest of the device.

    • The small metal spudger is only used to create separation between the back cover and the rest of the device, not to remove the back cover.

  2. Samsung Galaxy Tab A Earphone Jack Replacement: 2 단계, 이미지 1/2 Samsung Galaxy Tab A Earphone Jack Replacement: 2 단계, 이미지 2/2
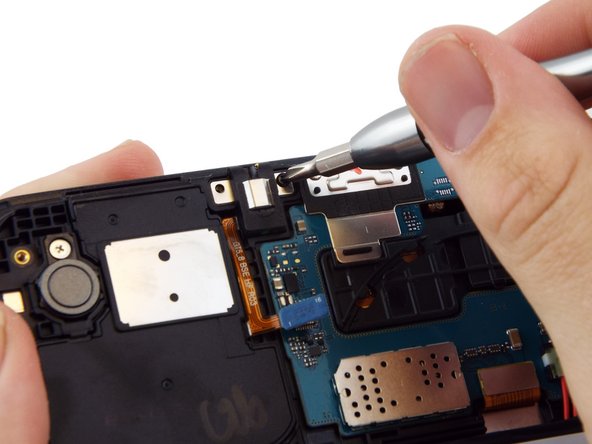
    • Use the intermediate metal spudger in place of the small metal spudger to remove the back cover. This is done by sliding the intermediate metal spudger around the perimeter of the device, beginning at the top portion of the memory card slot.

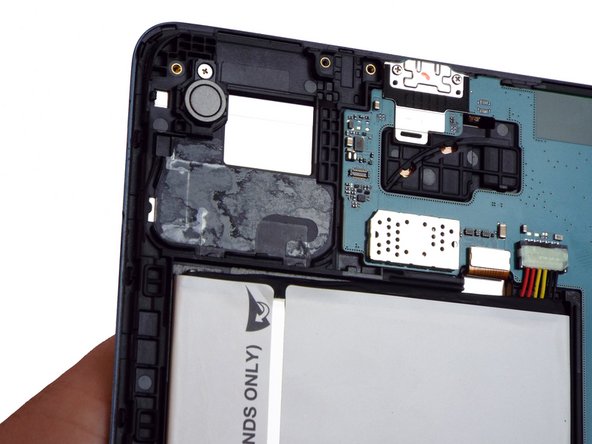
    • The second picture shows the internal portion of the device once the back cover is removed.

  3. Samsung Galaxy Tab A Earphone Jack Replacement: 3 단계, 이미지 1/2 Samsung Galaxy Tab A Earphone Jack Replacement: 3 단계, 이미지 2/2
    • Use the spudger to disconnect the earphone jack from the motherboard.

    • To prevent any damage to either the earphone jack or motherboard, it is recommend to remove the jack at its blue rubber portion.

    • The connected and disconnected earphone jack is shown in the first and second picture, respectively.

  4. Samsung Galaxy Tab A Earphone Jack Replacement: 4 단계, 이미지 1/2 Samsung Galaxy Tab A Earphone Jack Replacement: 4 단계, 이미지 2/2
    • Use the PH0 screwdriver bit to remove the 2.5 mm screws attaching earphone jack to the rest of the device.

    • The second picture shows this process in action.

  5. Samsung Galaxy Tab A Earphone Jack Replacement: 5 단계, 이미지 1/3 Samsung Galaxy Tab A Earphone Jack Replacement: 5 단계, 이미지 2/3 Samsung Galaxy Tab A Earphone Jack Replacement: 5 단계, 이미지 3/3
    • Use the spudger to fully remove the earphone jack from the rest of the device.

    • The second picture shows what the device should look like once the earphone jack has been removed.

결론

To reassemble your device, follow these instructions in reverse order.

다른 3명이 해당 안내서를 완성하였습니다.

Michael Wozny

회원 가입일: 02/04/16

3,690 평판

안내서 5개 작성하였습니다

USF Tampa, Team 17-4, Blackwell Winter 2016 USF Tampa, Team 17-4, Blackwell Winter 2016 회원

USFT-BLACKWELL-W16S17G4

4 회원들

안내서 11개 작성하였습니다

댓글 0개

댓글 쓰기

조회 통계:

24 시간 전: 1

7일 전: 3

30일 전: 14

전체 시간: 5,201