주요 콘텐츠로 건너뛰기

Samsung Galaxy Tab S2 9.7 Verizon Tablet Base Case Replacement

단지 전제 조건
이 안내서는 다른 가이드의 선행 작업으로 사용하기 위한 것입니다. 그 자체로는 불완전합니다.

필요한 것

  1. Samsung Galaxy Tab S2 9.7 Verizon Tablet Base Case Replacement, Back Case: 1 단계, 이미지 1/1
    • Turn off the tablet before disassembly.

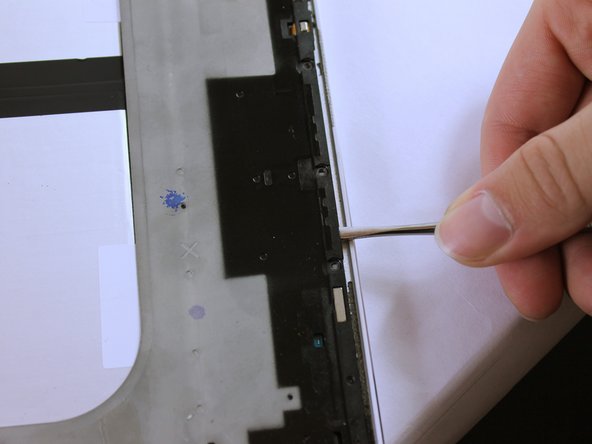
    • Heat up an iOpener for 30 seconds and place on all four seams of the screen. A heat gun can be used as well.

  2. Samsung Galaxy Tab S2 9.7 Verizon Tablet Base Case Replacement: 2 단계, 이미지 1/2 Samsung Galaxy Tab S2 9.7 Verizon Tablet Base Case Replacement: 2 단계, 이미지 2/2
    • The glue is now melted, so using the metal spudger shown, pry open all sides of the tablet.

    • When prying open near the home and touch screen buttons, use a suction cup.

    • Do not stick the metal spudger past these buttons as this may damage your device.

  3. Samsung Galaxy Tab S2 9.7 Verizon Tablet Base Case Replacement: 3 단계, 이미지 1/2 Samsung Galaxy Tab S2 9.7 Verizon Tablet Base Case Replacement: 3 단계, 이미지 2/2
    • Carefully lift up the screen.

    • There is a ribbon cable attached. Lifting the screen too quickly can damage the cable.

  4. Samsung Galaxy Tab S2 9.7 Verizon Tablet Base Case Replacement: 4 단계, 이미지 1/3 Samsung Galaxy Tab S2 9.7 Verizon Tablet Base Case Replacement: 4 단계, 이미지 2/3 Samsung Galaxy Tab S2 9.7 Verizon Tablet Base Case Replacement: 4 단계, 이미지 3/3
    • Remove the ribbon cable using the Metal Spudger.

    • The ribbon may be taped underneath to the grey frame. Gently lift the ribbon to untape it.

  5. Samsung Galaxy Tab S2 9.7 Verizon Tablet Base Case Replacement: 5 단계, 이미지 1/2 Samsung Galaxy Tab S2 9.7 Verizon Tablet Base Case Replacement: 5 단계, 이미지 2/2
    • Remove all seventeen 3 mm screws using a PH000 Phillips screwdriver.

  6. Samsung Galaxy Tab S2 9.7 Verizon Tablet Base Case Replacement: 6 단계, 이미지 1/3 Samsung Galaxy Tab S2 9.7 Verizon Tablet Base Case Replacement: 6 단계, 이미지 2/3 Samsung Galaxy Tab S2 9.7 Verizon Tablet Base Case Replacement: 6 단계, 이미지 3/3
    • Lift the black frame using the two Metal Spudgers shown.

    • On the third picture, there is a Sim Card component that is connected to the frame and back cover. As you lift up the frame, it'll detach. This is normal.

  7. Samsung Galaxy Tab S2 9.7 Verizon Tablet Base Case Replacement: 7 단계, 이미지 1/1
    • Once lifted, flip the grey frame over.

    • This component connects to the sim card.

    • Remember to click this component back into place when reassembling the tablet.

결론

To reassemble your device, follow these instructions in reverse order.

Divya Prabakaran

회원 가입일: 02/20/17

633 평판

안내서 6개 작성하였습니다

USF Tampa, Team S2-G4, Sullivan Spring 2017 USF Tampa, Team S2-G4, Sullivan Spring 2017 회원

USFT-SULLIVAN-S17S2G4

4 회원들

안내서 12개 작성하였습니다

댓글 0개

댓글 쓰기

조회 통계:

24 시간 전: 0

7일 전: 0

30일 전: 0

전체 시간: 224