주요 콘텐츠로 건너뛰기

Samsung Gravity TXT Plastic Back Frame Replacement

필요한 것

  1. Samsung Gravity TXT Plastic Back Frame Replacement, Battery: 1 단계, 이미지 1/2 Samsung Gravity TXT Plastic Back Frame Replacement, Battery: 1 단계, 이미지 2/2
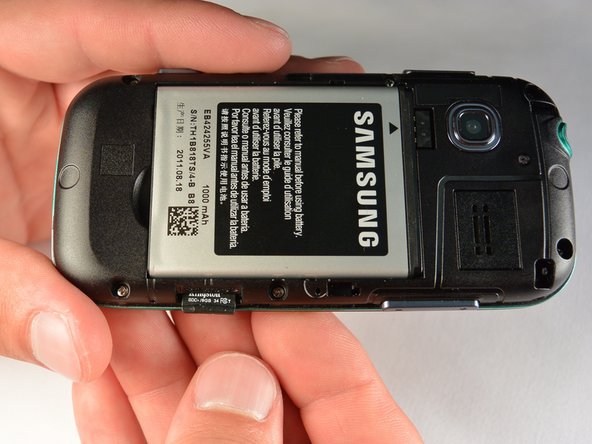
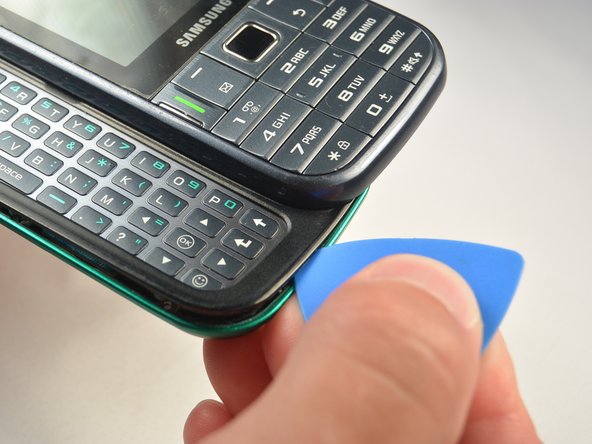
    • Pry the back cover off with a plastic opening tool, or your fingernail, in the indentation on the bottom of the device.

  2. Samsung Gravity TXT Plastic Back Frame Replacement: 2 단계, 이미지 1/1
    • Lift the back cover away from the main body of the phone.

  3. Samsung Gravity TXT Plastic Back Frame Replacement: 3 단계, 이미지 1/1
    • Insert your finger in the groove below the battery.

    • Press the battery toward the audio jack while lifting upward and away from the phone.

    • Remember to place the battery back with the copper contacts on the battery lined up with those on the phone.

  4. Samsung Gravity TXT Plastic Back Frame Replacement, SIM Card: 4 단계, 이미지 1/3 Samsung Gravity TXT Plastic Back Frame Replacement, SIM Card: 4 단계, 이미지 2/3 Samsung Gravity TXT Plastic Back Frame Replacement, SIM Card: 4 단계, 이미지 3/3
    • Using your finger, push the SIM Card down and slide out of the slot.

    • Slide the SIM card out enough to grab it firmly.

    • Remove the SIM card away from the phone.

    • Follow the visual on the bottom of the SIM card slot to put the SIM card back in the correct orientation.

    • When sliding the SIM Card back in the slot, make sure the card goes all the way in the slot until it hits the stopper.

  5. Samsung Gravity TXT Plastic Back Frame Replacement, microSD Card: 5 단계, 이미지 1/3 Samsung Gravity TXT Plastic Back Frame Replacement, microSD Card: 5 단계, 이미지 2/3 Samsung Gravity TXT Plastic Back Frame Replacement, microSD Card: 5 단계, 이미지 3/3
    • Using your fingernail, push the microSD card slightly deeper into the slot, until you hear a click.

    • The removal of the battery is not required for this operation; therefore, step 3 can be skipped if just replacing the microSD card.

    • After the click, release the microSD card to allow it to pop out.

    • Remove the microSD card from its slot

    • When placing the microSD card back in the phone, make sure the card clicks in place.

  6. Samsung Gravity TXT Plastic Back Frame Replacement, Plastic Back Frame: 6 단계, 이미지 1/1
    • Remove the six 3 mm #00 Phillips screws in the plastic back frame.

  7. Samsung Gravity TXT Plastic Back Frame Replacement: 7 단계, 이미지 1/3 Samsung Gravity TXT Plastic Back Frame Replacement: 7 단계, 이미지 2/3 Samsung Gravity TXT Plastic Back Frame Replacement: 7 단계, 이미지 3/3
    • Slide the keyboard out.

    • Use a Jimmy to separate a small segment of the plastic back frame from rest of the phone.

    • Starting at the bottom of the keyboard is recommended.

    • Slide an opening pick around the rest of the seam, starting at the gap just created with the Jimmy.

    • You will have to slide the keyboard back in to separate the back frame from the top have of the keyboard slider.

    • Lift the plastic back frame away.

결론

To reassemble your device, follow these instructions in reverse order.

Josh Brown

회원 가입일: 07/07/15

222 평판

안내서 2개 작성하였습니다

IUPUI, Team 1-1, Renguette SU 2015 IUPUI, Team 1-1, Renguette SU 2015 회원

IUPUI-RENGUETTE-SU15S1G1

5 회원들

안내서 16개 작성하였습니다

댓글 0개

댓글 쓰기

조회 통계:

24 시간 전: 0

7일 전: 1

30일 전: 2

전체 시간: 212