주요 콘텐츠로 건너뛰기

Samsung NP-NC10-KA02US RAM Replacement

필요한 것

  1. Samsung NP-NC10-KA02US RAM Replacement, Battery: 1 단계, 이미지 1/2 Samsung NP-NC10-KA02US RAM Replacement, Battery: 1 단계, 이미지 2/2
    • Locate the external battery on the bottom side of the device.

    • Locate the tab on the right side of the battery.

    • Shift the tab to the left.

  2. Samsung NP-NC10-KA02US RAM Replacement: 2 단계, 이미지 1/1
    • Locate the tab on the left side of the device's battery.

    • Push the left tab to the right.

  3. Samsung NP-NC10-KA02US RAM Replacement: 3 단계, 이미지 1/1
    • Pull the battery up from the device.

  4. Samsung NP-NC10-KA02US RAM Replacement, Back Plate: 4 단계, 이미지 1/1
    • Locate the 14, 3.93 mm, screws that need to be removed on the base of the computer.

  5. Samsung NP-NC10-KA02US RAM Replacement: 5 단계, 이미지 1/1
    • Remove all 14 of the 3.93 mm screws using a PH1 screw bit.

  6. Samsung NP-NC10-KA02US RAM Replacement: 6 단계, 이미지 1/2 Samsung NP-NC10-KA02US RAM Replacement: 6 단계, 이미지 2/2
    • Using two plastic opening tools remove the back plate.

    • These plastic opening tools have a flat-head that extends as a wedge which are utilized to separate pressure fit plastic components without causing any damage to them.

    • The back plate is now removed exposing all of the hardware components.

  7. Samsung NP-NC10-KA02US RAM Replacement, Fan: 7 단계, 이미지 1/2 Samsung NP-NC10-KA02US RAM Replacement, Fan: 7 단계, 이미지 2/2
    • Remove the three screws holding the fan using a 3.9mm screwdriver.

    • All three screws need to be removed in order to continue on to next step.

  8. Samsung NP-NC10-KA02US RAM Replacement: 8 단계, 이미지 1/1
    • Unplug the wires connected to the fan using a plastic opening tool.

  9. Samsung NP-NC10-KA02US RAM Replacement: 9 단계, 이미지 1/1
    • You are now able to carefully detach the fan from the base.

  10. Samsung NP-NC10-KA02US RAM Replacement, RAM: 10 단계, 이미지 1/1
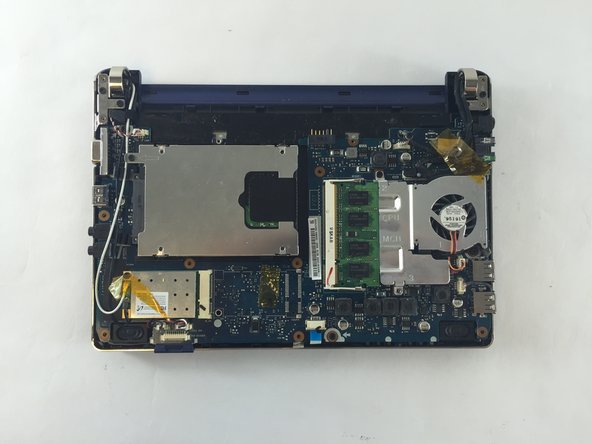
    • After detaching the fan, you are now able to remove the RAM by extending the two side bars out

    • During this process, the computer needs to be shut off. Other components could be damaged and the computer would not be able to recognize the RAM properly.

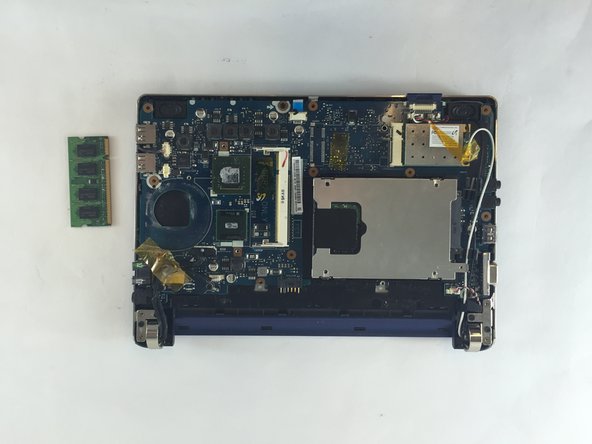
  11. Samsung NP-NC10-KA02US RAM Replacement: 11 단계, 이미지 1/2 Samsung NP-NC10-KA02US RAM Replacement: 11 단계, 이미지 2/2
    • With the bars extended, you are now able to slide the RAM off the base.

결론

To reassemble your device, follow these instructions in reverse order.

다른 3명이 해당 안내서를 완성하였습니다.

JHOAN USECHE

회원 가입일: 10/03/16

372 평판

안내서 2개 작성하였습니다

USF Tampa, Team 1-1, Sullivan Fall 2016 USF Tampa, Team 1-1, Sullivan Fall 2016 회원

USFT-SULLIVAN-F16S1G1

3 회원들

안내서 6개 작성하였습니다

댓글 0개

댓글 쓰기

조회 통계:

24 시간 전: 0

7일 전: 0

30일 전: 6

전체 시간: 380