이 버전에는 잘못된 편집 사항이 있을 수 있습니다. 최신 확인된 스냅샷으로 전환하십시오.
필요한 것
-
이 단계는 번역되지 않았습니다. 번역을 도와주십시오
-
Push both tabs away from the center of the device.
-
While both are in the fully unlocked position, slide the battery out.
-
-
-
이 단계는 번역되지 않았습니다. 번역을 도와주십시오
-
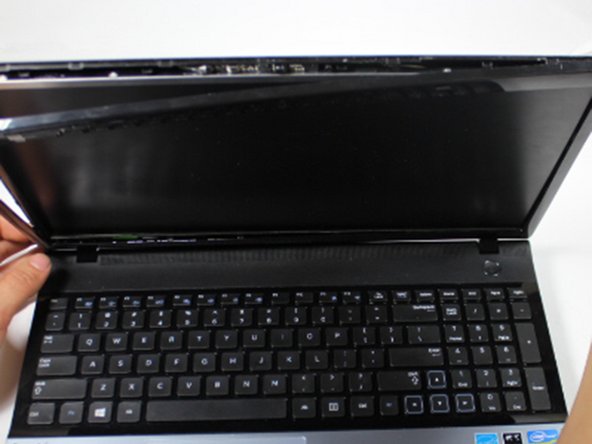
Turn the laptop over and open it so that you can see the keyboard and screen.
-
Using a Phillips #000 screwdriver, remove the two 4 mm Phillips #8 screws that are under the black covers on the front of your screen.
-
-
이 단계는 번역되지 않았습니다. 번역을 도와주십시오
-
Insert the plastic opening tool into the seam on the top of the screen.
-
Use the plastic opening tool to pop open the clasps that keep the casing on the screen.
-
Follow this seam around the laptop's screen with the plastic opening tool until the plastic cover comes off.
-
-
이 단계는 번역되지 않았습니다. 번역을 도와주십시오
-
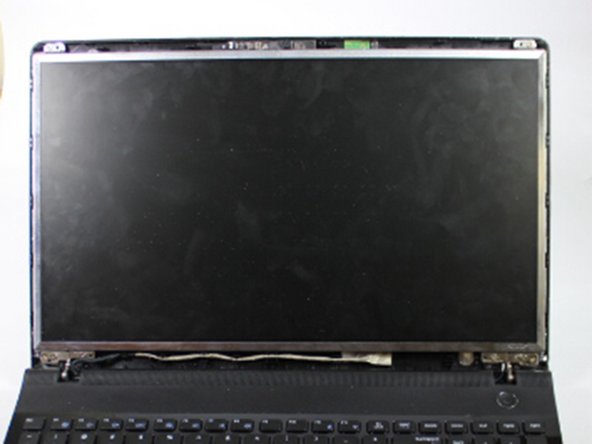
Using a Phillips #000 screwdriver, remove the top two 4 mm Phillips #8 screws that join the LCD screen to the plastic casing.
-
Using the same screwdriver, remove the bottom four 4 mm Phillips #8 screws that mount the screen onto the base of the laptop.
-
-
이 단계는 번역되지 않았습니다. 번역을 도와주십시오
-
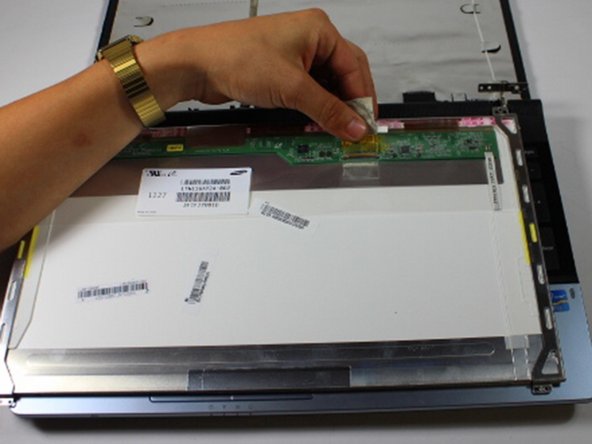
Gently lay the LCD on the keyboard, and lay down the back panel of the screen as well. They are not attached and will separate easily.
-
Remove the tape that secures the video connector to the LCD.
-
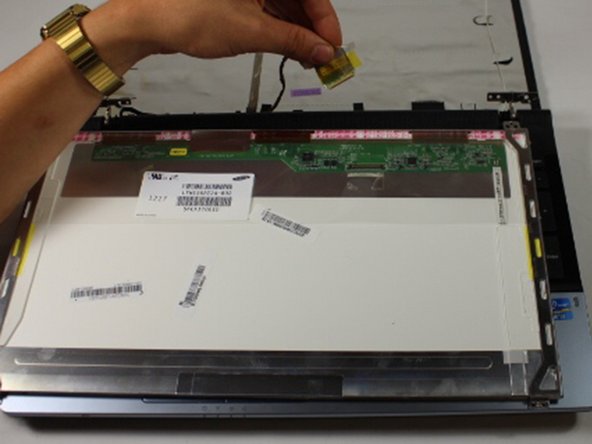
While maintaining a firm grip on the LCD, grasp the video connector at its base, and pull it away from you.
-


다른 10명이 해당 안내서를 완성하였습니다.
팀

Baylor, Team 10-13, Williams Fall 2015 Baylor, Team 10-13, Williams Fall 2015 회원
BU-WILLIAMS-F15S10G13
3 회원들
안내서 4개 작성하였습니다