주요 콘텐츠로 건너뛰기

Samsung NX3000 LCD Replacement

필요한 것

  1. Samsung NX3000 LCD Replacement, Battery: 1 단계, 이미지 1/3 Samsung NX3000 LCD Replacement, Battery: 1 단계, 이미지 2/3 Samsung NX3000 LCD Replacement, Battery: 1 단계, 이미지 3/3
    • Turn the camera upside down. Only remove the lens if you have to in order to access the battery compartment, as dust particles could easily enter the main body and fall onto the delicate sensor.

    • Slide the button to the left to open the battery compartment.

    • Push the blue button up to release the battery.

    • The battery is not shown in these photos.

  2. Samsung NX3000 LCD Replacement, Lens Assembly: 2 단계, 이미지 1/2 Samsung NX3000 LCD Replacement, Lens Assembly: 2 단계, 이미지 2/2
    • Remove the four 7.3 mm Phillips screws from the front of the lens assembly.

    • Remove the silver ring with tweezers.

  3. Samsung NX3000 LCD Replacement: 3 단계, 이미지 1/2 Samsung NX3000 LCD Replacement: 3 단계, 이미지 2/2
    • Use tweezers to remove the black plastic ring and small metal ring inside the lens assembly.

  4. Samsung NX3000 LCD Replacement: 4 단계, 이미지 1/3 Samsung NX3000 LCD Replacement: 4 단계, 이미지 2/3 Samsung NX3000 LCD Replacement: 4 단계, 이미지 3/3
    • Use tweezers to lift the pyramid screw and spring from the lens assembly.

  5. Samsung NX3000 LCD Replacement, Back Case: 5 단계, 이미지 1/2 Samsung NX3000 LCD Replacement, Back Case: 5 단계, 이미지 2/2
    • Remove the three 4.3 mm Phillips screws from the bottom of the camera.

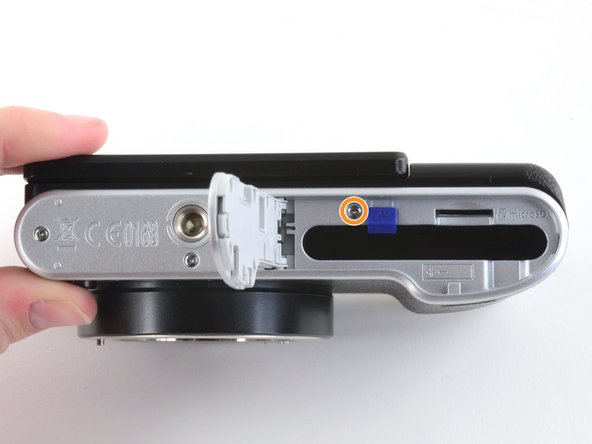
    • Remove the 4.3 mm Phillips screw hiding inside the battery compartment.

  6. Samsung NX3000 LCD Replacement: 6 단계, 이미지 1/2 Samsung NX3000 LCD Replacement: 6 단계, 이미지 2/2
    • Remove the 4.2 mm Phillips screw from the left handgrip.

    • Remove the two 4.2 mm Phillips screws from the right handgrip.

  7. Samsung NX3000 LCD Replacement: 7 단계, 이미지 1/2 Samsung NX3000 LCD Replacement: 7 단계, 이미지 2/2
    • Use tweezers to remove the metal shield from the external flash mount.

    You have to lift the front and then slide back

    Anthony Hunter - 답글

  8. Samsung NX3000 LCD Replacement: 8 단계, 이미지 1/1
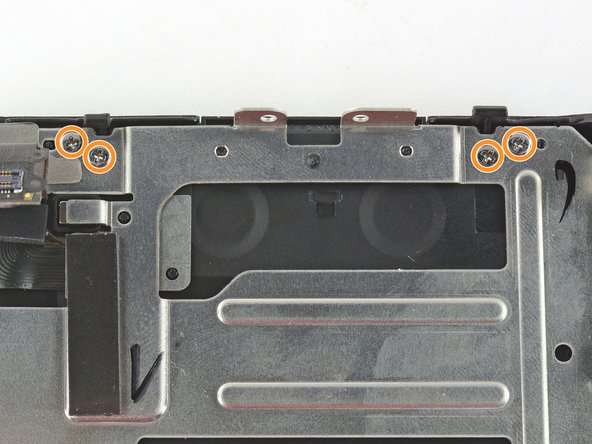
    • Remove the four 5 mm Phillips screws from the external flash mount .

  9. Samsung NX3000 LCD Replacement: 9 단계, 이미지 1/2 Samsung NX3000 LCD Replacement: 9 단계, 이미지 2/2
    • Remove the external flash mount.

  10. Samsung NX3000 LCD Replacement: 10 단계, 이미지 1/2 Samsung NX3000 LCD Replacement: 10 단계, 이미지 2/2
    • Slowly pull the bottom of the back case away from the camera.

    • Do not attempt to remove the back case as it is attached to the motherboard by a ribbon cable.

  11. Samsung NX3000 LCD Replacement: 11 단계, 이미지 1/3 Samsung NX3000 LCD Replacement: 11 단계, 이미지 2/3 Samsung NX3000 LCD Replacement: 11 단계, 이미지 3/3
    • Use the flat end of a spudger to pry the flat topped connector straight up from the motherboard.

    • Remove the back case.

  12. Samsung NX3000 LCD Replacement, LCD: 12 단계, 이미지 1/3 Samsung NX3000 LCD Replacement, LCD: 12 단계, 이미지 2/3 Samsung NX3000 LCD Replacement, LCD: 12 단계, 이미지 3/3
    • To remove the metal shield on the back case, remove the following screws:

    • Five black 4.2 mm Phillips screws .

    • Four silver 5.3 mm Phillips screws.

  13. Samsung NX3000 LCD Replacement: 13 단계, 이미지 1/3 Samsung NX3000 LCD Replacement: 13 단계, 이미지 2/3 Samsung NX3000 LCD Replacement: 13 단계, 이미지 3/3
    • Insert the pointed end of a spudger into the whole on the ribbon cable holding the button panel to the back case.

    • Remove the button panel.

  14. Samsung NX3000 LCD Replacement: 14 단계, 이미지 1/2 Samsung NX3000 LCD Replacement: 14 단계, 이미지 2/2
    • Use a spudger to peel back the LCD ribbon from the back case.

    • The ribbon is held in place by adhesive.

  15. Samsung NX3000 LCD Replacement: 15 단계, 이미지 1/2 Samsung NX3000 LCD Replacement: 15 단계, 이미지 2/2
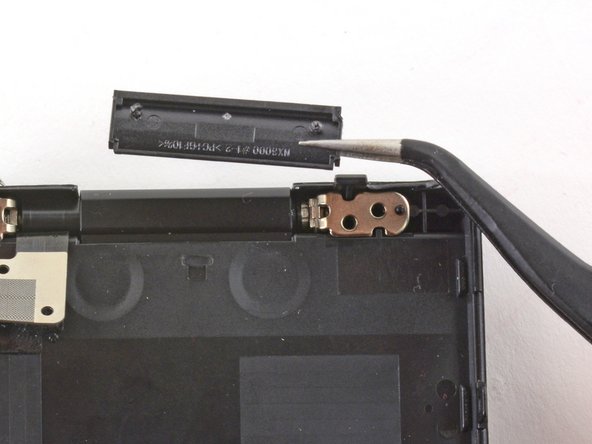
    • Use tweezers to remove the plastic cover on the LCD hinge.

  16. Samsung NX3000 LCD Replacement: 16 단계, 이미지 1/2 Samsung NX3000 LCD Replacement: 16 단계, 이미지 2/2
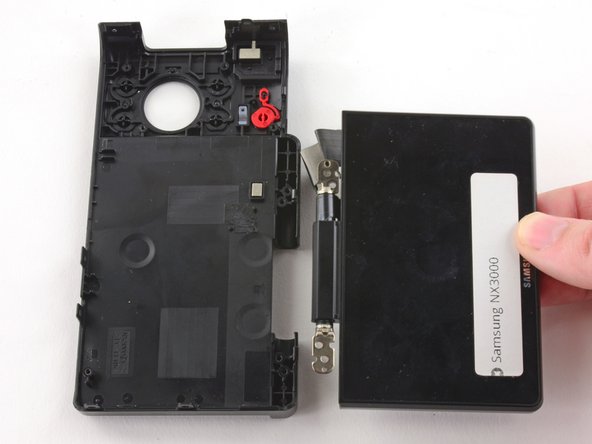
    • Tilt the LCD so it lays flat against the back case.

    • Wiggle the LCD joints and pull the LCD away from the back case.

결론

To reassemble your device, follow these instructions in reverse order.

다른 2명이 해당 안내서를 완성하였습니다.

Kelsea Weber

회원 가입일: 11/12/15

19,857 평판

안내서 32개 작성하였습니다

iFixit iFixit 회원

Staff

135 회원들

안내서 16,731개 작성하였습니다

댓글 한 개

Hello, Any Idea how to reset firmware after update did not succeed. Service manual for NX300 gives some glue but how about NX3000? Wherefrom to get the needed software pieces

Raimo - 답글

댓글 쓰기

조회 통계:

24 시간 전: 0

7일 전: 0

30일 전: 5

전체 시간: 1,118