이 버전에는 잘못된 편집 사항이 있을 수 있습니다. 최신 확인된 스냅샷으로 전환하십시오.
필요한 것
-
이 단계는 번역되지 않았습니다. 번역을 도와주십시오
-
With the back of the DVD player facing you, remove the three 1 cm black screws on the right, left, and top sides using a Phillips #1 screwdriver.
-
-
-
이 단계는 번역되지 않았습니다. 번역을 도와주십시오
-
Unclip the power cable from the motherboard and gently pull up to remove.
-
-
이 단계는 번역되지 않았습니다. 번역을 도와주십시오
-
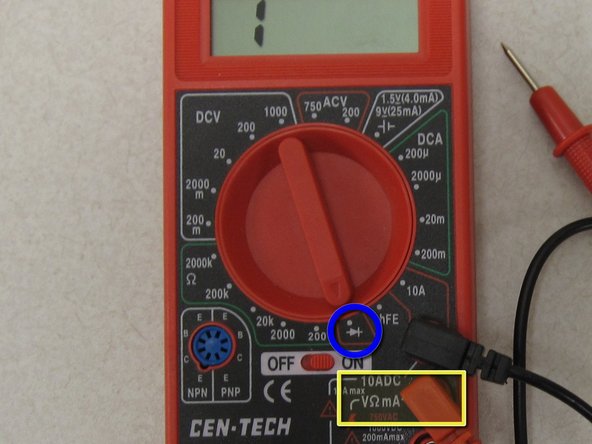
Once you have unclipped the power cable, use a multimeter (left) to test if the cable is still functional.
-
Turn the dial on the multimeter to continuity test mode.
-
Make sure the positive lead is plugged into the voltmeter/ohmeter outlet.
-
-
이 단계는 번역되지 않았습니다. 번역을 도와주십시오
-
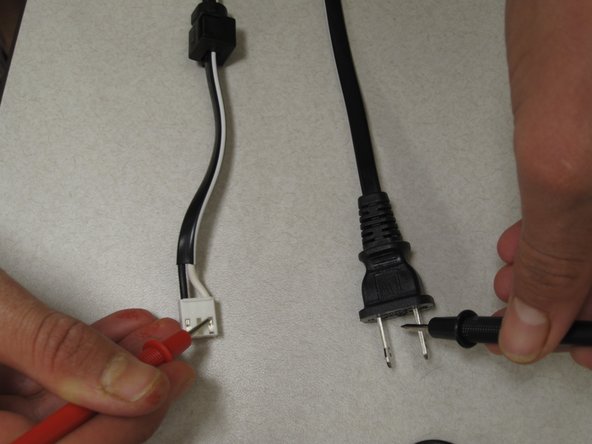
Use one multimeter lead to touch one of the prongs on the AC side of power cable. Use the other lead to touch one end of the clip side of the power cable.
-
The multimeter will show numbers if there is a good electrical connection. If it does not show any numbers the first time, try using the lead to touch the other prong.
-
Repeat the above directions with the other prong and clip side of the power cable.
-
If the multimeter does not show numbers during any of the connections, your power cable is dead and you will need to replace it.
-
-
이 단계는 번역되지 않았습니다. 번역을 도와주십시오
-
If you found that the power cable has a good electrical connection, you will have to test that the cable has not shorted out.
-
To do this, touch each prong on the AC side of the power cable. If numbers show on the screen, your power cable is bad and must be replaced.
-
If the cable works, the problem is with the motherboard.
-


팀

Cal Poly, Team 14-7, Forte Winter 2011 Cal Poly, Team 14-7, Forte Winter 2011 회원
CPSU-FORTE-W11S14G7
5 회원들
안내서 7개 작성하였습니다