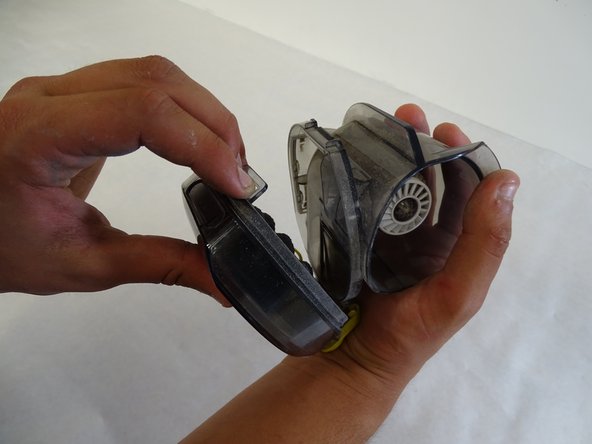
주요 콘텐츠로 건너뛰기

Samsung POWERbot VR9000 Filter Replacement

  1. Samsung POWERbot VR9000 Filter Replacement, Filter: 1 단계, 이미지 1/2 Samsung POWERbot VR9000 Filter Replacement, Filter: 1 단계, 이미지 2/2
    • Turn off the emergency switch on the bottom of the power bot.

  2. Samsung POWERbot VR9000 Filter Replacement: 2 단계, 이미지 1/2 Samsung POWERbot VR9000 Filter Replacement: 2 단계, 이미지 2/2
    • Gently pull up on the dustbin handle to to remove it from the rest of the power bot.

  3. Samsung POWERbot VR9000 Filter Replacement: 3 단계, 이미지 1/2 Samsung POWERbot VR9000 Filter Replacement: 3 단계, 이미지 2/2
    • Push down on the yellow button to remove the dustbin cover.

  4. Samsung POWERbot VR9000 Filter Replacement: 4 단계, 이미지 1/3 Samsung POWERbot VR9000 Filter Replacement: 4 단계, 이미지 2/3 Samsung POWERbot VR9000 Filter Replacement: 4 단계, 이미지 3/3
    • Separate the dustbin cover from the filter.

  5. Samsung POWERbot VR9000 Filter Replacement: 5 단계, 이미지 1/2 Samsung POWERbot VR9000 Filter Replacement: 5 단계, 이미지 2/2
    • Pull gently on the yellow tab to remove the filter from the cover.

  6. Samsung POWERbot VR9000 Filter Replacement: 6 단계, 이미지 1/1
    • The filter is removed. You can dispose of collected dust or rinse the filter with warm water before replacing.

결론

To reassemble your device, follow these instructions in reverse order.

다른 한 분이 해당 안내서를 완성하였습니다.

Josh Brouwer

회원 가입일: 04/24/17

164 평판

안내서 1개 작성함

Cal Poly, Team S15-G3, Banghart Spring 2017 Cal Poly, Team S15-G3, Banghart Spring 2017 회원

CPSU-BANGHART-S17S15G3

4 회원들

안내서 14개 작성하였습니다

댓글 0개

댓글 쓰기

조회 통계:

24 시간 전: 0

7일 전: 0

30일 전: 2

전체 시간: 1,179